• chevron_right

      How to Remove Pet Hair From Your Washing Machine and Dryer

      pubsub.dcentralisedmedia.com / LifehackerAustralia · Sunday, 10 July, 2022 - 15:00 · 2 minutes

    As much as we love our pets, sometimes our furry friends provide us with more than love and affection: They also leave hair all over our homes and clothing. And while there are ways to deal with the fur coating everything you own, somehow, no matter what you do, some always ends up in the laundry.

    There are a few reasons for this, including the fact that your washing machine and dryer probably need to be cleaned. Here’s how to do that, along with some other ways to remove pet hair from your laundry.

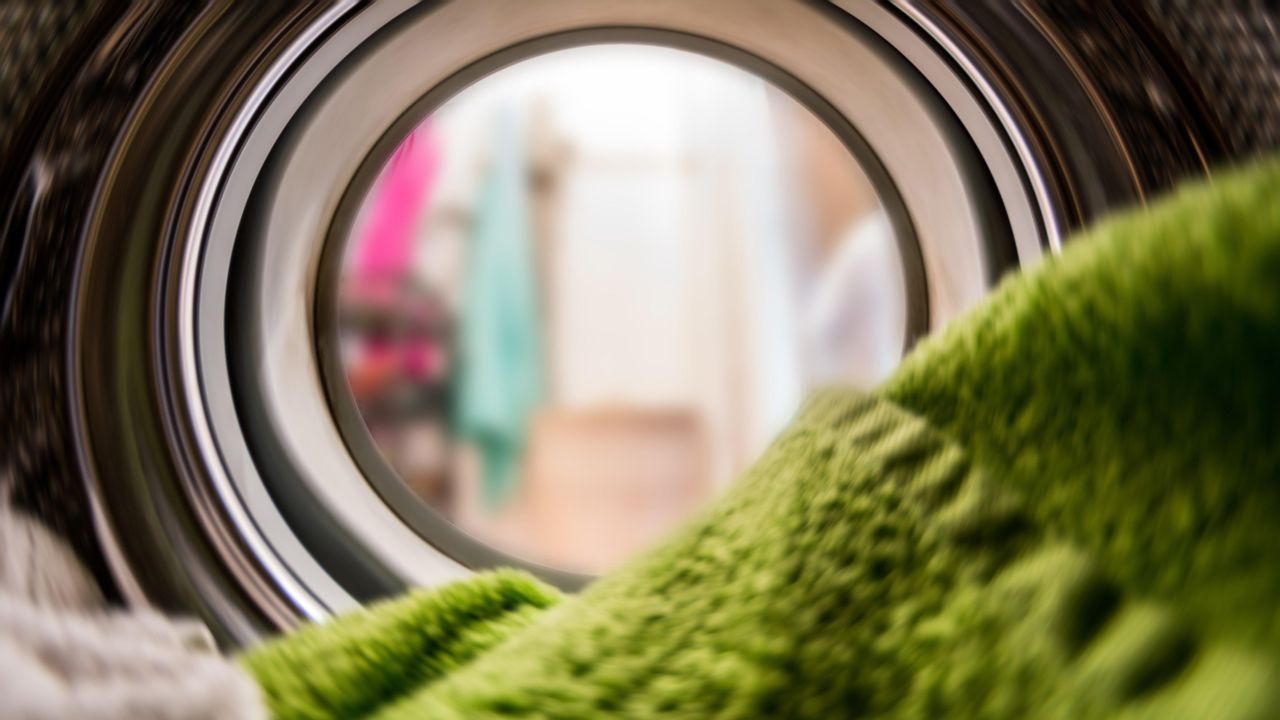
    How to remove pet hair from your washing machine

    Let’s start with your washer. Even when you shake your clothes and linens out before putting them in, there always seems to be fur when it comes out. Here’s how to deal with that:

    Clean the machine

    Before anything else, try cleaning your washer. You can do this by putting 1/2 cup of white vinegar into the empty drum, and running it through a complete cycle. When it’s finished, wipe it down with a clean, damp, lint-free cloth.

    Put them in the dryer first

    Another option is to pop your laundry in the dryer before washing it. The idea here is to loosen the pet hair on the fabric so it ends up in the lint trap. It only needs to tumble for about 10 minutes on a low-heat or no-heat setting. Adding a slightly damp clean cloth to the load, along with a dryer sheet or wool dryer balls can help remove more of the fur that’s stuck to everything else.

    Rinse your clothes with vinegar

    Add 1/2 cup white vinegar during the rinse cycle when washing a load of laundry that you know is coated in pet hair or lint. This softens the fabric, which can help release trapped fur.

    How to remove pet hair from your dryer

    Even if you take steps to get rid of pet hair in your washer, you know that somehow, at least a bit of it is going to make its way into your dryer. Here are a few ways to keep it from getting on your clothes:

    Clean it

    Again, it’s best to start out with a clean dryer. In addition to cleaning out the lint trap after every load, take a minute to wipe down the drum of the dryer using a damp, lint-free cloth to get rid of any hair in there.

    Use dryer sheets

    Drying your laundry using dryer sheets can make a difference, as their antistatic properties help pull pet hair off the fabric and into the lint trap. Though any dryer sheet will work, you can also opt to purchase ones specifically made for removing pet hair and lint, which tend to be around the same price.

    Use wool dryer balls

    Not into dryer sheets? Reusable wool dryer balls are a great alternative, providing the same hair-loosening power as sheets, but without the scent and creating waste. Plus, they increase airflow in the dryer, which also helps remove fur from your laundry.

    The post How to Remove Pet Hair From Your Washing Machine and Dryer appeared first on Lifehacker Australia .

    • chevron_right

      How to Divide Perennials, and Why You Should

      pubsub.dcentralisedmedia.com / LifehackerAustralia · Saturday, 9 July, 2022 - 17:00 · 2 minutes

    Perennials have earned a place in the hearts and yards of people who enjoy having foliage around, but don’t necessarily want to spend time planting it each year. And while perennials do tend to be lower-maintenance than their annual relatives, that doesn’t mean that they’re completely hands-off.

    In fact, after residing in your yard or garden for a few years, you may begin to notice that they don’t look as full and healthy as they once did. Their blooms be may smaller, they may develop a “bald spot” in the middle of their crown, or you may have to start staking their stems to prevent them from toppling over.

    If you notice any (or several) of these signs, it’s probably time to divide your perennial plant. Here’s how to do that, and why it’s important.

    Why you should divide your perennials

    While dividing perennials does, in fact, leave you with more plants that you can add to other parts of your garden or yard (or give away or sell to other people), it has other benefits as well . The biggest one is that it can stimulate new growth in a plant — especially if it previously resided in a patch of ground that was getting to be overcrowded (with plants).

    When the plants are all crammed into a small space, they have to compete for nutrients and water. Plus, the restricted airflow makes it easier for them to become diseased. When you divide your perennials, it gives their roots the space they need to spread out so they can grow and bloom.

    How to divide perennials

    Before you start to divide and conquer your perennials, be sure that their soil is moist — either by watering them the day before, or doing the dividing after a few days of rain showers. And, if possible, divide your plants on a cloudy day, so that the sun doesn’t dry the plants out while they’re in transit.

    Here’s how to divide perennials, according to the University of Minnesota Extension :

    1. Use a spade or fork to dig up the parent plant.
    2. Gently lift the plant — and its roots — out of the ground.
    3. Remove any loose dirt clinging to the roots.
    4. Divide the plant using one of these three methods: (1) Gently pulling or teasing the roots apart with your hands; (2) Cutting them with a spade or sharp knife; (3) Putting two forks back-to-back in the middle of the clump, then pulling them apart.
    5. Be sure that each “new” plant has three to five vigorous shoots, and a healthy supply of roots.
    6. Either plant the divided perennials right away, or keep them moist and in the shade until you replant them in the ground.

    The post How to Divide Perennials, and Why You Should appeared first on Lifehacker Australia .

    • chevron_right

      How to Stop Your HVAC Filter From Getting So Dirty So Fast

      pubsub.dcentralisedmedia.com / LifehackerAustralia · Saturday, 9 July, 2022 - 13:00 · 2 minutes

    When you change the air filter in your furnace, you expect the old one to be dirty. But let’s say that when you go to make your regularly scheduled switch, you find that your old filter isn’t just a little grimy — it’s completely filthy. And it’s not as though you left more time between filter changes, so it somehow ended up getting this dirty in a relatively short period of time.

    Here are a few of the reasons why your HVAC filter got so dirty so fast, and what you can do to prevent it from happening again.

    Your home is extra dusty

    Whether you’ve deep-cleaned a room or have been in the process of a renovation project, doing anything to disturb (or create new) dust can send more of it into the air, and then, into your furnace air filter.

    Solution : Try vacuuming more often. The dust and dirt that the vacuum sucks up means less will make it to the filer.

    Your HVAC system is on the wrong setting

    Most thermostats have two fan settings : “On” and “auto.” When it’s on “auto,” the fan only blows when your HVAC system is actively heating or cooling your home. But if you switch to the “on” setting, it’s constantly running, meaning that air is continuously passing through the filter, giving it more of a chance of getting dirty.

    Solution : Switching your thermostat to the “auto” setting will extend its life of the filter.

    The filter has a high MERV rating

    Some high-performing furnace filters have the ability to trap substantially more indoor air contaminants than your run-of-the-mill filter. Some may even offer the protection of a HEPA filter. But because it traps so much of what’s in the air (which is what you want it to do), these filters get dirty very quickly.

    Solution : Pay attention to the MERV rating when buying a new filter , and be aware that the more protection one offers, the faster it’ll be coated in grime.

    Pet hair and dander

    Did you get a new pet? Or did an existing pet start shedding more than usual? Both can cause your furnace filter to fill up faster than usual.

    Solution : Brush your pet (outdoors) on a more regular basis, and increase the number of times you vacuum in a week.

    The post How to Stop Your HVAC Filter From Getting So Dirty So Fast appeared first on Lifehacker Australia .

    • chevron_right

      What Does It Mean to Lift ‘Heavy’?

      pubsub.dcentralisedmedia.com / LifehackerAustralia · Friday, 19 February, 2021 - 21:00 · 5 minutes

    Lift heavy to build muscle: that’s advice you’ve probably seen in a million places. But how heavy is “heavy,” and how do you know if your workout qualifies?

    There’s no specific number of pounds that will constitute “heavy” for everyone. What’s heavy for a teenage girl picking up a dumbbell for the first time will be a lot less than what’s heavy for a pro strongman. (If you do want to compare your lifts to other people, sites like Symmetric Strength can show where you stand — but please consider these comps as just for fun.)

    Training “heavy” is shorthand for resistance training that is in a low-rep range and gets heavier over time. This is the type of training that gets you the biggest gains in strength and muscle size.

    Training this way is not the only way to build muscle, but it’s a very effective one. So let’s look at what does and doesn’t count as training heavy.

    How many reps are you doing?

    Training for strength usually has you doing 1-5 reps in each set. Training for hypertrophy (bigger muscles) is often in the 8-12 range.

    The truth is there isn’t much difference in results between the two; getting stronger gives you bigger muscles and getting bigger muscles makes you stronger. I’d say that as long as you’re doing 12 reps or fewer, you’re in an appropriate range to say you are training heavy.

    Once you’re doing much more than that — 15, 20, 50 reps — you’re training your muscular endurance more than strength. You can build some strength this way, but it doesn’t really count as training heavy.

    Does It Matter How Many Reps You Do When You Work Out?

    So, your workout has you doing 4 sets of 5 reps for this exercise, 3 sets of 8 after that, and — oh, thank goodness — only 2 sets of 50 to finish it out. Well, hey, the good news is that these rep numbers aren’t just based on a...

    Read more

    How hard does the set feel?

    OK, let’s say you’re doing squats in sets of 8. That could count, but only if you’re loading the squats enough that it’s hard to do 10 of them.

    For some exercises and some goals, you might be aiming for failure — literally, going until you can’t do another rep. An example would be if you’re doing 8 bicep curls and couldn’t manage a ninth.

    But you can also get close to failure without quite going there. For example, if you’re doing squats, a set of 8 might be done at a weight that you could squeeze out 10 or 11 reps of if you really pushed yourself. That still counts as heavy training.

    What doesn’t count is if you’re doing eight reps of goblet squats with a light dumbbell because it’s the only dumbbell you have, or because you’re intimidated about going up in weight. Heavy lifting is when you’re doing the appropriate rep range with a weight that is challenging within that range .

    Are you increasing the weight over time?

    The only way to keep the lift challenging as you get stronger is to keep increasing the weight.

    To use our goblet squat example, maybe squatting with a 9 kg dumbbell was challenging the first time you tried it. But a week or two later, you can probably do the same eight reps with a 11 kg dumbbell. Before long, it may make more sense to do front squats with a barbell, to make it easier to add more weight. You’re lifting heavy.

    But if you kept doing the same sets of 8 squats with the same 9 kg dumbbell, you’re not efficiently challenging yourself to build muscle or strength — you’re just doing an exercise that keeps getting easier. That’s still good for you, because it’s still exercise, but it no longer fits the description of lifting heavy.

    Are you resting between sets?

    This is where a lot of people go wrong, especially if they’re doing home workouts or are concerned about calorie burn during a workout. We don’t lift heavy for the calorie burn during the workout; we lift heavy to build muscle, and save the cardio for another day.

    How Long You Should Rest Between Sets For The Biggest Training Benefits

    Rest between sets and exercises has as large an impact on your fitness as the number of sets and reps do. If your breaks are too short, you rob yourself of their benefits, or worse, increase your risk for injury. If they’re too long, you’re not exercising hard enough. The...

    Read more

    If you’re constantly working to keep your heart rate up, with little to no time to rest between exercises, you aren’t training heavy. More likely, you’re doing circuit training. Crossfit “metcon” WODs often fall into this category, as do many home workout videos that bill themselves as high-intensity interval training (HIIT). They’re usually not real HIIT, but that’s a rant for another time.

    If you aren’t resting, that means you aren’t approaching each set of lifts when you’re fresh. Reducing rest times makes the workouts feel harder, but it also means you’ll be working with less weight. That means they usually don’t fit our definition. They might still help you build strength or muscle size, but not nearly as efficiently as lifting heavy.

    If you take a few minutes’ rest between exercises, then you’re lifting heavy. A typical range would be 2-4 minutes between exercises that work smaller or fewer muscles (like curls or presses) and 3-5 minutes or more between sets of big compound lifts (like squats or deadlifts). With an appropriate rest time, you’ll be able to properly lift heavy.

    The post What Does It Mean to Lift ‘Heavy’? appeared first on Lifehacker Australia .

    • chevron_right

      Why Vaccine Selfies Are Actually Good

      pubsub.dcentralisedmedia.com / LifehackerAustralia · Thursday, 18 February, 2021 - 19:30 · 3 minutes

    I never realised how many of my friends and acquaintances are healthcare workers until my social media feeds started lighting up with vaccine selfies. People flash their reminder cards or brandish their bandages, and that’s a good thing: Each vaccine selfie is a little public health message, and you’re doing your part to make vaccination a normal part of life.

    With the COVID vaccines being so new, a lot of people are waiting and watching as those around them get vaccines. If you’ve heard misinformation about the vaccines being harmful, that gets harder to believe as you see people in your life safely get them. And when you know who among your friends has decided to get the vaccine, you also know who you can talk to if you have concerns or want to know what it’s like.

    That’s why something as simple as a vaccine selfie can help beat the pandemic. By posting on social media about your vaccination, you can help others make an informed choice. As more people get vaccinated, the virus becomes less able to spread, and we all get closer to a return to something like normal.

    So here’s how to take the best vaccine selfie:

    Plan your shot

    You’ll send a great message whether you take your selfie before, during, or after your shot, but think about the specifics as you’re planning your appointment. Make sure to wear appropriate clothing if you want to show off your bandage or the shot itself.

    While you can take a selfie anywhere, be sure to take a look around the vaccination site — some even have selfie stations set up for this purpose.

    Respect others

    The person giving your shot may not want to be in the photo, so don’t count on being able to take a video mid-vaccine. Sure, plenty of celebrities and politicians have had a camera crew follow them into the clinic, but that doesn’t mean providers want to be photographed or videoed while they’re at work — so either save your selfie time for afterward, or ask whether the provider is ok with you taking a pic while they’re in it.

    And definitely make sure you don’t get other people in your shot who didn’t agree to be there. That’s basic manners, but sometimes we forget that others may be accidentally photobombing us. Consider who’s in the frame before you take your photo.

    Cover any personal info

    Posing with a vaccine reminder card is a great alternative to showing the needle or the Band-Aid on your arm, but don’t forget that your reminder card usually has your full name and birthdate on it. Block out that info if you want to share such a pic.

    Write a caption

    Once you’ve taken your vaccine selfie, share it with pride! Add a caption explaining what you’re doing and giving any information you like about how you feel about it or how you made your decision. If you’re tempted to add a joke about how you got microchipped today, please make extremely clear that it’s a joke. Posts that are misunderstood can be screenshotted and passed around as misinformation, so do your best not to fuel that fire.

    You can use these tips for flu shots or your baby’s vaccines, as well. Often, people don’t hear much about vaccines except in the context of misinformation or complaints, but the truth is that most parents vaccinate their kids, and around 40% of adults get a flu shot in a typical year. It means a lot just to see that trusted people in your life are getting their shots.

    The post Why Vaccine Selfies Are Actually Good appeared first on Lifehacker Australia .

    • chevron_right

      How to Take Time Off Without Screwing Over Your Coworkers

      pubsub.dcentralisedmedia.com / LifehackerAustralia · Thursday, 18 February, 2021 - 19:00 · 3 minutes

    On Wednesday night, with a winter storm of historic magnitude battering Texas and leaving millions of residents without electricity or potable water, U.S. Senator Ted Cruz decamped for the sunny climes of Cancun, Mexico with his family.

    What could have been merely an insidious Twitter rumour was soon confirmed — via photos of the senator holding a boarding pass and wearing familiar sneakers and his signature mask, emblazoned with his favourite second amendment rallying cry, “Come and take it,” and by major news outlets, including Fox News . Twitter was soon riddled with contempt for Cruz (even more than usual, anyway) for appearing to abandon his constituents and colleagues in an hour of crisis.

    The outpouring seems to have been enough to wrest Cruz from the warm embrace of an oceanfront vacation, as reports indicate he was Texas-bound by Thursday morning. But it’s anyone’s guess whether Cruz — who’s as fond of tweeting as he apparently is a sun-dappled sojourn during a Congressional recess — learned any lessons from the episode, even as he left other Texans to do his job for him .

    Though a high-profile example, Cruz’s missteps can prove instructional for the general, working populace in how to use your vacation time without leaving your colleagues in the lurch.

    Don’t take leisure time off during a busy season

    Chances are you aren’t a public official beholden to the needs of a broad base of constituents, but as a general rule, it’s best not to schedule your time off during a period when your colleagues will be under a more intense workload than usual.

    Most industries have times of year that are busier than others, and you’ll do your reputation a service by resisting the urge to abscond when your abilities are needed most. In the case of Cruz, it’s likely that his family vacation wasn’t planned on a whim. But with millions of the state’s residents deprived of the electricity necessary to weather unusually frigid temperatures, he might have realised his efforts were needed closer to home.

    Understand what times of year require an all-hands-on-deck approach, and plan your getaways accordingly. If a personal or family crisis arises even during a hectic schedule, then all of this goes out the window, obviously — your personal and family needs will always prevail over those of your employer.

    Tell your colleagues when you’re leaving

    If you’re afraid that your well-earned vacation will leave your co-workers buried under a deluge of your responsibilities, leave them a detailed note outlining what exactly it is you do that shouldn’t be ignored in your absence. If your duties have to be picked up by someone else, delineate those tasks in a memo to your colleagues.

    They’ll appreciate your candor and that you’ve left them a clear outline demonstrating how you do your job, so they don’t have to scramble to figure it out themselves. If you fail to provide this, don’t be surprised if your colleagues take to lambasting you in private.

    To Find Out if Your Potential Boss Will Be Any Good, Ask This Question

    Job interviews are a delicate balance between selling yourself and your skills, while also evaluating the company and your potential new boss. As many people have found out, even if you land what you thought was your “dream job,” if you work for someone who turns out to be a...

    Read more

    Thank your coworkers for picking up the slack

    You don’t need to grovel — everyone deserves a holiday, and to use their time off how they want to. But show your colleagues that you appreciate the courtesy if they had to add to their plates in your absence. You can do this with another written note, or by offering a different token of appreciation, such as a small gift or tasty snack (when your office is safely open again). Obviously you shouldn’t feel the need to lavish them with praise, but letting them know you appreciate how they’ve stepped up while you dipped your toes in a white sandy beach will surely be endearing.

    The post How to Take Time Off Without Screwing Over Your Coworkers appeared first on Lifehacker Australia .

    • chevron_right

      Give Your Meat-Loving Valentine Some ‘Heartcuterie’

      pubsub.dcentralisedmedia.com / LifehackerAustralia · Friday, 12 February, 2021 - 14:30 · 2 minutes

    My first “serious” boyfriend did not like chocolate. But rather than explain that his choice of milkshake (strawberry) was a preference, he lied and told everyone (including me) that he was “allergic” to cocoa. When I found out the truth (only after we broke up), I felt a little betrayed — like I didn’t know him at all! And this was after he told me he was gay. (I’m happy to help anyone figure out their sexuality, but do not lie to me about your milkshakes!)

    How to Find Ethical Chocolate (And Why You Should)

    Ethical chocolate can be difficult to find. There are labels to look for, like “fair” or “direct trade,” but these only tell us so much, and the process for obtaining those marks can be expensive for chocolate-makers, not to mention that brands who are careful about where their cacao comes...

    Read more

    Loving someone means accepting their weird food preferences and idiosyncrasies. My current partner is a “ketchup guy,” if you can imagine, and I have accepted that there is no changing this. (I now buy him huge restaurant-sized pump bottles of Heinz , because they make him happy.) This is all to say that you don’t have to conform to societal norms when it comes to tokens of affection. Chocolate isn’t the only thing you can put in a heart-shaped box; you can fill one with meat just as easily.

    yiltlslzrgz7t9cng0zk-scaled.jpg?auto=format&fit=fill&q=65&w=1280

    I must confess this is not a Claire Lower Original Thought. All of my paramours since that first have been fans of chocolate, but one year Beth Skwarecki, Lifehacker’s senior health editor, found herself with a valentine (husband) who was not a fan of filled chocolates (and was also on a keto diet). So she did what any reasonable person would do: She bought a box of chocolates, ate the chocolates herself, and filled the empty box with cheeses and meats.

    vbrsohbwiftsgrvvnzhr.png?auto=format&fit=fill&q=65&nrs=40

    This is a brilliant idea — which makes sense, because Beth is known for her brilliance. And unlike elaborate meat bouquets that require a good bit of meat styling, filling little divots with charcuterie (henceforth known as “heartcuterie”) is a project that can be executed by someone without significant fine motors skills. (I am hysterically unskilled as a sculptor, but even I was able to roll prosciutto into rose-like shapes.)

    There really isn’t much to it: Buy some chocolate — preferably some you like — eat it (or save it to eat later), then dust out any errant chocolate bits from the divots and fill them with meat, cheeses, nuts, olives, and any other accouterment you think your sweetie would enjoy. (If you do use olives, pickles, or anything that comes packed in brine, make sure to blot them with paper towels first.) Edit any labelling on the box as needed — change “Whitman’s Sampler” to “MEAT Sampler” for example — then close the box and give the heartcuterie to your meat- and/or cheese-loving beloved. Make sure to use the word “heartcuterie.” Puns are very sexy.

    The post Give Your Meat-Loving Valentine Some ‘Heartcuterie’ appeared first on Lifehacker Australia .

    • chevron_right

      How to Take Scrollable, Full-Page Screenshots of Websites on iOS

      pubsub.dcentralisedmedia.com / LifehackerAustralia · Thursday, 11 February, 2021 - 18:45 · 2 minutes

    Once a year or so, I spend some time trying to find the best way to take a seamless screenshot of an entire website, as I’m not always a fan of the CTRL + S approach for saving a site’s data. I only wish I knew earlier how absurdly easy this was to do on iOS, of all places.

    I’ve tried plenty of browser extensions that worked to varying degrees (until I found the reason why most of them would typically mess up for me). Capturing the entirety of a site on my iPhone now opens up plenty of new possibilities though — including being particularly convenient if I want to send someone a snapshot of what a site looks like at the exact moment I’m viewing it or want to show someone how a bug is mucking up my experience.

    How To Fix Full-Page Browser Screenshots That Render Black

    There are a bunch of different extensions you can use to take full-page screenshots in your browser — typically a more elegant way to preserve a site’s contents than “printing” it as a PDF or saving it to your computer as a complete website. Since I use Chrome, Full Page Screen Capture...

    Read more

    Whatever the reason, capturing a full-page screenshot of a website on iOS is simple. To start, launch the website in your device’s Safari browser — after you’ve made sure you’re using the latest version of iOS. Take a screenshot of a website as you normally would — Side Button + Volume Up , in my case. You’ll now see this screen:

    vepbqjrmswvylva3nh9c.png?auto=format&fit=fill&q=80&w=1280&nr=20

    If you don’t see those two options at the top — Screen and Full Page — iOS is probably being fussy. Close Safari, reopen it, and try taking another screenshot. These options are critical, as tapping Full Page is the magic sauce that will lead you to this screen:

    mehgkw3upcs5p8hc6lds.png?auto=format&fit=fill&q=80&w=1280&nr=20

    That little sidebar on the right, which you can scroll through up and down, shows you the entirety of the page that your phone has captured. When you go to save it, however, you won’t be dropping it in your photo album because your device isn’t technically creating a giant photograph. Instead, your iPhone will have converted this mega-screenshot into a PDF, so you’ll need to send it to some other folder on your device:

    d9hoyi8zyhgwctpsyo0d.png?auto=format&fit=fill&q=80&w=1280&nr=20

    And that’s it. You now have a gigantic, full-page screenshot of whatever website you were looking at — one that’s already been converted into a PDF for you. If you’re doing a lot of archiving of old work, I would argue this is almost easier to deal with than the combination of a desktop browser and an extension, but that’s just me.

    The post How to Take Scrollable, Full-Page Screenshots of Websites on iOS appeared first on Lifehacker Australia .

    • chevron_right

      Make Microsoft Word’s ‘Dark Mode’ Actually Dark

      pubsub.dcentralisedmedia.com / LifehackerAustralia · Thursday, 11 February, 2021 - 14:00 · 2 minutes

    Microsoft’s Word app has a dark mode that you can use right now, but it’s not as dark as you might prefer it if you’re the kind of person who likes working on projects in the wee hours of the night.

    When you fire up Word normally, this is what you’ll see when you’re using its “Colourful” theme:

    uy5nmu8rqh53on04enlr.png?auto=format&fit=fill&q=80&w=1280&nr=20

    If you go to switch the theme (via File > Options > General > Personalise your copy of Microsoft Office or File > Account > Office Theme ), you’ll be able to pick a slightly darker grey to use:

    k5poxp2ubavp6zii3gho.png?auto=format&fit=fill&q=80&w=1280&nr=20

    And even a straight-up black setting, the app’s “dark mode” as it currently exists:

    ygdydhd02vuay0wfoheb.png?auto=format&fit=fill&q=80&w=1280&nr=20

    Even in dark mode, you have a big-arse hunk of white staring you in the face: the very page you’re working on. It kind of takes away the purpose of having a dark mode.

    While you can certainly change this yourself using the Page Colour option under Design , that modifies the document for all who view it. And it’s possible that whoever you’re sending your work to might not want white text on a black background.

    To get around this, Microsoft is testing a new dark mode iteration for Word that turns the page black, if that’s your preference — but only as a viewing mode. That document will still look normal in whatever viewing mode another person has set up for themselves.

    To get to this feature, you’ll need to first sign up to be an Office Insider. You’ll find that option within the Account window on your main Office screen:

    fzp4aeiyap7wowuibtp8.png?auto=format&fit=fill&q=80&w=1280&nr=20

    Sign up for the Beta Insider channel, rather than the Preview insider channel, and then click on the Update Options box on your Account screen to download whatever updates Word asks of you. You’ll now be “on the cutting edge,” as Microsoft says:

    bizgqnip5yf68yestldc.png?auto=format&fit=fill&q=80&w=1280&nrs=30

    Close Word and reopen it. From there, head back to File > Options , and set your theme to Black once again. You should now see a blissful black background that you can type on:

    r3apcqvedemobtvsaosj.png?auto=format&fit=fill&q=80&w=1280&nr=20

    And if you want to switch back to a white page at any point, simply pull up the View tab in your document and click on the new Switch Modes button:

    bd1t7js0igzmvh6xjpn6.png?auto=format&fit=fill&q=65&nrs=40
    trnqu3yys1fpdqxjzf5k.png?auto=format&fit=fill&q=80&w=1280&nrs=30

    The post Make Microsoft Word’s ‘Dark Mode’ Actually Dark appeared first on Lifehacker Australia .