• chevron_right

      Why Have Regular Shepherd’s Pie When You Can Add Sweet Potato?

      pubsub.dcentralisedmedia.com / LifehackerAustralia · Monday, 11 July, 2022 - 01:47 · 2 minutes

    It’s winter, which means a lot of us are seeking comfort food . We’re here to help, so may I please direct your attention to this recipe for vegan Shepherd’s Pie with a roast sweet potato top? This delicious vegan winter warmer comes from Kate Flowers and our friends over at Wiltshire . Give it a try if you need something tasty and full of hearty vegetables.

    Vegan sweet potato shepherd’s pie recipe

    What you’ll need: For the filling
    • 3 tbsp olive oil
    • 3 tbsp of semolina
    • 1 large onion, finely diced
    • 1 large carrot, peeled and finely diced
    • 1 medium red capsicum, diced
    • 3 cloves of garlic, minced
    • 2 sticks of celery, diced
    • 2 bay leaves
    • 3 tbsp fresh rosemary, finely chopped
    • 2 cups cauliflower rice
    • 4 tbsp tomato paste
    • 2 tablespoons balsamic vinegar
    • 2 cups beef style Masel vegetable stock (vegan)
    • 2 cups water
    • 1 x 400 g tin of lentils, rinsed and drained
    • 1 x 400 g tin of chickpeas, rinsed and drained
    For the sweet potato top
    • 2 large sweet potato, skin on
    • Olive oil
    • Season
    • Rosemary
    • Lemon zest
    • Breadcrumbs
    Directions for vegan sweet potato Shepherd’s pie:
    1. Preheat the oven to 200°C.
    2. Place sweet potato on a tray and place in the oven for about 30 minutes or until fork-tender to the centre.
    3. Remove and set aside to cool. Lower oven temperature to 180°C.
    4. Meanwhile, heat a large pan to high heat, add oil, onion, carrot, red pepper and celery and cook stirring for around 5 minutes or until the vegetables are beginning to caramelise.
    5. Add the garlic, rosemary and bay and cook, stirring for 1 minute.
    6. Add tomato paste, cauliflower rice and vinegar and stir through. Continue to cook stirring for another few minutes before adding stock, water, lentils and beans.
    7. Bring the pan to a simmer and allow the liquid to evaporate until there is around a cup left.
    8. Scatter the top with semolina and stir through to thicken, season to taste then turn off the heat.
    9. Pour the filling into your Wiltshire Enamel Pie Dish 1.5 ltrs and set aside.
    10. To make the top, peel the sweet potato and place the flesh in a bowl. Add oil, salt and mash roughly with a fork.
    11. Place the topping on your pie filling and gently manipulate the sweet potato to evenly cover the filling.
    12. Use a spoon to create an organic pattern on top then sprinkle the remaining ingredients across the top and place the pie back in the oven.
    13. Cook for around 25 minutes, or until the top is starting to brown at the tips and the filling is bubbling.
    14. Serve immediately.

    If you’re after some more warm winter recipes to go with your sweet potato pie, check out these delicious soup ideas.

    The post Why Have Regular Shepherd’s Pie When You Can Add Sweet Potato? appeared first on Lifehacker Australia .

    • chevron_right

      This Cheesy Arancini Recipe Is Surprisingly Healthy

      pubsub.dcentralisedmedia.com / LifehackerAustralia · Monday, 11 July, 2022 - 01:24 · 3 minutes

    Is there anything better than being out at the pub and realising they have arancini on the menu? I don’t think so. Given so many of us are spending the cooler months cosied up inside, this is the perfect time to experiment a little more in the kitchen. And thankfully for us, it’s actually surprisingly easy to make arancini. We’re going to do it using a recipe that cooks them in the oven to save on some extra calories (because with those extra calories you could make something like avocado fries to enjoy alongside your baked arancini!). Jamie Milne of Instagram and TikTok account @Everything_Delish shared this delicious recipe for baked arancini and it looks pretty damn simple.

    @everything_delish

    BAKED ARANCINI #recipe #healthy #rice #arancini #tiktokfoodie #airfryer #fy #fyp #voiceover #food #cheese #cheesy #tiktokfood #foodtiktok #cooking

    ♬ Steven Universe – L.Dre

    Jamie shared the full recipe to create these arancini on Instagram, thank you, Jamie! We’ve also added in a tomato dipping sauce that you might like to have with your cheesy rice balls, too.

    Easy baked arancini recipe

    What you’ll need to make baked arancini: For the arancini
    • 2 cups Arborio rice
    • 5 cups chicken stock
    • 1 block Gruyere cheese or mozzarella, diced into cubes (okay not that healthy, but this is to be shared!)
    • 1/2 cup Parmesan, grated
    • 1 cup bread crumbs
    • 1 cup whole wheat flour
    • 4 eggs, divided in two and beaten
    • 1/4 cup parsley, chopped
    • Salt + pepper
    • Cooking spray
    For the tomato dipping sauce
    • 2 tbsp olive oil
    • 1 onion chopped
    • 2 cloves garlic crushed
    • 400g tin of chopped tomatoes
    • 1 tsp dried oregano
    • 1 tbsp balsamic vinegar
    • Juice of half a lemon
    • salt and pepper to taste
    Directions for baked arancini:
    1. Bring five cups of chicken stock to a boil. Rinse your rice until the water runs clear, and add to a pot. Slowly add a ladle-full of the hot stock to the rice, stirring until it’s absorbed. Repeat until the rice is fully cooked, but not mushy.
    2. Place the rice in a bowl and refrigerate for 30 minutes.
    3. Preheat the oven to 220 degrees Celsius and line a baking dish with baking paper.
    4. Remove rice from the fridge and place in a large mixing bowl. Add in 2 beaten eggs, salt and pepper, 1/2 cup parmesan cheese and chopped parsley. Mix well.
    5. Take 1-2 tbsp of the rice mixture and form a ball. Using two fingers, press down in the centre and add 1-2 cubes of cheese. Pinch the rice around the cheese to enclose.
    6. Place the ball into the second egg mixture to coat, followed by flour and bread crumbs. Place on a baking tray. Repeat until all the rice mixture has been used.
    7. Spray the arancini balls with cooking spray and place in the oven for 25-30 minutes or until the balls are golden brown.
    8. While the arancini are in the oven, make your sauce by heating olive oil in a medium saucepan and sauté your onion until soft.
    9. Add garlic and cook for one minute, then add the remaining ingredients and stir well.
    10. Bring to a boil and reduce to simmer, cooking until thickened slightly
    11. Remove the arancini from the oven and season with freshly grated parmesan, salt and pepper and serve with your sauce!
    Hot tip: The cheese inside the arancini might be pretty hot, so allow it to cool, especially if you’re serving it to kids! Hands up if you’re going to be trying out this arancini recipe for yourself at home. All of you? Thought so. This article has been updated since its original publish date.

    The post This Cheesy Arancini Recipe Is Surprisingly Healthy appeared first on Lifehacker Australia .

    • chevron_right

      Libyan food recipes: Shakshuka

      Egypt · Wednesday, 2 February, 2022 - 20:30

    If you are not familiar with shakshuka, I am thrilled to introduce the concept to you! Shakshuka is a North African dish that is now popular throughout the Middle East. This easy and healthy egg dish is vegetarian, gluten-free, and incredibly delicious. Shakshuka is one of the first recipes I ever blogged about, and has become one of the most popular posts on my site—a simple vegetarian meal that works as a breakfast, lunch, dinner, or “brinner.”

    The shakshuka concept is very simple. Eggs are soft-cooked atop a bed of thick reduced tomato sauce with peppers. In the Maghreb, this chunky sauce is known as matbucha. Similar preparations are made throughout the world, including a popular Italian dish known as “eggs in purgatory.” Shakshuka is somewhat different than the Italian dish; it’s generally spicier and has the addition of peppers #food #recipes #shakshuka

    Lentil soup is a soup based on lentils; it may be vegetarian or include meat, and may use brown, red, yellow, green, or black lentils, with or without the husk. Dehulled yellow and red lentils disintegrate in cooking, making a thick soup. It is a staple food throughout Europe, Latin America, and the Middle East. Lentils were unearthed in the Paleolithic and Mesolithic layers of Franchthi Cave in Greece (9,500 to 13,000 years ago), in the end-Mesolithic at Mureybet and Tell Abu Hureyra in Syria, and sites dating to 8000 BC in the area of Jericho. Aristophanes called it the "sweetest of delicacies."

    Lentil soup is mentioned in the Bible: In Genesis 25:30-34, Esau is prepared to give up his birthright for a pot of fragrant red lentil soup being cooked by his brother, Jacob. In Jewish tradition, lentil soup has been served at times of mourning; the roundness of the lentil represents a complete cycle of life. #food #recipes #soup #lentil

    • chevron_right

      How To Make Single-Serve Jam Doughnuts in a Mug

      pubsub.dcentralisedmedia.com / LifehackerAustralia · Monday, 8 February, 2021 - 23:09 · 1 minute

    With Valentine’s Day fast approaching, many of us have sweet things on the brain. And whether or not you’re planning to spend the big V Day with a significant other, access to a tasty little treat should be a given this February 14th.

    I came across a recipe via Gemma Stafford of Bigger Bolding Baking in recent weeks, and I believe it may just be the perfect Valentine’s Day dessert. It takes five minutes to pull together, it sounds tasty AF, and it’s made in single serves so it’s the perfect dessert to enjoy solo – if you like.

    Introducing, the Jam (or jelly, ’cause America) Doughnut in a Mug:

    What you’ll need:

    • Ingredients are listed in full on the website here . But be sure to grab yourself some quality jam and cinnamon for this baby. The recipe calls for strawberry jam, but you can go with your preferred flavour.

    Directions:

    1. Place butter into a microwavable mug and microwave until just melted (roughly 20 seconds).
    2. Add in the remaining ingredients; mix well with a fork until just combined.
    3. Once the batter is mixed place the spoonful of jam down into the batter to get a jammy centre.
    4. Microwave for 45 seconds or until it is firm on top. (Cooking time is based on a 1200W microwave so your timing might vary) Always keep a close eye on your mug while in the microwave so it doesn’t overflow or overcook.
    5. Sprinkle some cinnamon sugar on top and enjoy straight away!
    IMG_9826.jpg?auto=format&fit=fill&q=80&w=1280&nrs=30 Tell me this doughnut doesn’t look damn delicious. Image via Bigger Bolding Baking

    Hot tip: Cooking time will vary depending on your microwave and the width and depth of the mug.

    Hot tip #2: You can replace the egg with 2 tablespoons of banana or apple sauce, if you prefer.

    Hot tip #3: You can bake your doughnuts in the oven at (180°C) for roughly 10-12 minutes. However, every mug is different so I advise checking on it after 10 and then make a call.

    Want to do more mug baking? You should check out our write up on Stafford’s single-serve pizza in a mug here .

    The post How To Make Single-Serve Jam Doughnuts in a Mug appeared first on Lifehacker Australia .

    • Th chevron_right

      The Best Ways to Reheat and Reuse Leftover French Fries

      Brett & Kate McKay · tests.marevalo.net / The Art of Manliness · Thursday, 6 August, 2020 - 16:05 · 4 minutes

    The pandemic supposedly got people back into their kitchens — baking bread and making comfort food casseroles. But around here, we’ve actually found ourselves getting take-out a little more often. At first it was a way to support local restaurants, and then it became increasingly uncomfortable to linger in grocery stores hunting for rarely-used ingredients for new recipes. Plus, there’s just the fact that when there are other stressors on the mind, it’s nice to have one less thing on the mental bandwidth.

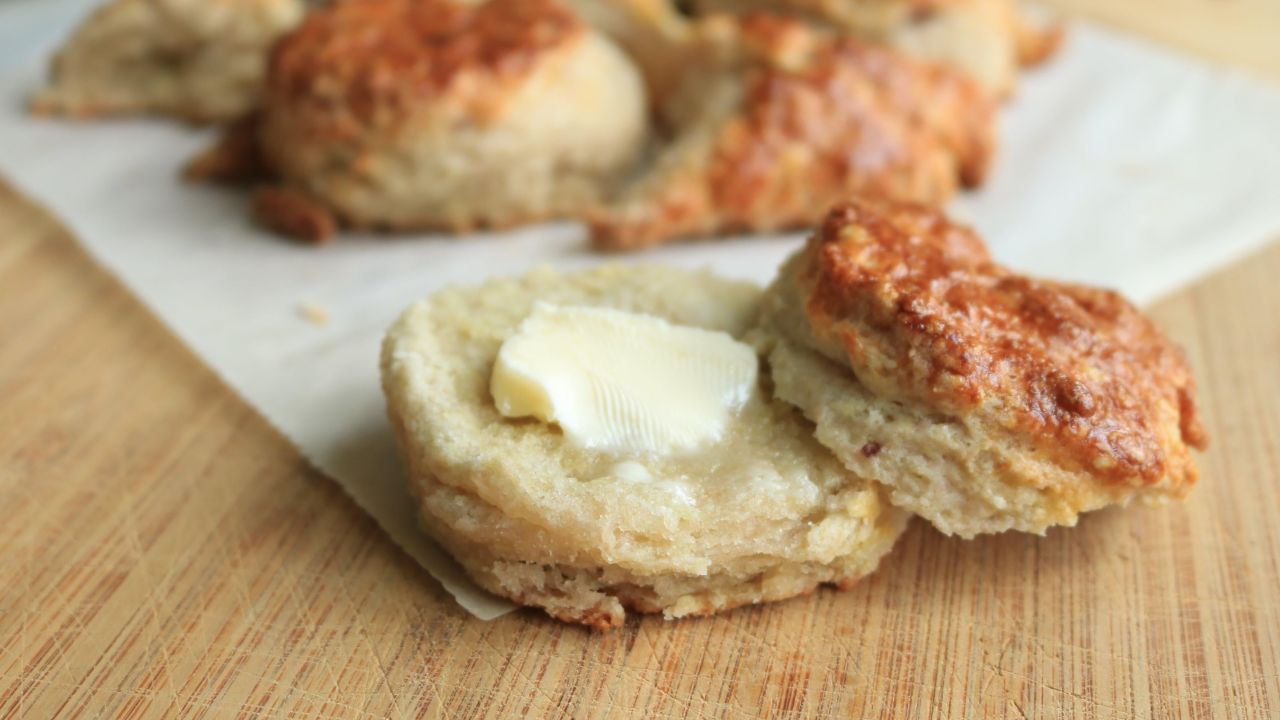
    So we’re still cooking ( Jeremy’s stupidly-easy-but-incredibly-delicious biscuits have seen perennial action), but restaurant take-out has ended up in the dinnertime rotation a bit more frequently.

    Something I noticed after consuming these Styrofoam-encased meals, is that we sometimes ended up with some leftover French fries. Restaurants often accompany their entrees with outsized portions of them, and our kids especially don’t always have the appetite to finish theirs off. The leftover fries would end up in the fridge, where they would invariably remain untouched, and then be shunted to the trash.

    Because who likes to eat leftover French fries? Their deliciousness has a short shelf-life; fresh from the fryer, they’re the height of tastiness, but a day, even an hour later, and they’re soggy and mealy. Reheat them in the oven, and they turn hard and dry. Nuke ‘em in the microwave, and they become soft and limp, devoid of their former crispness.

    And yet, it seems a shame to throw your fries away. You paid for them, and take-out is expensive. You want to get your full money’s worth instead of letting your food go to waste.

    Fortunately, it’s possible to reheat and reuse leftover French fries in ways that restore their golden glory.

    How to Reheat French Fries (So They Actually Taste Good)

    While many methods for reheating fries turn out lackluster results, these two will bring your fries back to something approaching their fresh-from-the-fryer state.

    The Improved Oven Method

    As mentioned above, reheating fries in the oven tends to make them dry and hard. But with a few tweaks to this method, you can get a much superior result.

    1. Preheat oven to 400 degrees.
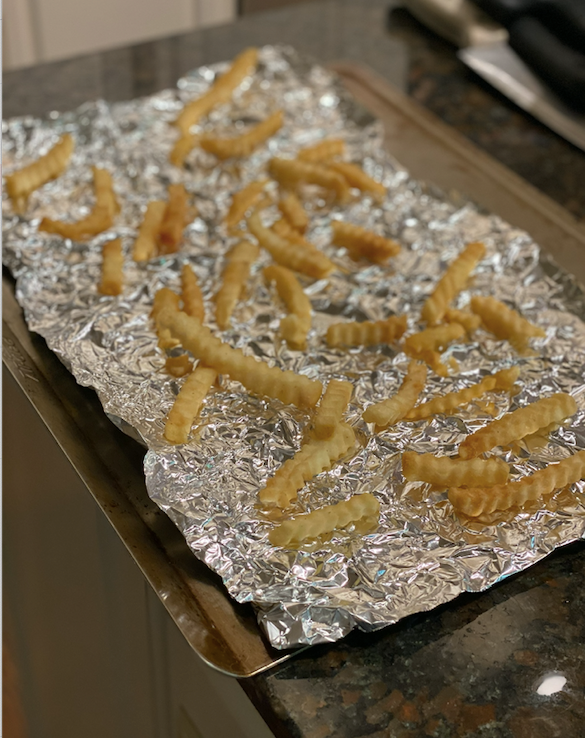
    2. Tear off a sheet of foil big enough to cover a baking sheet and crumple it into a ball.
    3. Gently (to avoid tearing) unfold the foil so that it’s flat, but not entirely smoothed out. Keep the textured ridges you’ve created; the fries will sit on top of these ridges, allowing the oven’s heat to warm every side of the elevated pieces.
    4. Place French fries on the foil spaced out in a single layer.
    5. Hit the fries with a light spray of cooking spray.
    6. Bake for about 5 minutes, until hot.
    7. Add salt to taste (you wouldn’t think it’d be needed, but it likely is and quite enhances ’em) and consume.

    The Re-Fried Fries Method

    If fries taste best straight from the oil, then it makes sense that returning them to some grease would restore their deliciousness. And indeed, this was the best method we tried; re-fried fries taste almost better than they did originally.

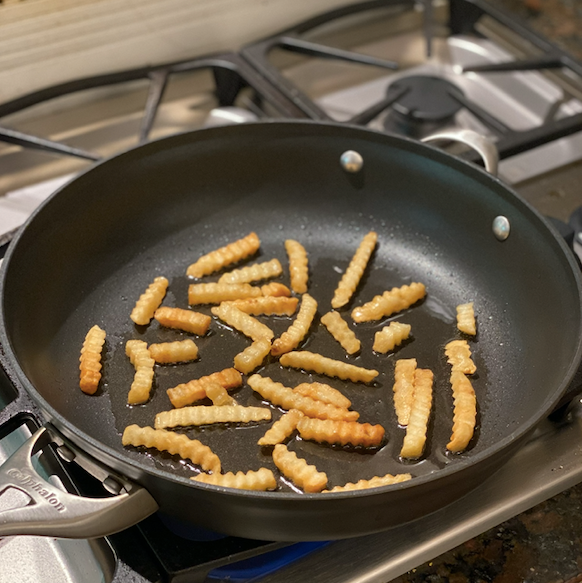
    1. Coat the bottom of a pan with a thin layer of oil and heat over medium-high heat.
    2. Place the fries spaced out in a single layer in the pan.
    3. Leave fries to heat for 1-2 minutes (depending on thickness/desired crispiness), then flip/stir them, and fry for 1-2 minutes more, until hot, golden, and crispy.
    4. Let drain on a paper towel-lined plate and add salt as needed.

    If you like softer fries (and aren’t keen on adding oil to an already grease-laden food), use the oven method. If you like crispier fries, use the frying method.

    How to Reuse French Fries in a Meal

    If you don’t want to go through the trouble of heating up the oven or dirtying a frying pan just to make yourself a French fry snack, consider reusing your leftover fries by incorporating them into another food or meal. When they’re mixed with other things, their texture becomes less consequential.

    Smothering the fries with cheese and toppings or poutine (gravy + cheese curds) is a good option, as it turns a would-be snack into something that eats like a meal.

    You can also use leftover fries pretty much in any recipe that calls for potatoes (keeping in mind that they’re already cooked, and won’t need as much cook-time as the original recipe calls for). You can stick them a breakfast burrito or hash, or incorporate them into a casserole.

    Possibly the best option is to put your leftover fries into a frittata. Frittatas are a versatile dish – they can be eaten for breakfast or dinner, and you can pretty much throw anything you have on hand, leftover or fresh, into them, whether veggies, meats, or even (cooked) pasta. While you can come up with infinite combos, here’s a recipe that will get you started and easily and tastily use up your leftover fries.

    Leftover French Fry Frittata

    Ingredients

    • 8 eggs
    • ¼ cup cream
    • 4-6 slices of bacon
    • ¼ cup cheddar cheese
    • 1/4 teaspoon salt
    • 1/2 teaspoon pepper
    • leftover French fries (the exact amount doesn’t matter, but no more than about 2 cups)
    • fresh chives

    Directions

    Preheat oven to 400 degrees.

    Cook bacon, drain, and dice. Dice chives. Whisk together eggs, cream, salt, and pepper until just combined. Lightly grease a cast-iron or other oven-safe pan. Place French fries in a single layer on its bottom. Sprinkle in pieces of bacon. Pour in eggs, covering fries and bacon evenly. Sprinkle on cheese.

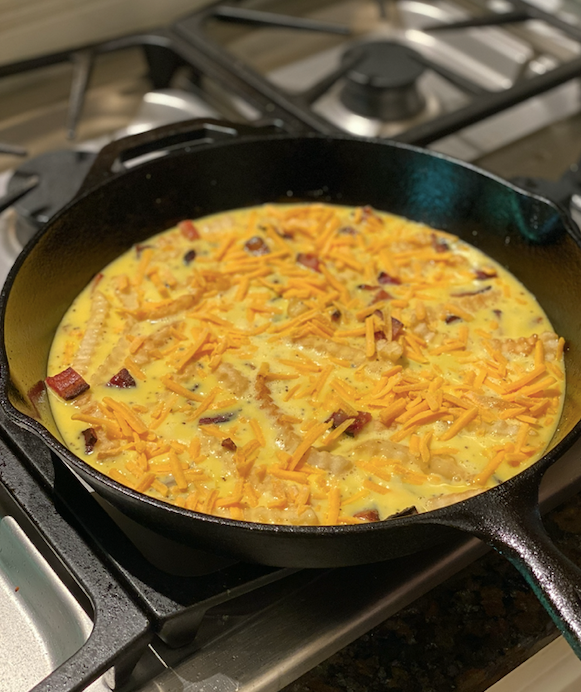
    Heat on stove over medium-high heat, until the edges begin to firm. Then transfer to oven and bake for 15 minutes/until you can cut into it without seeing runny egg. Sprinkle frittata with chives and serve.

    The post The Best Ways to Reheat and Reuse Leftover French Fries appeared first on The Art of Manliness .

    • chevron_right

      Buntes Linsencurry

      mulles · pubsub.movim.eu / emile-s-recipes · Friday, 24 February, 2017 - 18:21 · 1 minute

    Alt text

    Zutaten:

    • 300 g Linsen, rote
    • 1 Liter Wasser
    • 1 EL Gemüsebrühe, instant
    • 1 große Zwiebel(n)
    • 2 große Karotte(n)
    • 2 Paprikaschote(n), gelb und grün
    • 1 Tomate(n)
    • 3 EL Tomatenmark
    • 1 Pck. Kokosmilch (100 - 200 ml maximal)
    • 2 Chilischote(n), scharfe Curry, milder Kurkuma, gemahlen Koriander, gemahlen Kreuzkümmel, gemahlen Salz

    • Öl (Sesamöl)

    • Olivenöl
    • Sambal Oelek
    • Rohrzucker
    • Petersilie oder Dill, frisch gehackt

    Zubereitung

    Arbeitszeit: ca. 30 Min. / Schwierigkeitsgrad: normal / Kalorien p. P.: keine Angabe Das Wasser mit Gemüsebrühe aufkochen. Die Linsen waschen und in das kochende Wasser geben.

    In der Zwischenzeit Zwiebel, Chilischoten und Paprikaschoten klein schneiden, die Karotten am besten in schmale Streifen.

    In einer Mischung aus Olivenöl und Sesamöl (halb - halb) sowie dem Rohrzucker die Chilies anbraten (wer sich mit der Schärfe nicht sicher ist, lieber nur eine Chilischote nehmen und dann mit Sambal Oelek abschmecken), kurz darauf das Gemüse mit anbraten, bis die Zwiebeln glasig sind. Die Tomate nun auch klein schneiden. Noch kurz mit dem restlichen Gemüse mitbraten. Die Karotten sollten noch knackig sein (wer das nicht mag, sollte sie vorher dünsten).

    Wenn das Wasser bei den Linsen aufgesogen ist (nach ca. 10 Minuten), die Linsen kurz vom Herd nehmen, bis das Gemüse fertig ist. Jetzt die Linsen wieder auf den Herd und das Gemüse dazugeben. 50 ml Kokosmilch angießen und gut umrühren, wenn die Konsistenz nicht breiig genug ist oder wieder fester wird, noch einen Schuss dazugeben. Tomatenmark hinzufügen. Ca. 1 TL Currygewürz sowie je 1/2 TL Kurkuma, Koriander und Kreuzkümmel unterrühren. Weitere 5 Minuten köcheln lassen. Mit Salz, Sambal Oelek und Rohrzucker abschmecken.

    Nach Belieben kann über das fertige Gericht frische Petersilie oder Dill gestreut werden.

    Quelle: http://www.chefkoch.de/rezepte/873781192717703/Buntes-Linsencurry.html