• chevron_right

      Compute ppm of MQ sensors from datasheet graphs

      pubsub.slavino.sk / onetransistor · Saturday, 31 December, 2022 - 19:34 edit

    I tried to connect some of the gas sensor modules I have bought over time to Arduino. Unfortunately, I discovered these modules were not designed properly and require some modifications in order to power sensors according to datasheet specifications. I am using an MQ-2 type sensor for this test and all of the following estimations will be specific for this type of sensor. You can use the same approach to read and process analog input of any of the other sensors from MQ family.

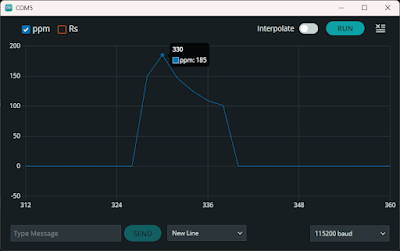
    You won't find in any of the available datasheets a direct, clear formula to approximate ppm of a gas based on the sensor resistance. But there are some sensitivity graphs which we can use to find a correlation. To make things even more complicated, for MQ-2 there are two datasheets available, from different manufacturers, with different sensitivity data.
    Compute ppm of MQ sensors from datasheet graphs

    Read more

    Značky: #Sensor, #Software, #MQ-2, #Arduino, #Elektro

    • chevron_right

      Attempts at reading data from MQ-2 gas sensor (2)

      pubsub.slavino.sk / onetransistor · Friday, 30 December, 2022 - 21:16 edit

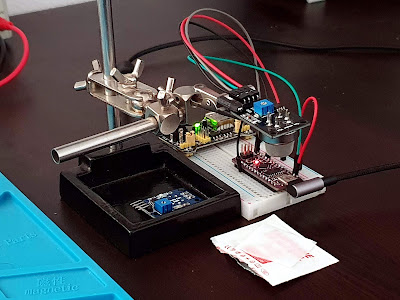
    MQ-2 is a gas leakage detecting sensor with good sensitivity to a wide range of gases. Since you can get most MQ sensor on ready-made modules, people are interfacing those with development boards. However, the modules are far from perfect. Some of the sensors require variable heater voltages. This is not the case for MQ-2. Since I own a module with this sensor and it can probably be used as is, I decided to make some tests while I'm waiting a PCB for MQ-9 to be manufactured and shipped.

    In the previous post I explained why modules with MQ-7 and MQ-9 are no good. Now, I'm about to discover the same for MQ-2. I thought I could use the module as is, since I am more interested in finding a method of computing useful data from the analog output of the sensor. With an Arduino compatible board and an MQ-2 module I will attempt to get ppm values. But not before some parts swapping.

    MQ-2 test fixture, with sensor exposed to alcohol
    MQ-2 test fixture, with sensor exposed to alcohol

    Read more

    Značky: #Elektro, #Gas, #Sensor, #Electronics, #MQ-2, #Arduino

    • chevron_right

      Useless sensor modules based on MQ-7 and MQ-9 (1)

      pubsub.slavino.sk / onetransistor · Sunday, 11 December, 2022 - 16:51 edit · 1 minute

    When shopping for electronics parts and modules, I oftentimes add to cart things I didn't plan to buy, since most suppliers offer free shipping when total order amount is above a threshold. This was the case with a module I bought recently, a carbon monoxide and LPG detector based on MQ-9 sensor. When I got the time to build a breadboard circuit to test it, I came across a problem. As with most modules and devices, I started with MQ-9 datasheet. And at first I did not quite understand what they were saying about high and low heater voltage.

    And the internet is full of examples regarding such modules interfaced to Arduino. And everybody seems to be powering it from 5 V, while some even developed code with advanced calculations to get real ppm value from the sensor. Throughout reading of the datasheets of both MQ-7 and MQ-9 reveals a "detail" everybody seems to have missed. In this post I will show you the correct way of using MQ carbon monoxide sensors. Keep in mind that CO and LPG are dangerous gases and if you need a detector, you should always buy a professionally manufactured one which is also properly calibrated.

    Useless sensor modules based on MQ-7 and MQ-9
    MQ-9 ready for testing

    Read more

    Značky: #Elektro, #MQ-9, #Sensor, #Gas, #Electronics, #Arduino

    • chevron_right

      8-Channel relay controller with keypad and RS485 interface (2)

      pubsub.slavino.sk / onetransistor · Saturday, 10 December, 2022 - 16:15 edit · 1 minute

    In the previous post I built a front panel with 8 push buttons which will be used to activate a module of 8 relays. Having so many I/O lines I had to come with a solution to be able to read and set each one of them with common microcontrollers. I ended up using 74HC165 for inputs and 74HC595 for outputs. These ICs are shift registers controlled using a serial synchronous protocol similar to SPI.

    In this post you will see the entire outdoor unit. In the end there will be two units, the outdoor one with keypad and relays; the other is the indoor unit with Wi-Fi connectivity and MQTT capabilities. A keypad will be featured on this one too. I went with this approach because I want a robust implementation without Wi-Fi dependency. Nevertheless the keypad on outdoor unit can be remotely disabled to prevent unauthorized use. I decided to use two units after a failed design which implied the use of an ESP8266 board directly as the MCU of outdoor unit. I had problems with voltage levels (shift registers are both 3.3 V and 5 V compatible, however my relay board is 5 V only, while ESP8266 is 3.3 V only; besides that, 3.3 V applied to shift registers powered from 5 V is not recognized as digital HIGH).

    Relay controller inside plastic box
    Relay controller inside plastic box

    Read more

    Značky: #Elektro, #RS485, #PCB, #74HC595, #Arduino, #3D-Print, #74HC165

    • chevron_right

      Front panel for 8-channel relay controller (1)

      pubsub.slavino.sk / onetransistor · Saturday, 24 September, 2022 - 20:10 edit

    This project started from a common issue I faced while trying to interface a relay board with a microcontroller: not enough I/O pins. My purpose is to control 8 outdoor lights; therefore, I got an 8-channel relay board, powered from 5 V. But I want to add some extra functionality: this controller should have a front panel with 8 push buttons and 8 LEDs. It should also take input from sensors with digital output. So, I got 16 inputs and 16 outputs to control.

    The most available solution was to use shift registers, 74HC595 for outputs and 74HC165 for inputs. Initially I thought I could use an ESP8266 microcontroller, since it would allow me to add MQTT functionality. But I had no success with this: ESP8266 is a 3.3 V microcontroller, relay board needs 5 V levels, and although shift registers can operate properly with voltages as low as 2 V, they will not recognize as high (“1”) a voltage of 3.3 V (from ESP8266) when powered with 5 V. The reason I powered them with 5 V is because relays will not be activated by 3.3 V.

    Front panel fitted on the plastic cover of a wiring box
    Front panel fitted on the plastic cover of a wiring box

    Read more

    Značky: #3D-Print, #74HC595, #Arduino, #PCB, #Elektro, #74HC165

    • chevron_right

      Turnkey PCB Assembly by PCBGOGO - 2022 Q3

      pubsub.slavino.sk / onetransistor · Sunday, 31 July, 2022 - 14:08 edit

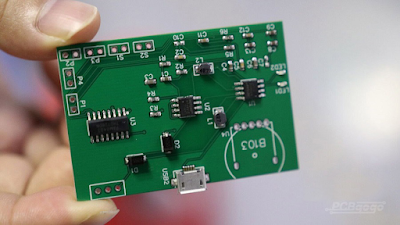
    Modern electronic devices can only work properly if the printed circuit boards (PCBs) they are built on are reliably manufactured with high precision. PCBGOGO manufactures the best PCBs and they can meet specific client needs. It is one of the world's leading PCB manufacturers, with a production line that can provide both precision and reliability. PCBGOGO provides turnkey assembly for their customers so you can use the PCB as soon as it is delivered to you. They provide quick, professional, and reliable turnkey PCB assembly.

    Turnkey PCB Assembly by PCBGOGO - 2022 Q3

    Read more

    Značky: #PCB, #PCBgogo, #Elektro, #Electronics

    • chevron_right

      High power versatile MQTT timer relay: software

      pubsub.slavino.sk / onetransistor · Sunday, 17 April, 2022 - 13:46 edit · 1 minute

    In the previous post I built an ESP8266 controlled 30A relay to automate an irrigation pump. I added a time display to this device because I want to have timer function, to set the pump on for a specified amount of time. I will not be using a web server to control the relay because I want to be able to switch it on from outside of the local network and it is difficult to obtain a properly secured HTTP server on ESP8266. I already did it , but this MCU has limited resources for such purpose.

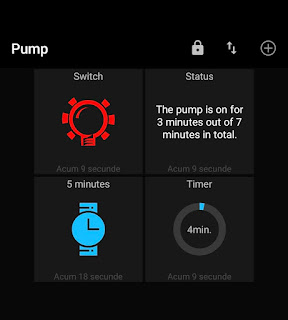
    Since I run a self-hosted MQTT broker on an Orange Pi Zero SBC I will make use of the MQTT capabilities. Orange Pi has a capable CPU for proper SSL encryption and I already made the server secure with self signed SSL certificate. ESP8266 can connect to the server in the local network on the unsecured listener port and that is not an issue since I have control over the devices my local network. Even so, WiFi is password protected. And ESP8266 uses credentials to connect to MQTT broker.

    MQTT relay controls in MQTT Dash app
    MQTT relay controls in MQTT Dash app

    Read more

    Značky: #Elektro, #Relay, #ESP8266, #ESP32, #MQTT

    • chevron_right

      High power versatile MQTT switch: hardware

      pubsub.slavino.sk / onetransistor · Sunday, 10 April, 2022 - 10:40 edit · 1 minute

    I wanted to automate an irrigation pump, to be able to turn it on and off remotely and set a power-on time limit. I looked for a ready-made solution and I found some products. But none fit my needs. There are mains powered ESP8266 boards with one or more relays, but those relays are common 10A type. After some searching on AliExpress, I found an ESP8266 module with 30A relay, but this one was missing a mains adapter and required DC low voltage supply. This one could have been my choice. After all I only had to get a power supply.

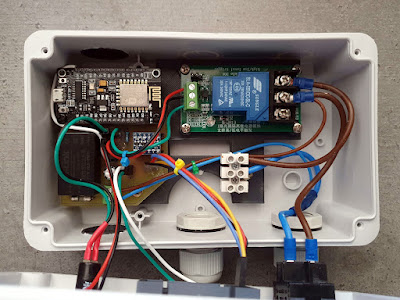
    Later, I decided to add a small display to my device so, I ended up making my own PCB. A NodeMcu board is the controller of this device. I added a 30A relay module and used a Hi-Link PCB power supply module to deliver required 5 V. The display is a 4-digit 7-segment TM1637 module which came with another challenge. It is a 5 V device that needs to be controlled by a 3.3 V MCU. I added a level shifter module and designed a PCB to fit all of them (except relay module which has its own PCB).

    Electronics for the MQTT switch mounted in a plastic box
    Electronics for the MQTT switch mounted in a plastic box

    Read more

    Značky: #ESP8266, #3D-Print, #Elektro, #MQTT, #Electronics

    • chevron_right

      Send data to weather station over 433.92 MHz (2)

      pubsub.slavino.sk / onetransistor · Thursday, 13 January, 2022 - 18:49 edit

    In a previous post I used a software defined radio (SDR) to analyze and decode data transmission over 433.92 MHz of a simple weather station. As I mentioned then, the indoor unit can receive data from up to three outdoor units. I found that outdoor units use basic OOK modulation to send data to indoor unit. Knowing this I can make my own outdoor unit using a 433 MHz transmitter module controlled by an Arduino.

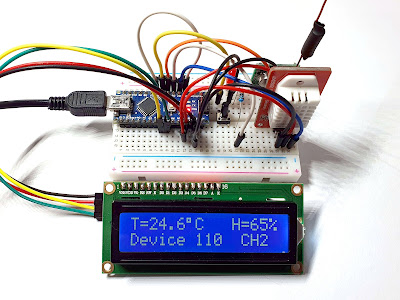
    Obviously, I had to use a temperature and humidity sensor such as DHT11, DHT22, AM2302 to get environment parameters. I emulated full original outdoor unit functionality by adding a display and a push button to trigger immediate transmission of data to indoor unit.

    Send data to weather station over 433.92 MHz
    Arduino based data transmission device

    Read more

    Značky: #Arduino, #Radio, #LPD433, #Elektro