• chevron_right

      The Best Polaroid Cameras for That Retro Feel

      pubsub.dcentralisedmedia.com / LifehackerAustralia · Thursday, 11 February, 2021 - 21:48 · 3 minutes

    Polaroid cameras are making a comeback in a big way. Sure, our phones can take sophisticated pictures but sometimes we want to hold onto our memories in a more physical way.

    Whether it’s a collective nostalgia or a genuine love for photography, it seems people are rushing out to buy these nifty little devices in droves. This type of camera is special as it’s able to develop a picture in front of your eyes and gives you a physical memory to keep as well. Whether you want to give it to someone, keep it in your wallet or string them all up on display in your bedroom, there’s no limit to what you can do once your photo has been developed.

    If you’re keen to learn more about this camera and find out the best ones to buy, keep reading.

    How are they different to other cameras?

    Without getting too technical, a polaroid camera is fitted with internal development mechanisms and self-developing film. It’s basically like having your own photo development studio in the palm of your hand – pretty clever, right?

    They’ve changed quite a bit over the years (as you’ll see the difference between the vintage and the instant cameras below). Nowadays, they’re a clever combination of the classic 80s camera and modern technology, giving you a unique photographic experience.

    Things to consider before buying:

    There are a number of things to consider before diving headfirst into the instant camera world.

    Firstly, polaroids come in a variety of different sizes so it’s important to choose a camera that’ll hold the right size of film. If you’re happy for your photos to come out a little smaller, you can opt for a pocket-sized camera. If you’d rather have a larger photo for a collage or display, opt for a camera that can hold a bigger film size.

    The second thing to think about is the shutter speed. Basic cameras like the Instax Mini come with a shutter speed of 1/60-second. This is a pretty decent speed which will reduce the amount of blurring in your photo, while maximising light to create clearer images. If you’re a more advanced photographer or someone looking for a wider range of shutter speeds, you might want to choose a different camera.

    There’s a few other aesthetic things to consider as well like selfie mirrors (some have them while others don’t) and in-app editing capabilities. Some are also fitted with self-timers and various modes (like landscape) so it’s important to read up on all the features of the camera before hitting purchase.

    Below, we’ve broken down all the different polaroid cameras you can buy and where to find them. Plus, where to shop for the right film if you’ve gone a little snap happy and need to grab some replacements.

    Cheap Polaroid Cameras:

    Fujifilm Instax Mini, $85.37

    (It’s available in other colours too if you’re more of a purple or a blue person.)

    Kodak Printomatic Instant Print, $85.48

    Polaroid Instant Cameras:

    Polaroid Instant Digital Camera, $180.64

    Polaroid 9030 Now I-Type Instant Camera, $132.01

    Polaroid POP Digital Camera, $158.94

    Instax Mini Camera, $122.27

    Snap Touch Instant Camera, $468.27

    Vintage Polaroid Cameras:

    Polaroid Original Camera, $176.24

    Polaroid Originals OneStep+, $197.91

    Polaroid Originals Autofocus Camera, $207.46

    Where to buy polaroid camera film:

    As we’ve established, these cameras require film to work. While the exact film you need varies from camera to camera, we’ve rounded up a bunch of options that’ll cover all bases (compatible devices are also listed in the product description).

    It’s always a great idea to keep one or two packets spare because you never want to run out when you need it most!

    Polaroid Originals Instant Color I-Type Film 40-Pack ($112.56)

    Fujifilm Instax Mini 60-Pack ($47.20)

    Polaroid 600 Film 5-Pack ($103.80)

    Instax Mini Rainbow Coloured Film 10 Photos ($15.76)

    Polaroid Black Coloured Film 8 Photos ($24.86)

    Fujifilm Instax Wide Film 20 Photos ($29.73)

    The post The Best Polaroid Cameras for That Retro Feel appeared first on Lifehacker Australia .

    • chevron_right

      These Colourful Kettle and Toaster Sets Will Perk Up Your Mornings

      pubsub.dcentralisedmedia.com / LifehackerAustralia · Thursday, 11 February, 2021 - 04:35 · 2 minutes

    Whether your kitchen is due for an upgrade or you just fancy a bit of a change up, a new kettle and toaster set could do the trick. Especially if, like me, there’s nothing more satisfying than having matching homewares.

    With a huge range of different styles and colours to choose from, you’re sure to find a set regardless of your kitchen style. Kitchenware brands like Smeg, Breville and Sunbeam, offer a variety of 2 and 4 piece toasters as well as funky vintage and modern kettles in bold, bright colours like cherry red, pastel blue and sunshine yellow, as well as classic colour-ways like black, white and stainless steel.

    Ahead, we’ve rounded up a bunch of kettle and toaster sets that’ll fit into any budget so you can find a set worth investing in.

    White kettle and toaster sets

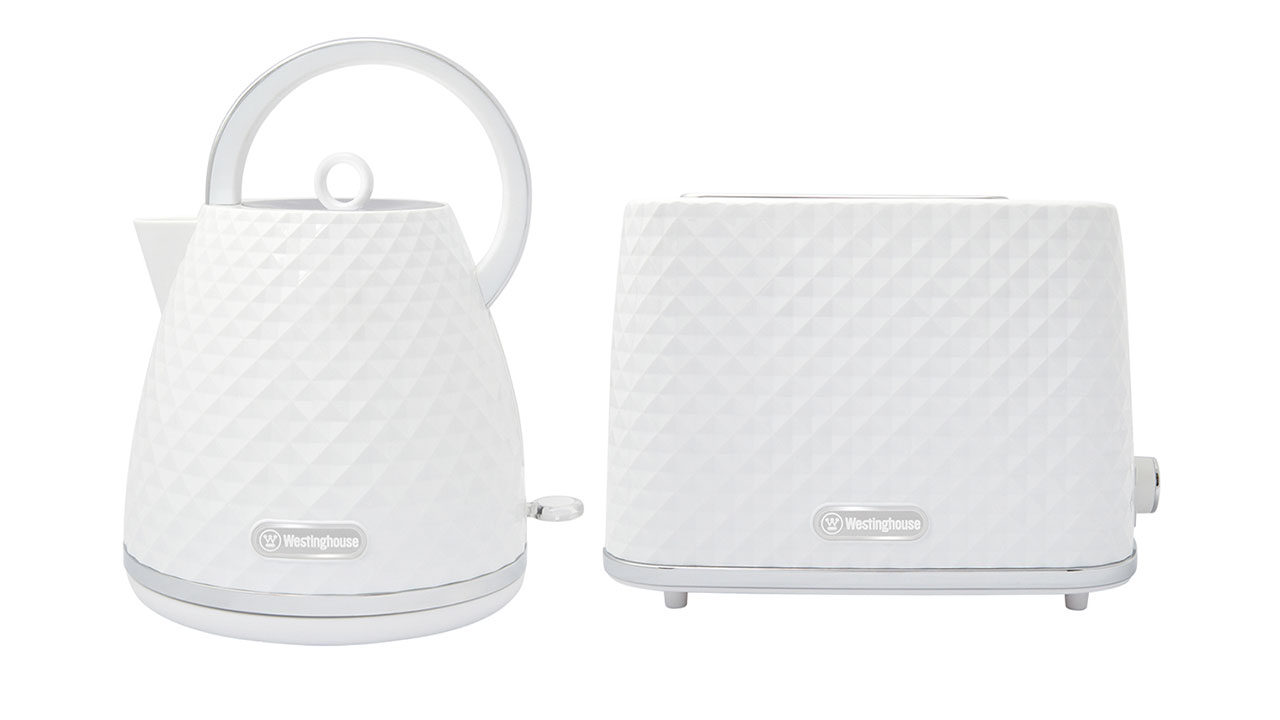
    westing-white-copy.jpg?auto=format&fit=fill&q=65&w=1280

    Westinghouse Diamond Kettle & Toaster Breakfast Pack in White, $88

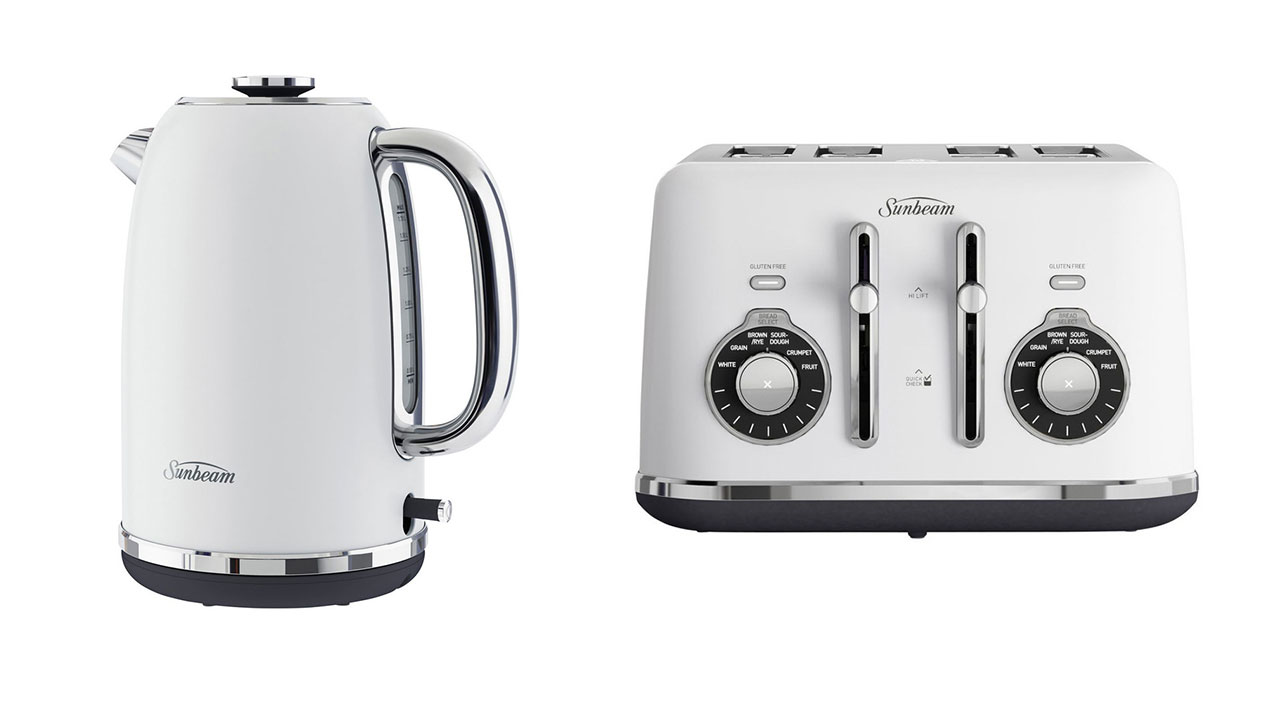
    sunbeam-white-copy.jpg?auto=format&fit=fill&q=65&w=1280

    Sunbeam Alinea Collection Kettle Ocean Mist White, $129

    Sunbeam Alinea Select 4 Slice Toaster White, $129, originally $149

    Black kettle and toaster sets

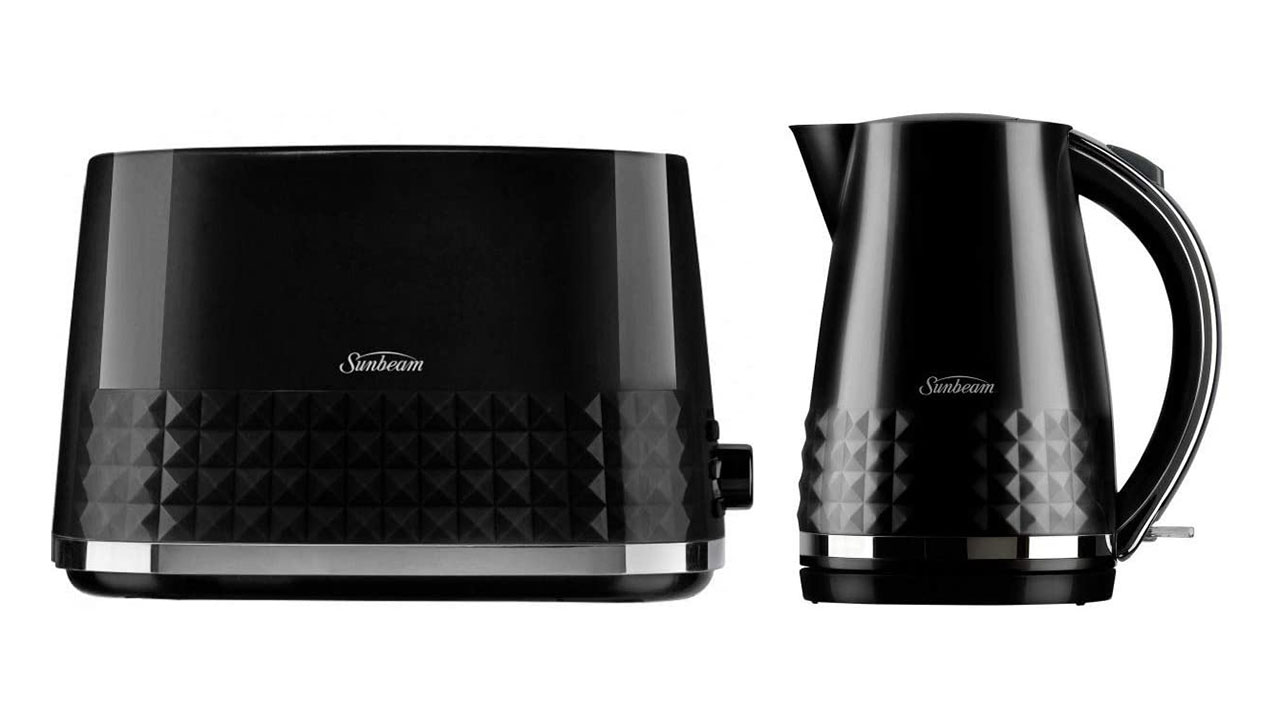
    Sunbeam-black-copy.jpg?auto=format&fit=fill&q=65&w=1280

    Sunbeam Diamond 2 Slice Toaster and 1.7L Kettle Set in Black, $159.99

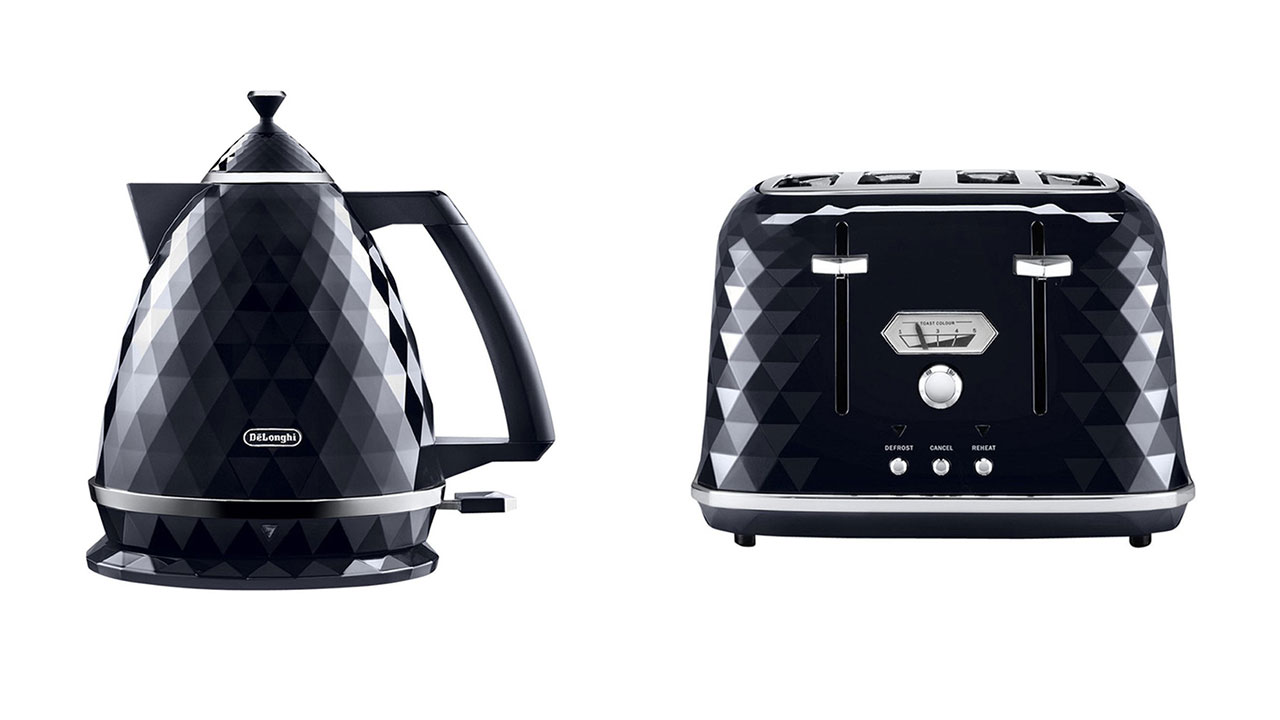
    DL-black-KT-copy.jpg?auto=format&fit=fill&q=65&w=1280

    Delonghi Brillante Exclusive Kettle Black, $99

    Delonghi Brillante Exclusive 4 Slice Toaster Black, $129

    Stainless steel kettle and toaster sets

    MR-SS-copy.jpg?auto=format&fit=fill&q=65&w=1280

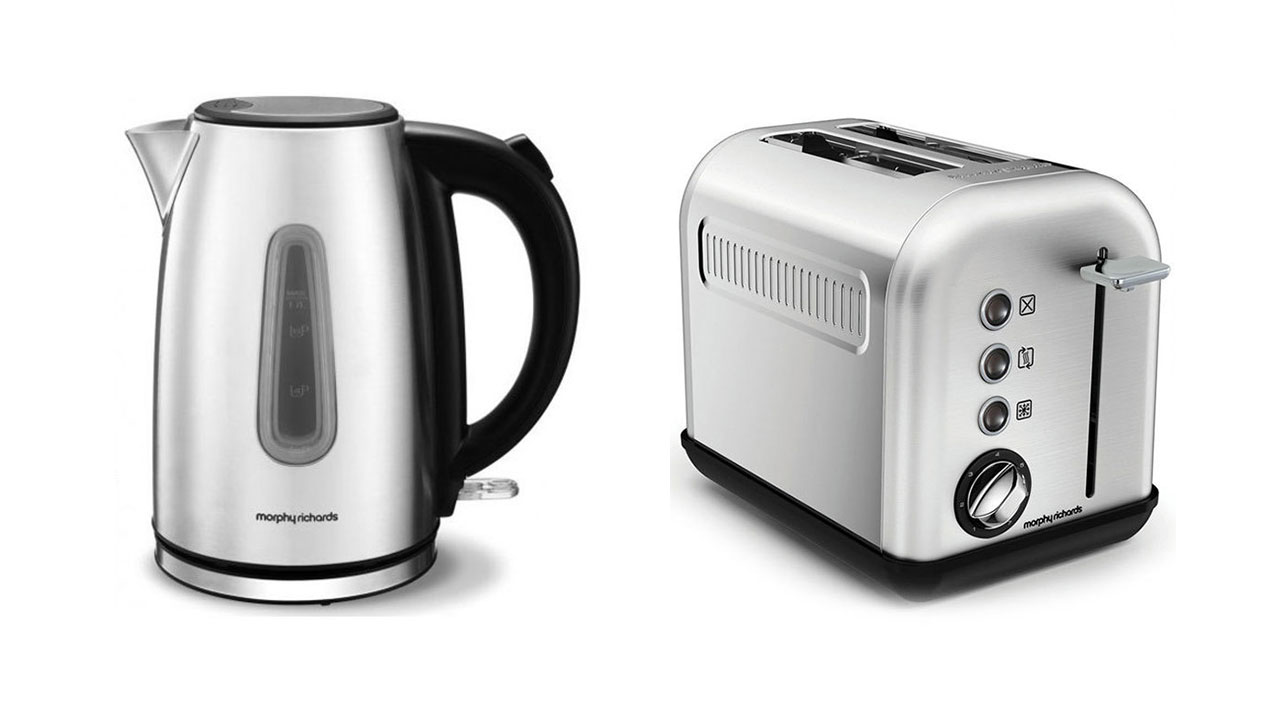
    Morphy Richards Equip 1.7L Kettle & 2 Slice Toaster in Brushed Stainless Steel, $122

    brev-SS-copy.jpg?auto=format&fit=fill&q=65&w=1280

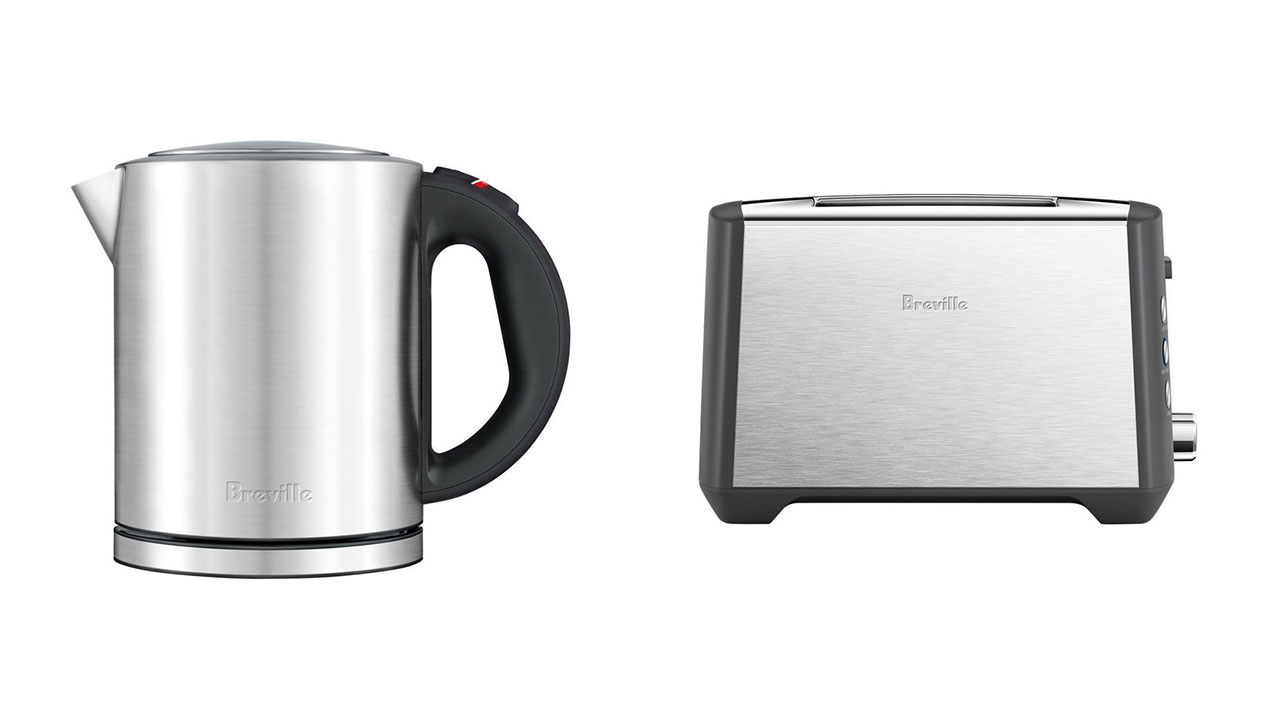
    Breville the Bit More Plus 2 Slice Toaster in Brushed Stainless Steel, $69.95

    Breville the Compact Kettle Brushed Stainless Steel, $89.95

    Red kettle and toaster sets

    smeg-red-copy.jpg?auto=format&fit=fill&q=65&w=1280

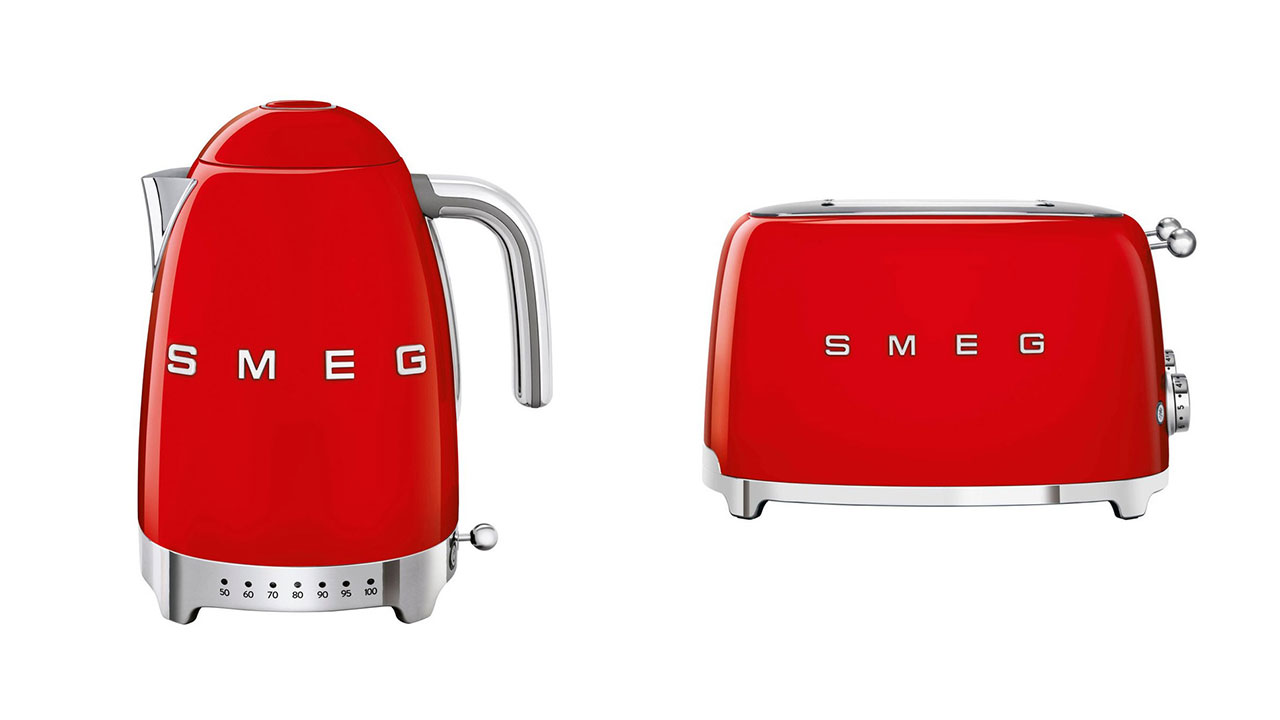
    Smeg 50’s Style 4 Slice Toaster in Red, $299

    Smeg 50’s Style Variable Temperature Kettle in Red, $269

    kitchenaid-red-copy.jpg?auto=format&fit=fill&q=65&w=1280

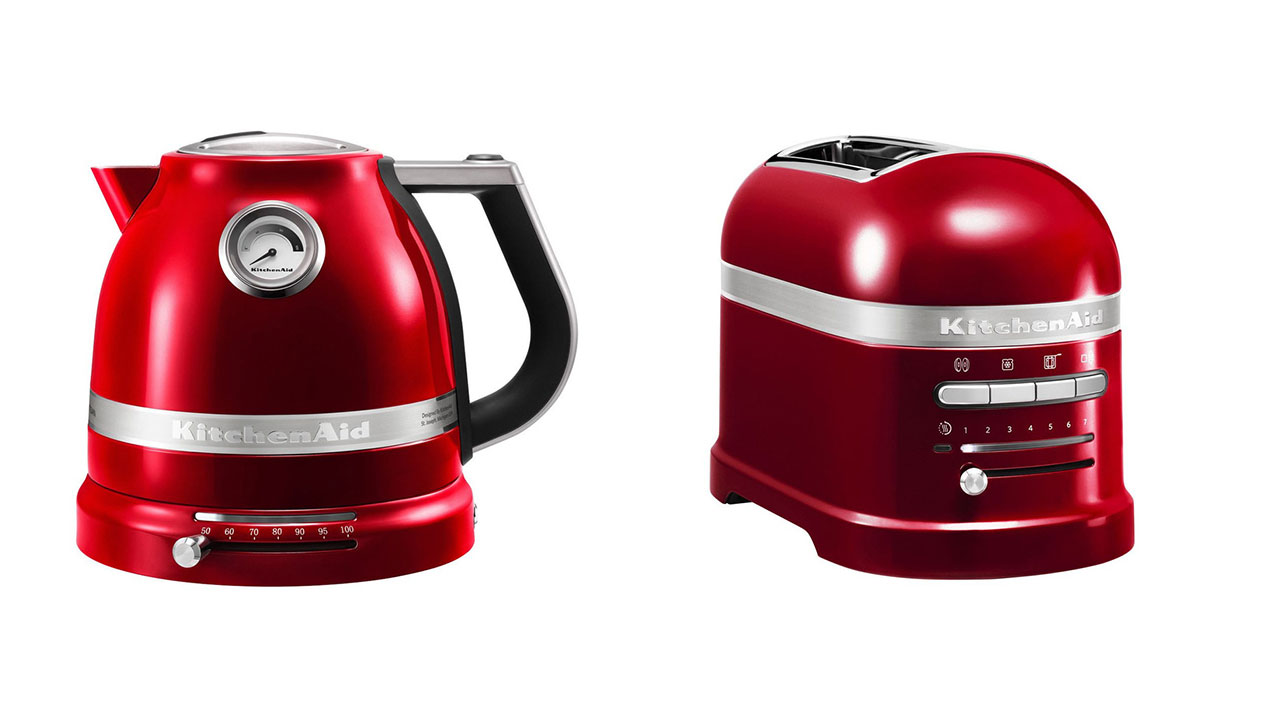
    KitchenAid dPro Line 1.5lt Electric Kettle in Candy Red, $379

    KitchenAid Pro Line Series 2 Slice Automatic Toaster in Candy Red, $379

    Blue kettle and toaster sets

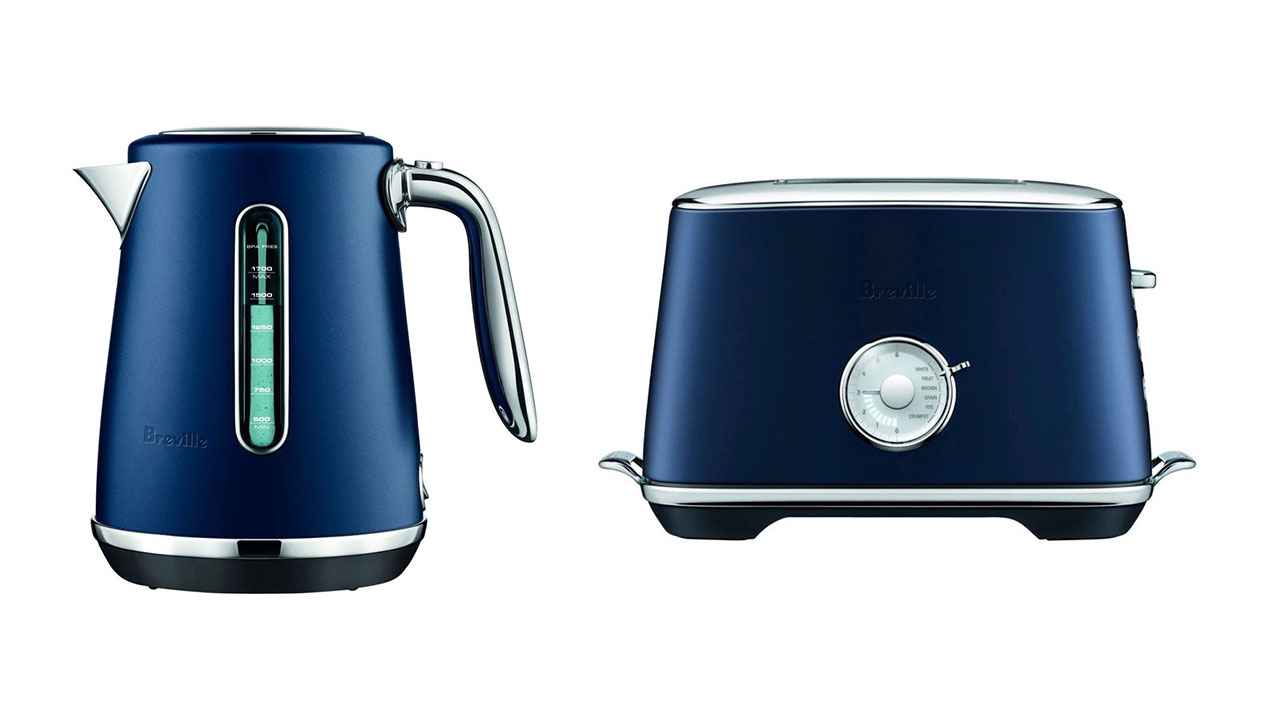
    brev-dark-blu-copy.jpg?auto=format&fit=fill&q=65&w=1280

    Breville Luxe Collection Toaster & Kettle Set in Damson Blue, $379

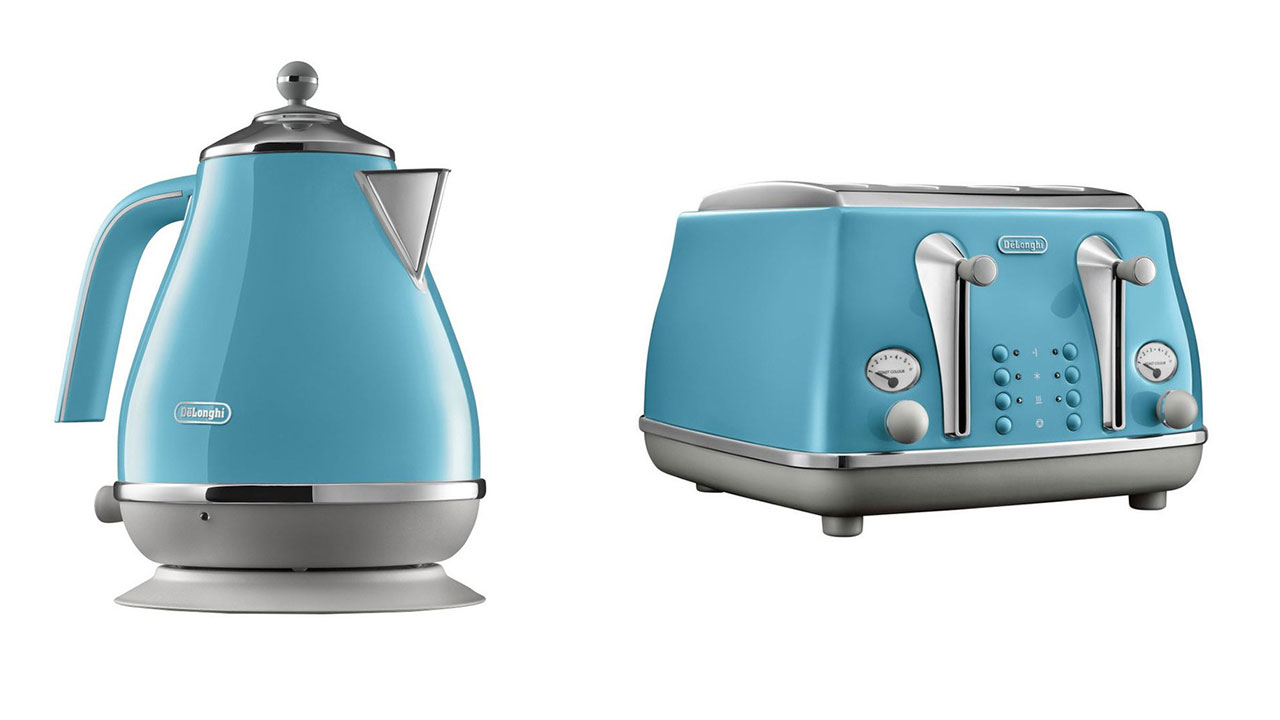
    DL-Blue-copy.jpg?auto=format&fit=fill&q=65&w=1280

    Delonghi Icona Capitals Lisbon Kettle Azure, $129, originally $139

    Delonghi Icona Capitals Lisbon 4 Slice Toaster Azure, $159, originally $169

    Yellow kettle and toaster sets

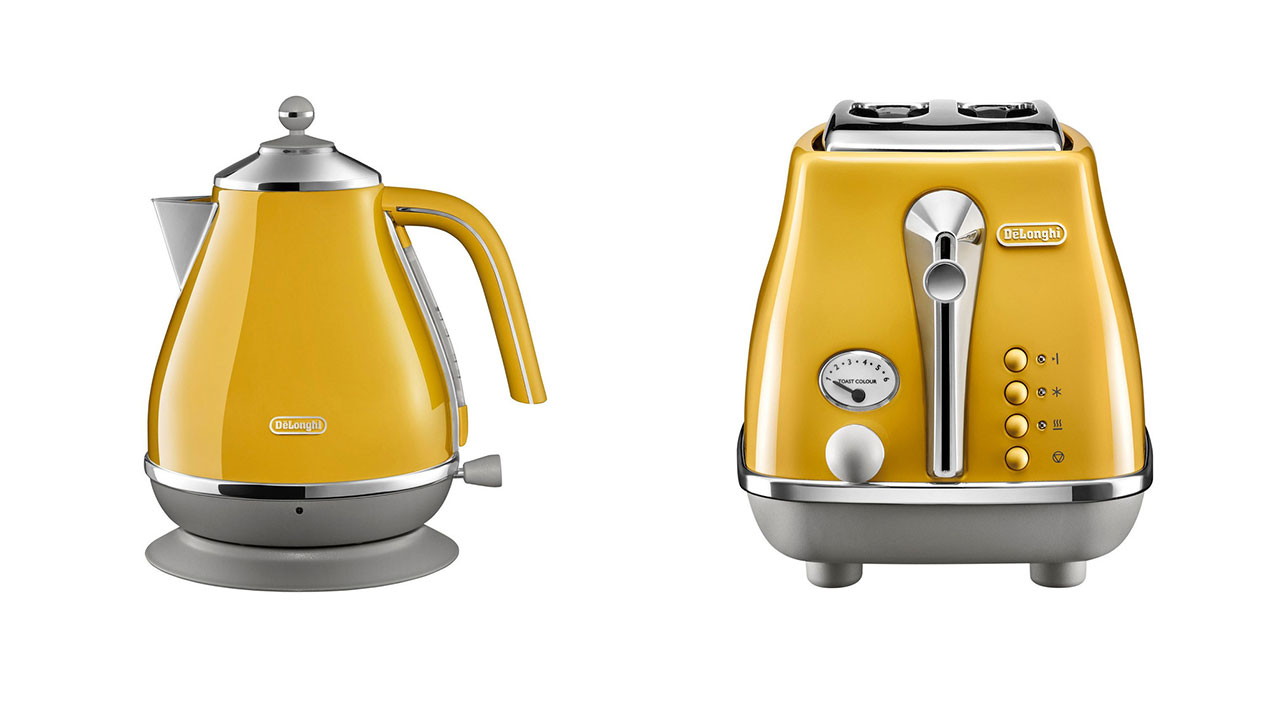
    DL-Yellow-copy.jpg?auto=format&fit=fill&q=65&w=1280

    Delonghi Icona Capitals New York 2 Slice Toaster Yellow, $139

    Delonghi Icona Capitals New York Kettle Yellow, $129, originally $139

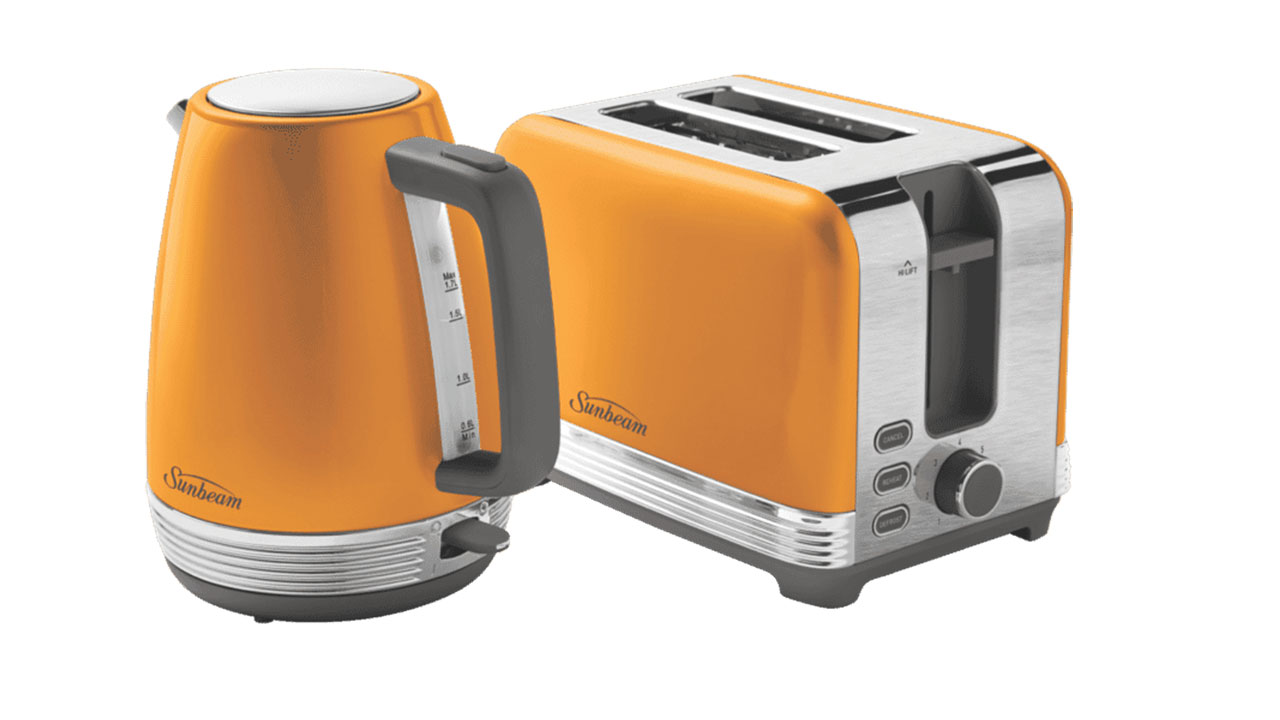
    sunbeam-yellow-copy.jpg?auto=format&fit=fill&q=65&w=1280

    Sunbeam Chic Breakfast Collection Pack in Yellow, $99

    Green kettle and toaster sets

    RH-LH-copy.jpg?auto=format&fit=fill&q=65&w=1280

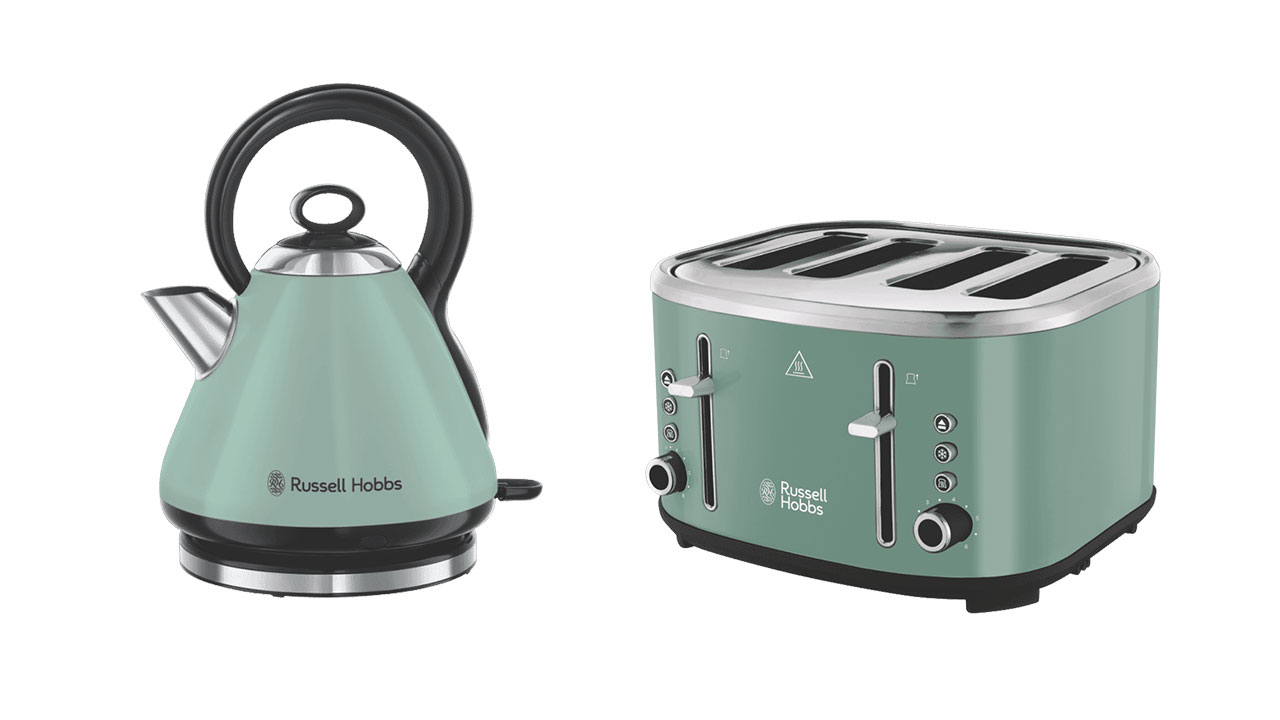
    Russell Hobbs Legacy 4 Slice Toaster in Green, $59

    Russell Hobbs Legacy Kettle in Green, $59

    DL-LH-copy.jpg?auto=format&fit=fill&q=65&w=1280

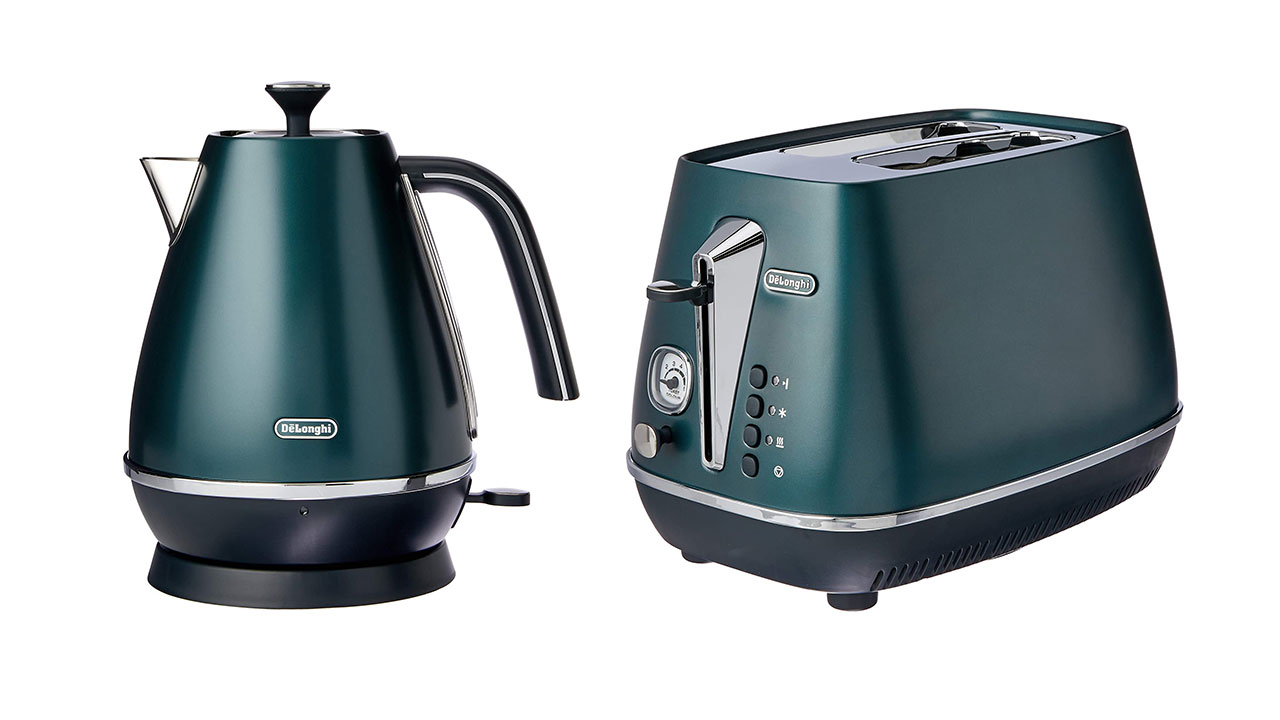
    De’Longhi Distinta Flair 2 Slice Toaster, $119

    DeLonghi Distinta Flair Electric Kettle 1.7L, $109

    Pink kettle and toaster sets

    MR-LH-copy.jpg?auto=format&fit=fill&q=65&w=1280

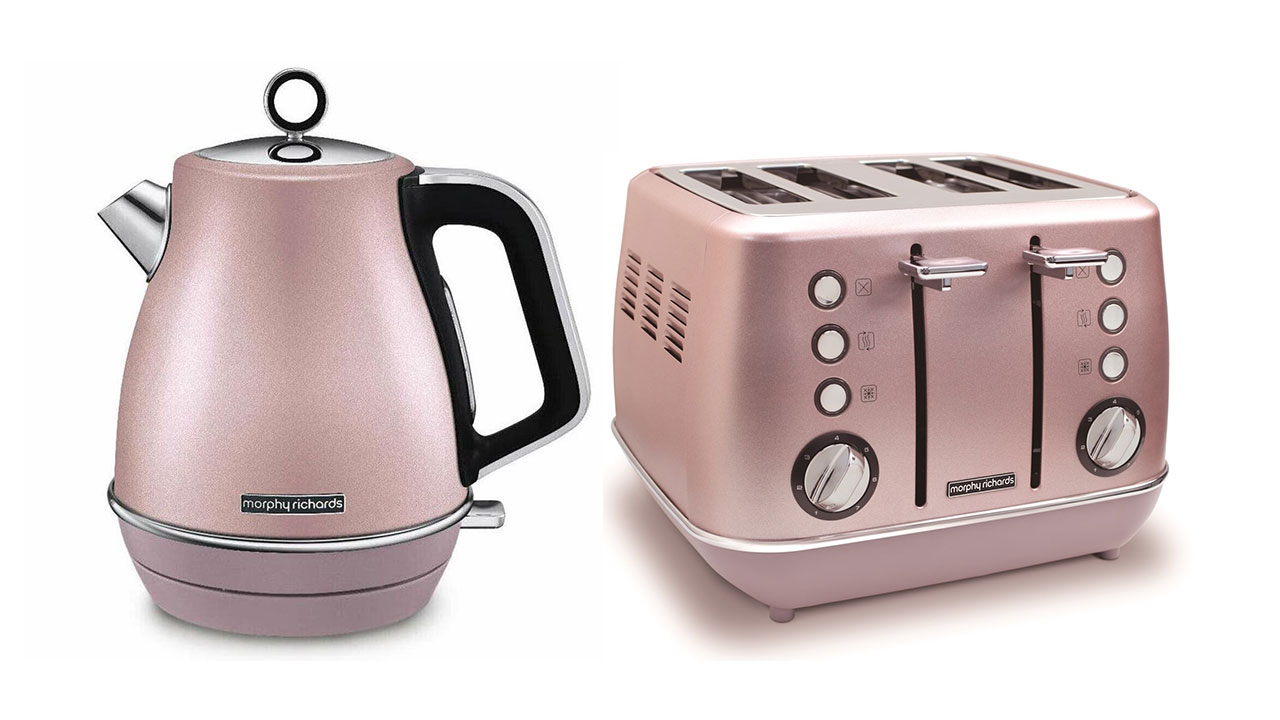
    Morphy Richards Evoke Kitchen 1.5L Jug Kettle and 4 Slice Toaster in Rose Quartz, $189

    Untitled-1-copy.jpg?auto=format&fit=fill&q=65&w=1280

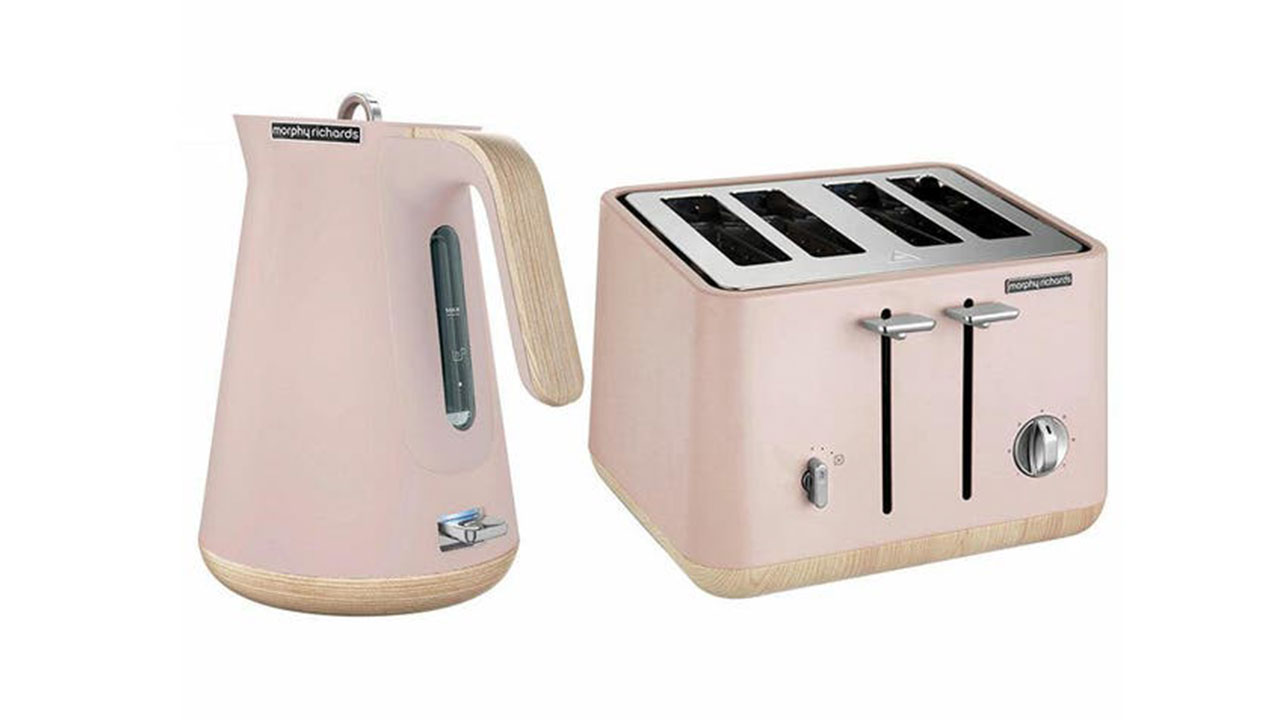
    Morphy Richards Scandi Dusty Pink Aspect Kettle and Toaster Pack, $341.26

    The post These Colourful Kettle and Toaster Sets Will Perk Up Your Mornings appeared first on Lifehacker Australia .

    • chevron_right

      4 Supportive Back Cushions for Your Office Chair

      pubsub.dcentralisedmedia.com / LifehackerAustralia · Wednesday, 10 February, 2021 - 23:55 · 2 minutes

    Working at a desk all day will undoubtedly take its toll on your back. One of the best ways to support your back and avoid the strains and stresses of working from home is with a supportive back cushion.

    Sitting down all day isn’t the healthiest occupational practice , but for many of us it’s a reality. You may be tethered to your desk whether you’re in an office or working from home, and while there’s plenty you can do to improve your overall work situation, like using a proper monitor mount or better office chair, one of the simplest adjustments you can make is investing in a good back cushion.

    Back support cushion options

    Ausale Memory Foam Lumbar Support Back Cushion $24.97
    One of the most frequent posture problems desk workers face is not sitting up straight enough when they work. The Ausale Memory Lumbar Support cushion forces you to sit forwards, and it can also double as a seat cushion if you need a little height boosting and comfort support.

    ObboMed- HR-7660 Inflatable Portable Bed Wedge Pillow $63.22
    While the ObboMed HR-7510 is largely sold as a bed pillow, its inflatable nature means you could use it to improve your home or office chair’s support pretty easily, and the fact that it’s inflatable means that it’s also a possibility if you do find yourself travelling and working from hotel rooms with poor chairs frequently.

    Everlasting Comfort 100% Pure Memory Foam Back Cushion $53.93
    Using a regular pillow might force your back forwards into a better posture, but it’s also prone to slipping. The Everlasting Comfort Memory Foam pillow’s selling point beyond lumbar support is the use of dual straps to keep it in place. That should ensure that it provides optimal support while you’re seated.

    Viktor Jurgen Neck and Back Massager Pillow $124.20
    If you need more than just support, the Viktor Jurgen Neck and Back Massager Pillow may suit; it’s designed to attach to the back of your chair and provide a powered back or neck massage, as well as optional heating elements to reduce those aches and pains that come with too many hours of staring at dull spreadsheets.

    Editor’s note: Descriptions and features are as taken from manufacturer/seller claims on Amazon.

    The post 4 Supportive Back Cushions for Your Office Chair appeared first on Lifehacker Australia .

    • chevron_right

      5 Laptop Stands for Every WFH Setup

      pubsub.dcentralisedmedia.com / LifehackerAustralia · Wednesday, 10 February, 2021 - 06:30 · 3 minutes

    Working from home has forced us to get pretty inventive when it comes to desk space. If you keep finding yourself putting your laptop precariously on a pile of books, you can do much better with a top-quality laptop stand. Here’s what to look for when choosing the best one for your WFH space.

    Sure, it’s inherent in the name “laptop” that you can place your personal computer on your lap when working from home. Let’s be honest, chances are you’ve done it more than once. But it’s a quick recipe to a sore neck from craning downwards for hours, or uncomfortably hot or pressured legs depending on the make and model of your computer.

    It’s far more efficient for both your health and your laptop to sit on a stand, because you can then adjust it to work to your proper eye level, give it sufficient ventilation and make it easier to use external peripherals like a really nice ergonomic keyboard or mouse.

    Now, if you’re particularly keen you can always opt for a DIY stand, but you are limited by your skills and your available materials there. If you’d rather select a stand that’s professionally built, here’s a range of options to consider:

    Nexstand Travel Laptop Stand $20.38
    A laptop stand can help you work from home but it doesn’t have to be limited to just your own domicile. Nexstand’s laptop stand is designed to fold down for easy travel storage, so you can use it when you’re working on the go as long as you’ve got a flat surface. Its 226g carrying weight won’t unduly add to your luggage capacity either.

    ViPowermate Aluminum Adjustable Stand $21.99
    ViPowermate’s Aluminium stand, like many others, pitches itself at the MacBook crowd, but with so many other silver ultrabooks it’s not as though you can’t use it universally. It states it’s good for up to 20kg, which is one seriously heavy laptop – and more relevantly, an indication that it should be a nicely durable bit of kit.

    Soundance LS1 Silver Aluminum Laptop Stand $47.01
    Soundance’s LS1 isn’t a complex laptop stand, but it could be a good option if you want a stand that doesn’t – pun not intended – stand out, because it’s a simple aluminium ledge with a loop for the stand part that raises any laptop sitting on it by six inches at default. Yes, you don’t get adjustable angles – but that also means you’ll never have to deal with the adjustable part breaking and watching your laptop sink down either.

    AstiVita 100% Bamboo Laptop/Computer Foldable Desk and Stand $56.99
    Most laptop stands are solid metal – typically aluminium frames – but if that doesn’t suit your style or environmental outlook, consider AstiVita’s Bamboo stand. It’s designed to work at regular or standing desks, and intelligently incorporates a hidden drawer underneath the stand that you could use for storing connection cables or other small items.

    Razer Laptop Stand Chroma $141.50
    If you want a laptop stand that’s not only built for elevation but also intimidation factor, consider Razer’s Laptop Stand Chroma. If you’re at all familiar with Razer’s gaming gear, you’ll be able to predict that it’s got Razer’s RGB Chroma lighting built in, but also three extra USB ports, making it a good fit for any additional peripherals – not just gaming gear – you might need to work from home.

    Editor’s note: Descriptions and features are as taken from manufacturer/seller claims on Amazon.

    The post 5 Laptop Stands for Every WFH Setup appeared first on Lifehacker Australia .

    • chevron_right

      How to Find The Right Wall Mount for Your TV

      pubsub.dcentralisedmedia.com / LifehackerAustralia · Wednesday, 10 February, 2021 - 03:15 · 4 minutes

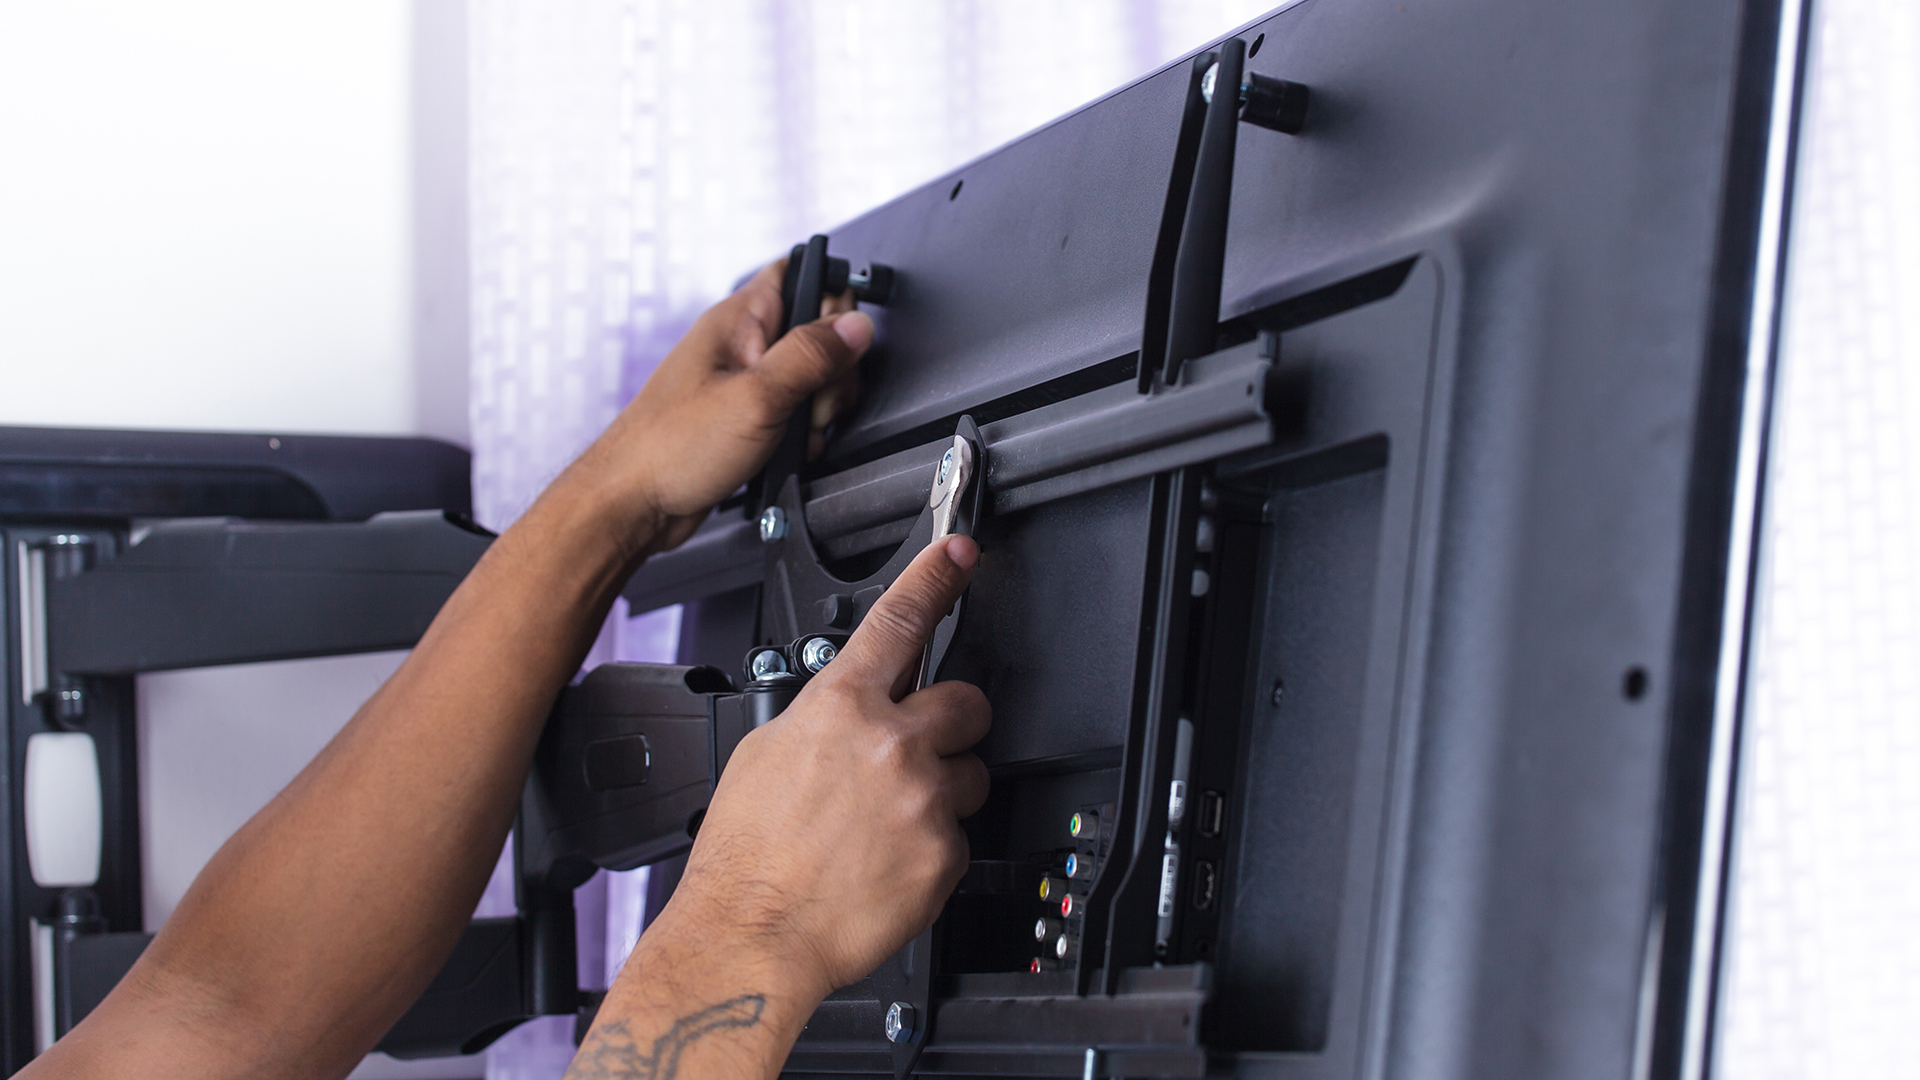
    If you’re a fan of that clean, finished look you get from hoisting your television up onto a wall (or you’re redecorating and want to know where to start), it all begins with selecting and installing the right wall mount bracket for your TV.

    TVs all pretty much come with stands so you can prop them up on a cabinet, table or anywhere else you’d care to watch, but if you’re after a simple visual style, nothing beats wall-mounting your TV. You might find the wall mount is in the box with your TV, or offered as a sales incentive, in which case you’ve only got to concern yourself with safely mounting it to your wall of choice.

    But if your TV didn’t come with a wall mount – and most don’t – then you’ll need to purchase one separately before attempting to hoist your TV up onto a nearby vertical surface.

    While some manufacturers do make or endorse specific brands, there’s a general standard – VESA – used by most TVs to define the distance between the mounting bracket holes on the back of your TV.

    One quick check here, although it’s pretty unusual: if you can’t locate mounting holes on the back of your TV, then it’s not VESA-compliant and most wall brackets won’t easily work with it. However that’s fairly unusual except for some very cheap brands or smaller TV types. If that describes your TV, or you’re not able to wall mount because you’re renting your property, solutions like these Anti-Tip Furniture Straps may be of use .

    How do I find out my VESA size?

    VESA is an important standard because while flat panel TVs aren’t as heavy as the old CRT TVs they replaced, they’re still substantial, and there’s definite risk involved in improperly wall mounting a TV – not just to the panel but potentially anyone standing nearby if it happens to fall!

    There are a couple of simple ways to determine your VESA sizing. Your TV’s product manual will almost certainly list its VESA compatibility somewhere, and these days you can often just look those specifications up online if you did drop the printed manual down the back of the sofa ages ago. If it’s not clear because you’re not 100 per cent sure of your model or online specifications suggest differing VESA compatibility, then you can always sort it out yourself with a little simple measurement.

    Find the mounting holes on the back of your panel, and measure left to right and top to bottom in millimetres. You’ll probably end up with a measurement of 200×200, 400×400 or 600×400 depending on the size of your TV. That’s the VESA sizing you’re looking for, although many third-party VESA mounts will come with multiple hole sizings to suit a variety of TV sizes.

    What other features should I look for in a wall mount?

    It sounds obvious, but it’s quite important to check that the mount you’re going to use is built to take the weight of the TV you’re placing on it. For most new wall mounts this shouldn’t be a huge issue, but if you do try to put a monster 85″ TV onto a tiny wall mount, it could come crashing down on you in the worst possible way.

    Once you’ve sorted out your compatibility for a wall mount, the next step is to decide how you want to mount it. The answer to that question might just be “up against the wall, stupid”, and that’s fine, because it’s quite easy to get simple flat wall mounts. But in many cases that’s not actually going to give you the ideal viewing position, because depending on where your light sources are and where you sit, a straight flat TV might not present its best picture unless it’s at an angle relative to your eyes.

    That’s where wall mounts with tilt functionality come into play. The key idea here is that you’ll fix your mount to the wall, then affix your TV and find the best fixed angle for your TV relative to your viewing plans and the layout of your room.

    Some mounts may only offer vertical tilt options ( like this one on Amazon ), while others may talk of “full motion” tilting ( like this one on Amazon ), which is to say that you can also tilt them horizontally if required.

    As you can imagine, you don’t have to stop at fixed-to-the-wall motion either, with some mounts ( like this one ) providing extension capabilities so you can bring a mounted arm forwards, which can be useful if you watch your TV in a room that the sun passes through during the day, because you can more easily adjust to avoid unwanted screen glare.

    The post How to Find The Right Wall Mount for Your TV appeared first on Lifehacker Australia .

    • chevron_right

      How To Find A Face Mask That’ll Actually Fit

      pubsub.dcentralisedmedia.com / LifehackerAustralia · Tuesday, 9 February, 2021 - 23:45 · 4 minutes

    Around the world, face masks have become increasingly more common in the fight against coronavirus. Have a quick scan the next time you go out and you’ll find most people wearing one. In Victoria and Greater Sydney, they’re now mandatory for certain indoor public settings. Unfortunately amid all the panic buying, people aren’t taking the time to consider all the features their mask needs for optimum protection. In fact, one of the biggest issue people are facing is finding the right face mask size for their head and face.

    Despite what many think, face masks aren’t a ‘one-size-fits-all’ situation. This can make face mask shopping pretty tricky,  particularly when it comes to finding the right face mask size. It might arrive and be far too big (with no adjustable ear loops) or it may be too small but made from material without any stretch – nightmare!

    It’s important to take all these factors into consideration when you’re choosing a mask – after all, if it doesn’t fit correctly, it really isn’t doing much good. Here’s what you need to look for when buying a mask and how to find the right face mask size for you.

    How To Choose The Right Face Mask Size:

    When you’re choosing a face mask, you need to ensure that it’ll fit snugly around your face. If there’s any gaps for air particles to get through, you’re susceptible to bacteria and germs (not to mention you could be harming others). When you’re shopping for face masks, it’s recommended features include multiple layers of fabric, ear loops, filter pockets and the ability to be rewashed and reused.

    iStock-1216092099-e1595918200954.jpg?auto=format&fit=fill&q=65&w=1280 Image: PeopleImages/ iStock

    Small Masks:

    So how do you got about choosing the right face mask size? If you have a smaller face and head, it’s best to opt for a face mask with adjustable straps. Anything that can tighten the mask to ensure it fits snugly on your face is the best possible option. Here, we’ve compiled a range of face mask size options to suit a variety of smaller framed faces.

    Slumbies Cloth Face Coverings ($9.50)

    If you’re keen to jazz up your face mask game, these slumbies masks are a perfect choice. Available in a range of fun patterns and colours and fitted with adjustable ear bands, they’re stylish and practical.

    Adjustable Face Mask ($13.99)

    This mask is fitted with an elastic, adjustable ear loop so you can loosen or tighten to achieve the exact face mask size you’re after. It also has an adjustable nose bridge so you can ensure it’s fitted as snugly as possible.

    Pure Silk Adjustable Face Mask ($40.70)

    If being comfortable is a big priority for you then this is the perfect mask. Made from 100% silk, it’s incredibly soft and gentle on your face if you need to wear it for long periods of time. Tuck the loops behind your ears before tightening as you need – and it won’t get stuck in your hair either which is always a plus.

    2 Pack Reusable Face Covers ($24.99)

    This face mask is made with a slider for adjusting the length of the ear loops so it couldn’t be easier to put on and take off. You can make it as tight as you need which makes it perfect for people with smaller heads and faces.

    facemaskpic.jpg?auto=format&fit=fill&q=80&w=1280&nr=20 Image: Getty Images

    Large Masks:

    If you have a larger face and head, you’ll probably want to choose a face mask that’s made from stretchy material and will have some give.

    Polyurethan Face Mask ($14.89)

    Made with a super soft, stretchy ear loop and face covering, this is a versatile option to achieve your ideal face mask size.

    Face Mask With Strap Extender ($7.99)

    Choosing a mask with a strap extender is a great idea for people looking to increase the range of their coverage without having to choose a different mask entirely. This design also takes pressure off your ears, allowing you to wear the mask for longer periods of time.

    Cotton Face Mask ($6.00)

    Measuring 25cm in length and 14cm in width, this face mask is a viable option for people with bigger faces.

    3 Layer Disposable Mask ($26.99)

    The flexible material of this face mask means it skews toward the larger side. Pull the fabric apart to ensure it covers your entire nose and mouth. Another bonus? It’s shipped from Australia so you can expect super speedy delivery.

    Face Mask Filters:

    30PCS Activated Carbon Filter Mask Insert ($12.73)

    Looking for multiple inserts and quick delivery? You’ve found it.

    50 PCS PM 2.5 Activated Carbon Filter 5 Layer Replaceable Insert ($28.97)

    A 5 layer filter system guarantees maximum protection against dust, pollutants and pollen allergens. PM 2.5 is the size of common carbon particulates – so a PM 2.5 filter will stop these from getting through.

    60PCS PM 2.5 Activated Carbon Filter ($10.00)

    Buying in bulk is always an economical choice.

    YIZER Face Mask with Breathing Valve and Activated Carbon Filter ($19.52)

    Two face masks fitted with exhalation valves and 10 filters to protect against most pollutants.

    The post How To Find A Face Mask That’ll Actually Fit appeared first on Lifehacker Australia .

    • chevron_right

      The Best Vegan Protein Powder to Add to Your Morning Smoothie

      pubsub.dcentralisedmedia.com / LifehackerAustralia · Tuesday, 9 February, 2021 - 22:58 · 1 minute

    Traditionally, we get our protein from a variety of animal-based food sources like meat, fish, eggs and dairy. However, once you make the switch to a plant-based diet, vegan protein sources are limited to foods like beans, lentils, nuts and seeds.

    And while all of those foods are great sources of protein, they might not be enough on their own, especially if you love to workout . That’s where supplements like vegan protein powder are worth considering.

    Protein is required in your diet to support your overall health and aid with fat loss and muscle gain. Adding a protein powder to your diet is a super-easy way to boost your intake without having to eat a million chickpeas. You can simply add it to things like yoghurts, porridge and smoothies, or mix it in with a little water or milk for a pre or post-workout hit.

    Each protein powder will come with recommendations for when and how to consume that particular protein powder, so it’s best to always read the instructions before you work it into your routine.

    Over the last few years, plant-based protein supplements have become much more accessible (and way better-tasting), so we’ve rounded up a bunch of places you can find some of the best options in Australia and get them delivered straight to your door.

    Vegan Protein Powder from Amazon Australia

    vital-protein-copy.jpg?auto=format&fit=fill&q=80&w=1280&nrs=40

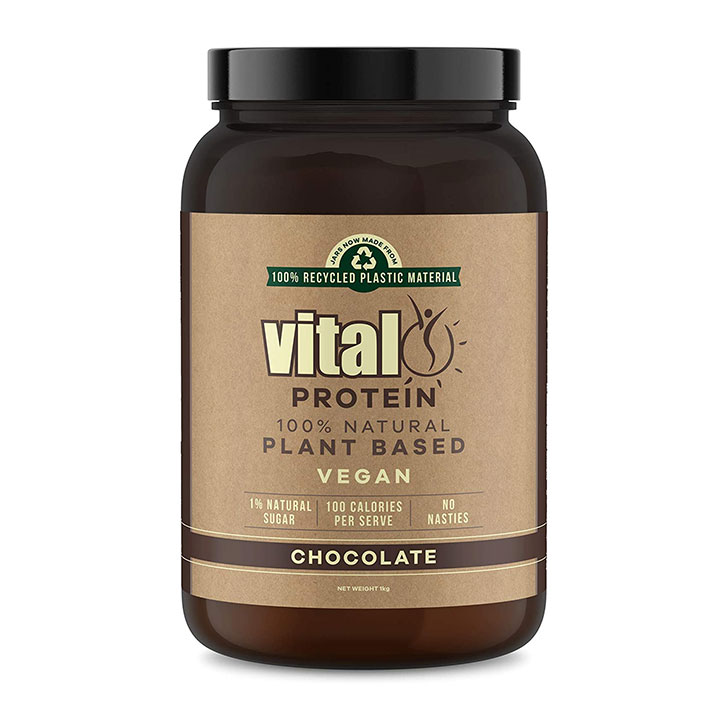
    Vital Protein’s Chocolate Protein Powder, $49.29

    orgain-organic-protein-copy.jpg?auto=format&fit=fill&q=80&w=1280&nrs=40

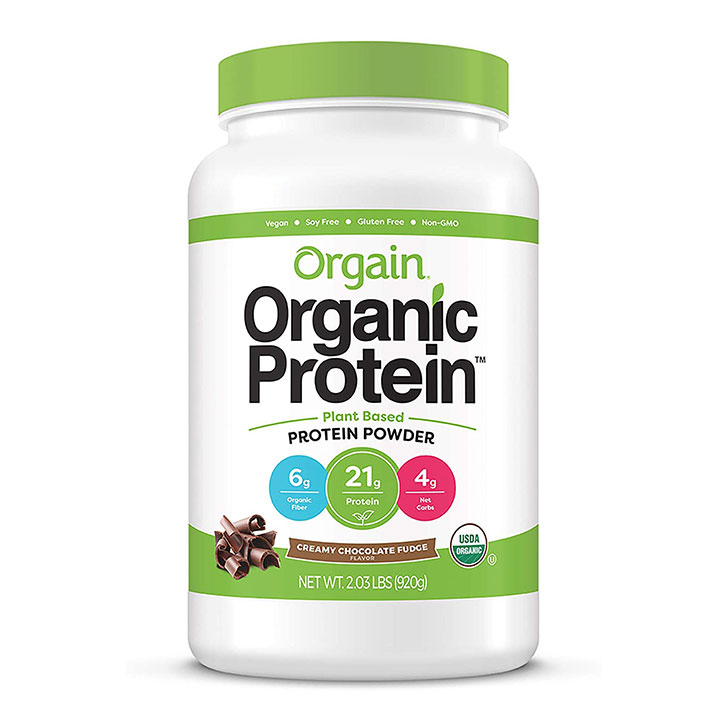
    Orgain Organic Plant Based Protein Powder, $48.99

    pure-plant-protein-copy.jpg?auto=format&fit=fill&q=80&w=1280&nrs=40

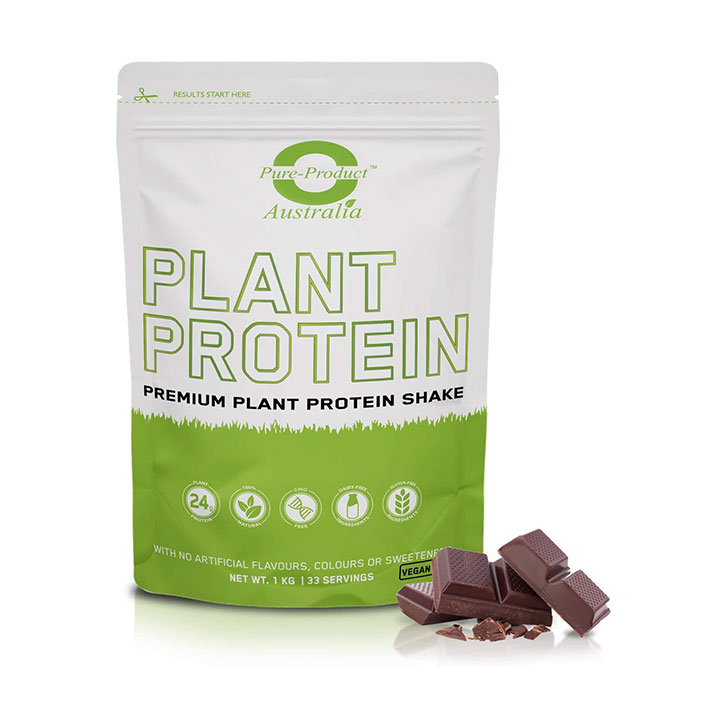
    Pure Product Australia Pea Protein Powder, $50.95

    iHerb

    naturals-way-pea-protein-copy.jpg?auto=format&fit=fill&q=80&w=1280&nrs=40

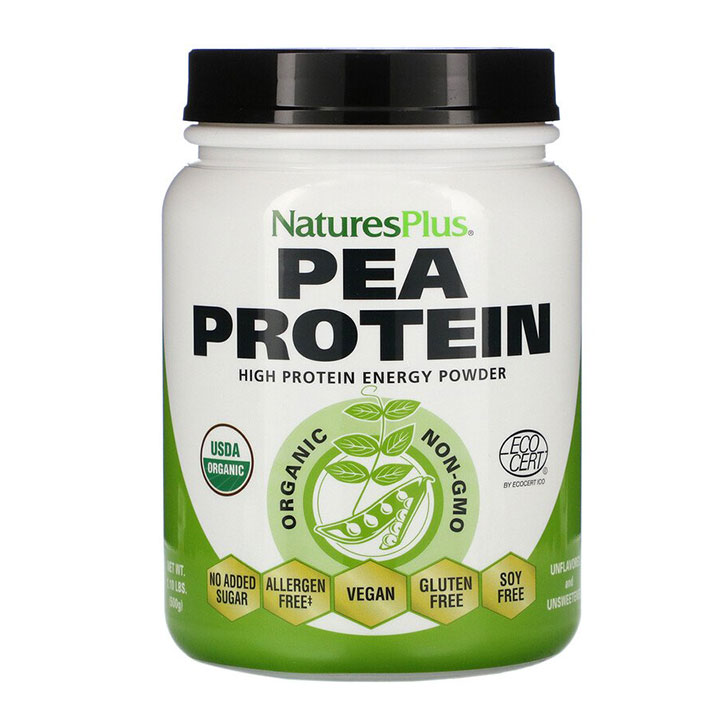
    Nature’s Plus Organic Pea Protein Powder, $28.36

    vega-sport-copy.jpg?auto=format&fit=fill&q=80&w=1280&nrs=40

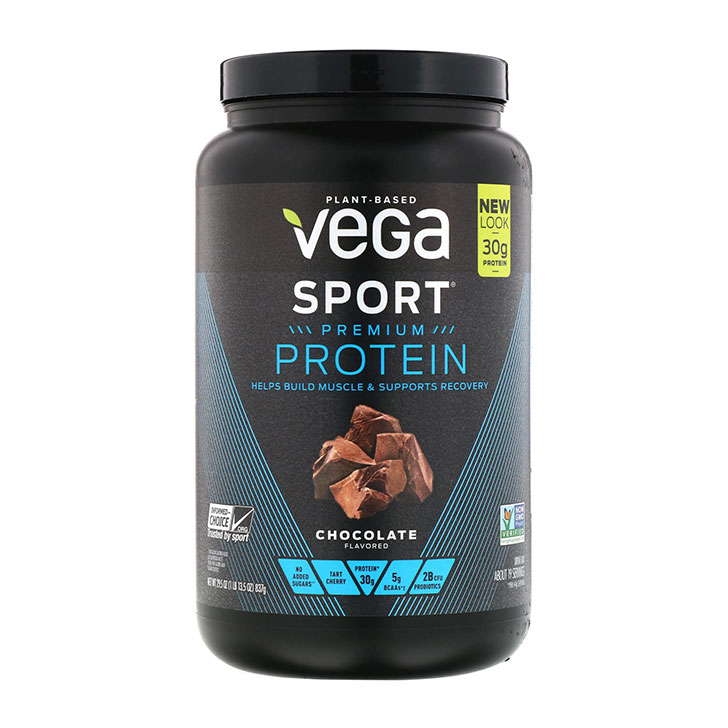
    Vega Sport Premium Protein Powder, $78.83

    sunfood-hemp-protein-copy.jpg?auto=format&fit=fill&q=80&w=1280&nrs=40

    Sunfood Raw Organic Hemp Protein Powder, $81.18

    Chemist Warehouse

    healthy-care-protein-copy.jpg?auto=format&fit=fill&q=80&w=1280&nrs=40

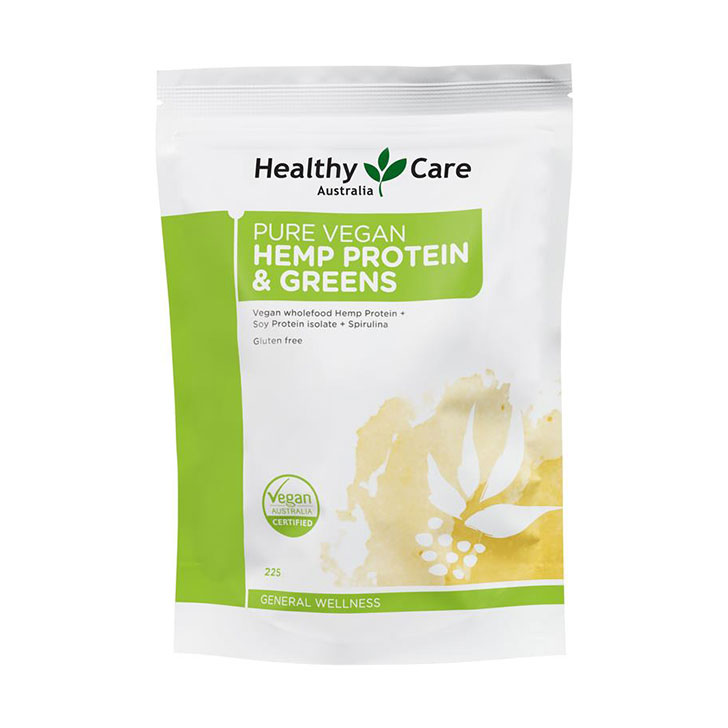
    Healthy Care Pure Vegan Hemp Protein & Greens Powder, $27.99

    the-vegan-blend-copy.jpg?auto=format&fit=fill&q=80&w=1280&nrs=40

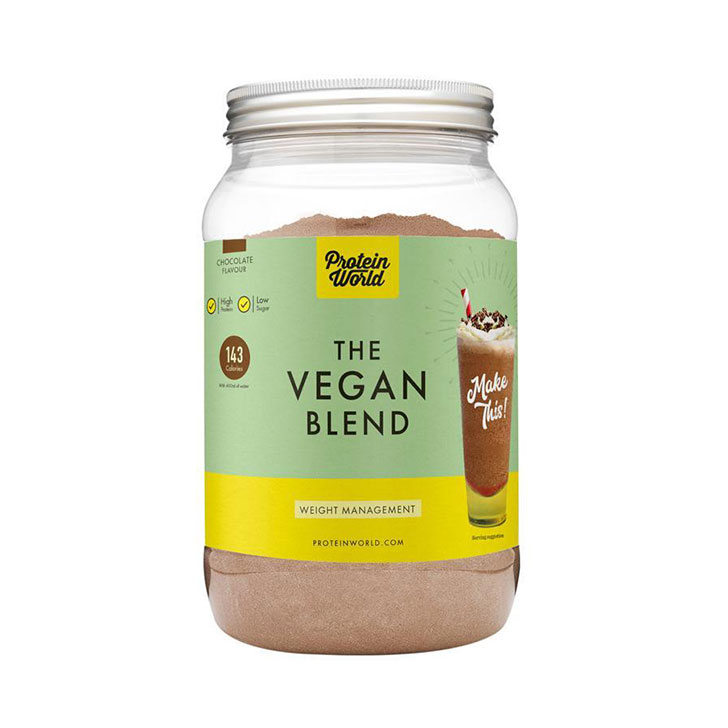
    Protein World Vegan Slender Blend Chocolate, $23.99

    bondi-protein-co-copy.jpg?auto=format&fit=fill&q=80&w=1280&nrs=40

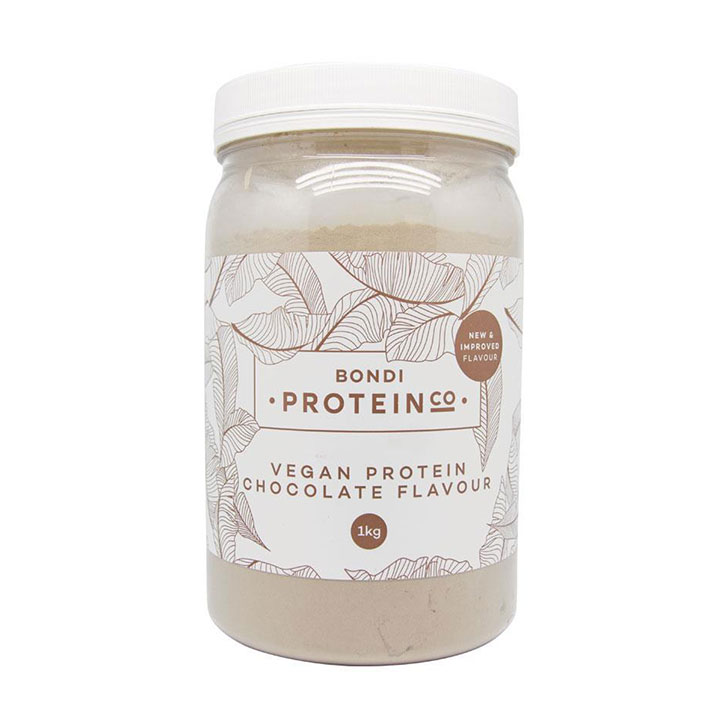
    Bondi Protein Co Vegan Chocolate, $29.99

    The post The Best Vegan Protein Powder to Add to Your Morning Smoothie appeared first on Lifehacker Australia .

    • chevron_right

      The Ultimate Beard Maintenance Guide for Men

      pubsub.dcentralisedmedia.com / LifehackerAustralia · Tuesday, 9 February, 2021 - 22:50 · 8 minutes

    Growing out a beard takes time and effort, but not nearly as much as maintaining it. Some folks seem to be able to sprout facial hair with ease while others struggle with the likes of patchiness or beard dandruff and ultimately give up before they’re able to proudly wear the facial fur of their dreams.

    If you’ve overcome those hurdles and you’ve got your facial growth happening at a pleasing pace, it’s time to consider what – and when – you should start working on to keep your new beard in the best possible shape. Here’s what you must do to keep your beard looking its best.

    One man’s rough beard is another man’s ideal beard

    Is there a single ideal beard shape and size that you should aspire to have? Absolutely not, and with that in mind, you do need to consider what kind of beard you actually want. There’s nothing wrong with a mega-trimmed style beard if that’s what floats your boat, but equally there’s nothing amiss with a full-on Wildman mountain beard either. A beard that looks amazing on one face might look terrible on another.

    It’s your face, your ability to grow and ultimately your choice, although your relationship status may also invite commentary and critiques from interested parties. One of the great things about beard ownership is that it’s also a facial state that can be fluid, because you can adjust your beard’s style and shape with carefully managed changes before you settle on a style… for now. Your summer beard doesn’t have to be your winter beard, and there’s a lot of scope for experimentation and fun. Just remember to clean up the sink when you’re done.

    Maintenance doesn’t have to take forever

    So what you must do to keep your beard in trim? We’ve heard from anti-hipsters on simplified beard routines and I once asked WWE’s Daniel Bryan for beard maintenance tips – for the record, he favours coconut oils – but once you’re happy with your style designs, it comes down to just a few simple tools.

    Dirty beards are the worst

    The very basis of beard maintenance involves keeping your beard hair clean and in the best possible condition. Remember that comment above about how there’s no real “wrong” beard style, because it is a matter of personal taste? The exception to that rule is a dirty beard. No, jokes about how you’re saving those toast crumbs “for later” aren’t funny. They’re just gross.

    The beard cleaning industry has loads and loads of different takes on the ideal shampoo, conditioner and treatment oils that you can apply to your beard to keep it not only clean but in fine condition. Seriously, check out the category on Amazon and you’ll see more than a few choices to pick from.

    The challenge here is finding an approach that works for you, and it’s far from a one-size-fits-all matter. Some blokes do just fine with regular shampoo and conditioner, while others swear by beard oils and butters and unguents of all kinds. Most beard oils are effectively conditioners that can help some beard wearers with a smoother beard, while beard balms are typically used to add a little volume and shape to your beard. It’s the one area where you will have to take a little time and have a little patience to find products that click with the chemistry and look of your personal beard.

    One general purpose tip here, however, is to be calm and gentle with your beard after you’ve washed it and you’re waiting for it to dry.

    Imagine your freshly washed beard is a friendly kitten. If you grab the kitten too roughly and thump it with a towel, it’s going to bite back and scratch you, and in beard terms this will take the form of split ends and an uneven and uncomfortable beard surface. Plus, it’s fun to imagine your beard as a tiny kitten, but don’t take it too far. On no account should you try to feed your beard tuna, for example.

    How to trim and shape your beard

    Left alone, most beards will grow to the point where you’re likely to be mistaken for folks who live in handmade wood cabins, write manifestos and consider pants optional because their beards are just that damned long in the first place. Again, if that’s your style, more power to you, although I probably don’t need to read your handwritten notes on the secret lizard conspiracy if that’s okay by you.

    You may want to consider a dedicated shaving mirror , and their magnification features can be handy for that close-up trimming work, although you don’t (or shouldn’t) go nuts looking for a fog-free option. While it’s tempting to trim your beard right after you’ve gotten out of the shower and you feel your beard is as clean as it’s going to be, a wet beard doesn’t shave or look the same as a dry beard. Unless your day job is frolicking in waterfalls, you’re going to spend more of your time with a dry beard, so you should trim it when dry, rather than when it’s wet.

    A good beard comb is the foundation of your maintenance routine, because you always want to start small. Preferably opt for a double sided comb with finer teeth for combing out your moustache, because it’s at the centre of your face. Getting your moustache trim wrong can do more to change the appearance of your beard and face than any other factor.

    You’ll also need some dedicated facial hair scissors . Yes, you can make do with anything that cuts, technically speaking, but a small and sharp and precise pair of scissors will let you more accurately shape your face the way you want to.

    Then you’ll need some kind of hair trimmer . Many full hair trimming kits include cutters quite suitable for beard trimming, so you don’t have to opt for a beard-specific model if you have other needs, although many of the beard-focused kits include smaller cutters that can make it easier to achieve specific styles.

    Even with the wide array of style choices, there are a few very simple maintenance routines that just about every beard wearer should be following when it’s time to manage their unruly facial hair:

    1. Start with the comb, and straighten out your beard hairs, including around the moustache. This will make it much easier to identify where you want to gently reduce, and where you’re going to need a more stringent cutback process.
    2. Then use the scissors to trim smaller areas and individual hairs that may warrant removal. For the cheek line, start high and work your way down your face, removing smaller areas of hair. What you don’t want to do here is over cut and remove a big ol’ chunk of your beard at the cheek, because that rarely looks anything but mangy.
    3. It’s generally a good idea to know how much shorter you really want your beard to be. But if you’re totally unsure, when it comes time to use the trimmer, start with a higher guard length to remove as little as possible. Remember, you can always trim more to achieve a look, but if you go too far all you can do is wait until you grow the hair back.
    4. Check what the guard lengths on your trimmer actually mean, because some may use metric while others stick to imperial measurements. Ultimately you’re looking for a trimmer length that makes you happy, but bear in mind if you change or update your trimmer, the numbers on the heads might not mean the same thing.
    5. Want to avoid the dreaded neckbeard? You probably do, and for that area you’re generally best off either using a razor or your unguarded trimmer to remove those lower neck areas that can sprout wild and crazy growths. However, what you want to do here is avoid going too high, because that can give your beard a really unnatural cut-off point. Typically, you’re looking for a smile shape a centimetre or two above your Adam’s Apple, curving up towards your ears, which you can easily form with your hand under your neck. Anything in front of your hand/towards your chin gets to stay, while anything under or behind is is where you want to eradicate hairs entirely.
    6. Take it slow. This is the single most important point. A good beard trim, like a good beard takes time to perfect, but if you rush you’re going to either miss hair you want gone, or more likely remove vital parts of your beard, leaving you with a patchy mess. The good news is you can always shave right down and start all over again – but even that will take time to do. It’s better to take your time and work slowly to achieve your beard goals than think you can get it all done in just a few minutes each morning.
    7. Don’t forget the skincare! If you’re wearing a light beard, moisturise and slap on sunscreen, because that smaller beard isn’t going to do much to prevent skin damage. Longer beard wearers can find this a trickier matter, but it’s worth persevering and also considering other shading options such as hats. Beards are awesome, but skin cancer totally isn’t.

    The post The Ultimate Beard Maintenance Guide for Men appeared first on Lifehacker Australia .

    • chevron_right

      Ease Yourself Back Into the Gym With a Home Setup

      pubsub.dcentralisedmedia.com / LifehackerAustralia · Monday, 8 February, 2021 - 23:00 · 6 minutes

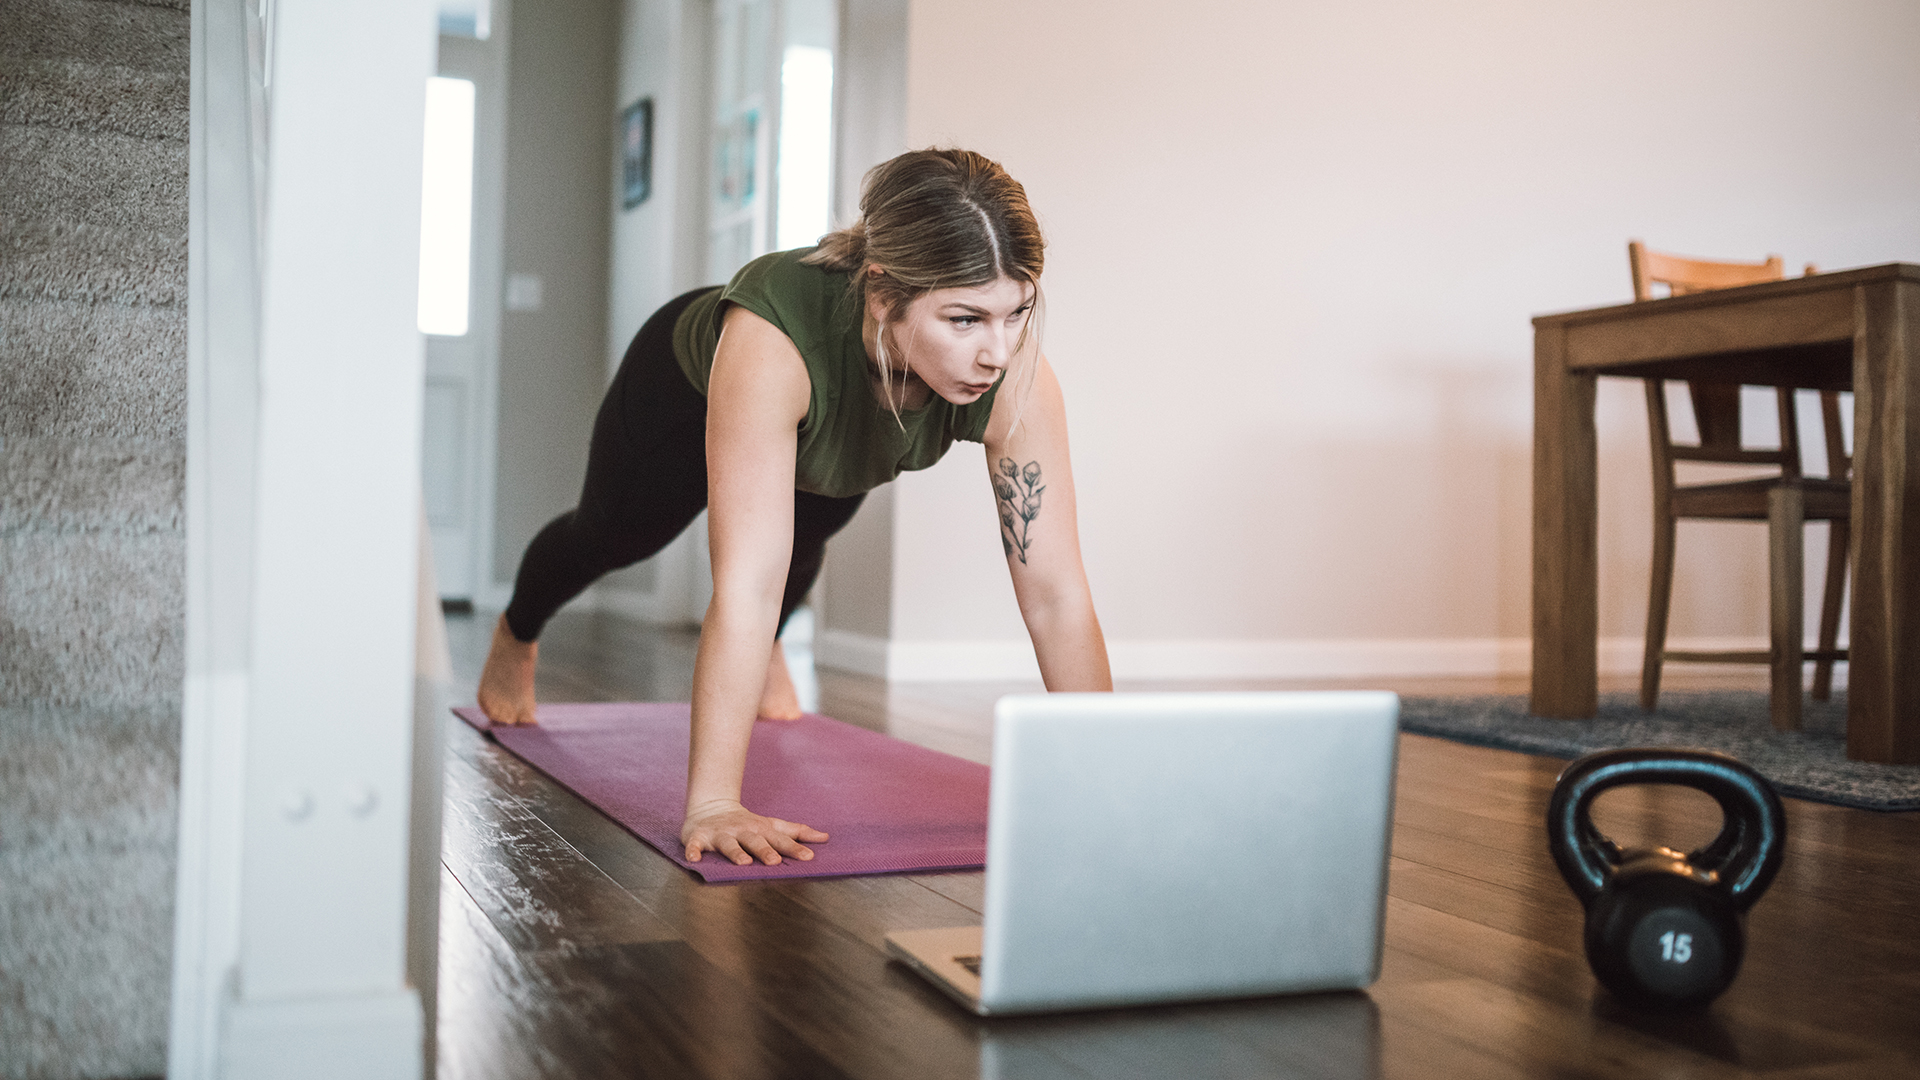
    Given the gym closures and changes, home workouts have been on the rise in a big way. We all know we should work out more, but going to the gym isn’t always practical for time or distance reasons. And while walking and/or jogging is basically free, it’s not always the most pleasant activity if it’s bucketing down rain outside. That’s where a home gym comes into its own.

    We’ve previously looked at how you can turn limited spaces into home gyms or alternatively how to transform your garage into a home workout zone , but once you’ve got your spacing decided, you then need to consider the equipment you’re going to install.

    Clearly, it’s going to differ a little depending on your fitness goals and workout types, as well as whether you’re going to be exercising exclusively in your home gym. If you only want an area to hit in-between your regular gym sessions, you’ll need less equipment, but remember you can also always start small and scale up. With a little work and moderate investment, it’s possible to wave goodbye to gym fees forever if you find a workout solution that gets you up and active at home.

    Things To Consider For Your Home Gym Setup:

    Budget: Sure, it sounds obvious, but the reality is you can spend just a little on making a home gym space, or a whole lot. It’s not an absolute correlation that you’ll get better results simply by spending hundreds or thousands of dollars on gym gear, but it’s equally not wise to skimp and buy items that will easily break, which can be either frustrating or in some cases dangerous. Working out how much you want to spend, and how much you can afford to spend is key. Remember that a home gym can expand over time so you don’t have to buy everything all at once. If you are dropping your gym membership in favour of home fitness, the easiest budget measure possible is to simply work out your yearly membership dues, and allocate that as your budget, because it’s money you were already going to spend on your fitness anyway.

    Space: You’re constrained by your living arrangements, but it’s best to try to make your home gym area as distraction-free as possible. It’s why the garage or spare room is ideal, because the easiest thing in the world is to ignore the gym gear in the corner – or just use it as an impromptu clothes rack – and watch some more Netflix, but that’s not going to get you fit, just fat. So what do you do if the only space open to you is a shared one? Get creative with how you create your isolation. A simple portable curtain frame (or a projection screen, or any large object) can block out an area so you’re not tempted to do anything but get physical.

    Sound: One of the big benefits of a home gym is that you are 100 per cent in control of your choice of exercise music, whether you prefer rapid-fire electronic beats, heavy guitar or the sheer annoyance factor of not being allowed to stop listening to Baby Shark until you’ve done 100 reps. Okay, maybe that last one is a tad excessive, but it’s worth considering your options when it comes to what you want to listen to while you sweat.

    If you’re after immersion, consider investing in a good pair of noise cancelling smaller Bluetooth headphones. I’d favour the Beats Powerbeats Pro (you can grab them on Amazon here ) but there’s plenty of choice in this category, including many built specifically with workouts in mind. Your other option here is to buy a good quality speaker or speaker setup; something like the Sonos One (which you can grab on Amazon here ) can put out a solid sound that will keep you moving, and with the right playlist ready to roll you’ll get better results from simple motivation.

    Basic Home Gym Equipment:

    Gym mats: You’ve got plenty of choice here, whether you want a simple yoga cool-down mat, a modular system that you clip together and pack away to save space or something in-between. It’s useful to have a defined safe area, and it can also help not only with your own workout, but with simple practical matters like reducing the sound your workout makes if you live in a shared household.

    Gym weights and bars: Again, you’ve got plenty of choice here, and much of it depends where you are in your fitness journey and what your goals are. Starting out small with a set of hand weights is fine if you’re chasing more of an aerobic goal, whereas folks who want a more bodybuilder-style approach will need to invest a little more in set weights and bars. Here’s our guide to gym bars if you’re confused about the choice there .

    Racks: You can spend a lot on a fancy high-end gym rack, but if you’re just starting out then a simpler and cheaper rack can be fine. Remember that the gym rack can be your gateway to a lot of alternative exercises, and it’s also a way that you can manage solo bench presses in a safer way too . Along with benches, good racks are usually items that people upgrade from, so it’s also worth considering the second-hand market if you want to save a few bucks.

    Bench: The bench is the other essential part of your fixed equipment, although “fixed” here is a bit of a misnomer. Better gym benches will allow for quick and easy adjustment, because the last thing you want in the middle of a home workout is to switch bench positions and have to fiddle with adjustment bolts when you should just be getting down to work. That being said, there’s nothing wrong with starting out with a simple flat bench, and that’s typically the cheapest way to begin your home gym journey.

    Jump Rope : One of the simplest (and most affordable) parts of a home gym is the jump rope. Even if you’re concentrating on muscle growth, you shouldn’t ignore the wide range of exercise options that a jump rope workout can offer you.

    What about dedicated workout machines?

    There’s nothing ostensibly wrong with including items like a treadmill or exercise bike into your home gym. However, these are higher cost items, and they’re generally best if that’s what you were already hitting the gym for in the first place.

    If hitting the treadmill while you catch up with podcasts or doing a few kilometres on an exercise bike while Netflix binging on your mobile was already in your exercise queue, then go for it! However, this is a category where equipment does wear out and it can be harder to sell it later if you outgrow its capabilities as a result.

    The post Ease Yourself Back Into the Gym With a Home Setup appeared first on Lifehacker Australia .