• chevron_right

      Attempts at reading data from MQ-2 gas sensor (2)

      pubsub.slavino.sk / onetransistor · Friday, 30 December, 2022 - 21:16 edit

    MQ-2 is a gas leakage detecting sensor with good sensitivity to a wide range of gases. Since you can get most MQ sensor on ready-made modules, people are interfacing those with development boards. However, the modules are far from perfect. Some of the sensors require variable heater voltages. This is not the case for MQ-2. Since I own a module with this sensor and it can probably be used as is, I decided to make some tests while I'm waiting a PCB for MQ-9 to be manufactured and shipped.

    In the previous post I explained why modules with MQ-7 and MQ-9 are no good. Now, I'm about to discover the same for MQ-2. I thought I could use the module as is, since I am more interested in finding a method of computing useful data from the analog output of the sensor. With an Arduino compatible board and an MQ-2 module I will attempt to get ppm values. But not before some parts swapping.
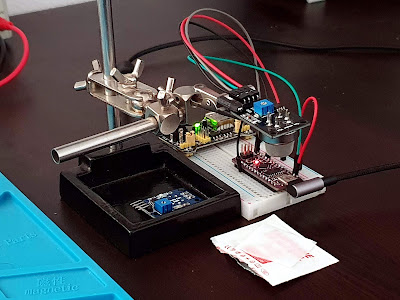
    MQ-2 test fixture, with sensor exposed to alcohol
    MQ-2 test fixture, with sensor exposed to alcohol

    Read more

    Značky: #Elektro, #Gas, #Sensor, #Electronics, #MQ-2, #Arduino

    • chevron_right

      Useless sensor modules based on MQ-7 and MQ-9 (1)

      pubsub.slavino.sk / onetransistor · Sunday, 11 December, 2022 - 16:51 edit · 1 minute

    When shopping for electronics parts and modules, I oftentimes add to cart things I didn't plan to buy, since most suppliers offer free shipping when total order amount is above a threshold. This was the case with a module I bought recently, a carbon monoxide and LPG detector based on MQ-9 sensor. When I got the time to build a breadboard circuit to test it, I came across a problem. As with most modules and devices, I started with MQ-9 datasheet. And at first I did not quite understand what they were saying about high and low heater voltage.

    And the internet is full of examples regarding such modules interfaced to Arduino. And everybody seems to be powering it from 5 V, while some even developed code with advanced calculations to get real ppm value from the sensor. Throughout reading of the datasheets of both MQ-7 and MQ-9 reveals a "detail" everybody seems to have missed. In this post I will show you the correct way of using MQ carbon monoxide sensors. Keep in mind that CO and LPG are dangerous gases and if you need a detector, you should always buy a professionally manufactured one which is also properly calibrated.

    Useless sensor modules based on MQ-7 and MQ-9
    MQ-9 ready for testing

    Read more

    Značky: #Elektro, #MQ-9, #Sensor, #Gas, #Electronics, #Arduino

    • chevron_right

      Researchers build a working camera out of atomically thin semiconductors

      news.movim.eu / ArsTechnica · Friday, 18 November, 2022 - 20:51 · 1 minute

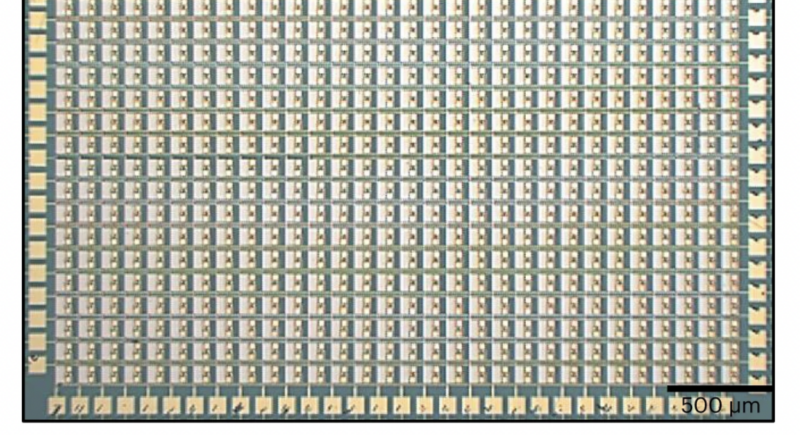
    Each one of the silvery squares includes a small sheet of an atomically thin material.

    Enlarge / Each one of the silvery squares includes a small sheet of an atomically thin material. (credit: Dodda, et. al. )

    Since the isolation of graphene, we've identified a number of materials that form atomically thin sheets. Like graphene, some of these sheets are made of a single element; others form from chemicals where the atomic bonds naturally create a sheet-like structure. Many of these materials have distinct properties. While graphene is an excellent conductor of electricity, a number of others are semiconductors. And it's possible to tune their properties further based on how you arrange the layers of a multi-sheet stack.

    Given all those options, it shouldn't surprise anyone that researchers have figured out how to make electronics out of these materials, including flash memory and the smallest transistors ever made, by some measures. Most of these, however, are demonstrations of the ability to make the hardware—they're not integrated into a useful device. But a team of researchers has now demonstrated that it's possible to go beyond simple demonstrations by building a 900-pixel imaging sensor using an atomically thin material.

    Making pictures

    Most image sensors currently consist of standard silicon semiconductors, manufactured using the usual complementary metal–oxide semiconductor (CMOS) processes. But it's possible to replace the silicon with another semiconductor. In this case, the researchers used molybdenum disulfide, an atomically thin material that has seen a lot of use in experimental devices.

    Read 8 remaining paragraphs | Comments

    • chevron_right

      Turnkey PCB Assembly by PCBGOGO - 2022 Q3

      pubsub.slavino.sk / onetransistor · Sunday, 31 July, 2022 - 14:08 edit

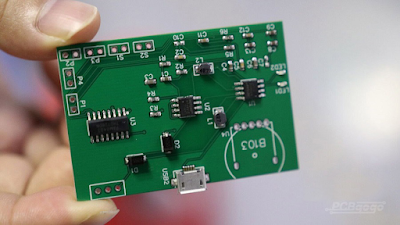
    Modern electronic devices can only work properly if the printed circuit boards (PCBs) they are built on are reliably manufactured with high precision. PCBGOGO manufactures the best PCBs and they can meet specific client needs. It is one of the world's leading PCB manufacturers, with a production line that can provide both precision and reliability. PCBGOGO provides turnkey assembly for their customers so you can use the PCB as soon as it is delivered to you. They provide quick, professional, and reliable turnkey PCB assembly.

    Turnkey PCB Assembly by PCBGOGO - 2022 Q3

    Read more

    Značky: #PCB, #PCBgogo, #Elektro, #Electronics

    • chevron_right

      Motion Sensitive Temperature Display

      pubsub.slavino.sk / warlord0blog · Saturday, 23 July, 2022 - 11:13 edit

    Following on from Python Motion Sensor I put to get a 2004 LCD display, DHT11 humidity and temperature sensor and the AM312 PIR and came up with a display that is triggered when motion is detected. To get things going, I needed to install the RPiI2C_Driver and Adafruit_DHT library and this is the result. I &ellipsisRead the full post »

    Značky: #Linux, #electronics, #python

    • chevron_right

      Python Motion Sensor

      pubsub.slavino.sk / warlord0blog · Thursday, 21 July, 2022 - 09:21 edit

    I wanted to add a motion sensor into a Python project that would activate a display to show the temperature only when someone was nearby. The AM312/HC-SR312 is a cheap, tiny passive infrared sensor that trips for 3 seconds when motion/heat is detected. It only has three wires, VIN, OUT, and GND. The VIN is &ellipsisRead the full post »

    Značky: #python, #electronics, #Linux

    • chevron_right

      Python: Basic Electronics Control with the Raspberry Pi

      GadgeteerZA · news.movim.eu / gadgeteerza-tech-blog · Saturday, 7 May, 2022 - 13:10 · 1 minute

    The Raspberry Pi device, beyond just being a low-cost introductory computing tool, also provides a robust electronic controller interface that enables programmatic control of external electronic systems. These systems can be as simple as turning on or off an LED, or as complex as being able to control a robotic arm or other, more elaborate, electronic devices. This Python and embedded programming tutorial will show the reader how to use Raspberry Pi-specific Python libraries to control basic electronic components. Many similar Python tutorials presume extensive knowledge in the use of such components, but this article will not make that presumption. Instead, programmers will be shown a “gentle” introduction into the electronics concepts needed to get this project going, in the hopes that this foundation will encourage the reader to do more experimentation beyond the simple experiment to be presented within this two part programming series.

    This article, and the second part of it (follow link from bottom of page in first article), presumes that the reader has a basic understanding of how to navigate the Raspberry Pi OS – namely, how to log in, open a terminal window, and how to use a text editor. It also presumes a basic understanding of the Python programming language and concepts.

    See https://www.developer.com/languages/python-raspberry-pi-controls/

    #technology #raspberrypi #relays #electronics #python

    • chevron_right

      High power versatile MQTT switch: hardware

      pubsub.slavino.sk / onetransistor · Sunday, 10 April, 2022 - 10:40 edit · 1 minute

    I wanted to automate an irrigation pump, to be able to turn it on and off remotely and set a power-on time limit. I looked for a ready-made solution and I found some products. But none fit my needs. There are mains powered ESP8266 boards with one or more relays, but those relays are common 10A type. After some searching on AliExpress, I found an ESP8266 module with 30A relay, but this one was missing a mains adapter and required DC low voltage supply. This one could have been my choice. After all I only had to get a power supply.

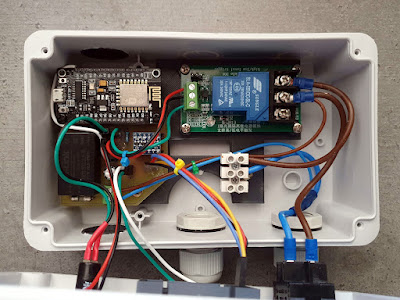
    Later, I decided to add a small display to my device so, I ended up making my own PCB. A NodeMcu board is the controller of this device. I added a 30A relay module and used a Hi-Link PCB power supply module to deliver required 5 V. The display is a 4-digit 7-segment TM1637 module which came with another challenge. It is a 5 V device that needs to be controlled by a 3.3 V MCU. I added a level shifter module and designed a PCB to fit all of them (except relay module which has its own PCB).

    Electronics for the MQTT switch mounted in a plastic box
    Electronics for the MQTT switch mounted in a plastic box

    Read more

    Značky: #ESP8266, #3D-Print, #Elektro, #MQTT, #Electronics

    • chevron_right

      Progress indicator with addressable pixel ring

      pubsub.slavino.sk / onetransistor · Thursday, 18 November, 2021 - 19:34 edit

    Individually addressable pixel rings are WS2812 based RGB LED strips also known as NeoPixel strips. When interfaced with a microcontroller this strip can display any different RGB color on every LED it contains. They are versatile and can be used in a lot of projects. I bought a 24-LED LED ring which I originally intended to use to build a clock but until then I noticed it could make a nice progress indicator.

    In the middle of the LED ring, I added a simple 4-digit 7-segment LED display with TM1637 controller. I opted for red display, yet you may use whatever color you like. Both display and LED ring, together with a buzzer are glued on a disc shaped piece of plastic. I could have 3D printed a better stand, yet the plastic disc does the job.

    Progress indicator with addressable pixel ring

    Read more

    Značky: #LEDs, #WS2812, #Electronics, #Arduino, #Elektro