• chevron_right

      High power versatile MQTT timer relay: software

      pubsub.slavino.sk / onetransistor · Sunday, 17 April, 2022 - 13:46 edit · 1 minute

    In the previous post I built an ESP8266 controlled 30A relay to automate an irrigation pump. I added a time display to this device because I want to have timer function, to set the pump on for a specified amount of time. I will not be using a web server to control the relay because I want to be able to switch it on from outside of the local network and it is difficult to obtain a properly secured HTTP server on ESP8266. I already did it , but this MCU has limited resources for such purpose.

    Since I run a self-hosted MQTT broker on an Orange Pi Zero SBC I will make use of the MQTT capabilities. Orange Pi has a capable CPU for proper SSL encryption and I already made the server secure with self signed SSL certificate. ESP8266 can connect to the server in the local network on the unsecured listener port and that is not an issue since I have control over the devices my local network. Even so, WiFi is password protected. And ESP8266 uses credentials to connect to MQTT broker.
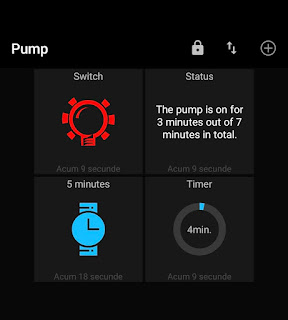
    MQTT relay controls in MQTT Dash app
    MQTT relay controls in MQTT Dash app

    Read more

    Značky: #Elektro, #Relay, #ESP8266, #ESP32, #MQTT

    • chevron_right

      High power versatile MQTT switch: hardware

      pubsub.slavino.sk / onetransistor · Sunday, 10 April, 2022 - 10:40 edit · 1 minute

    I wanted to automate an irrigation pump, to be able to turn it on and off remotely and set a power-on time limit. I looked for a ready-made solution and I found some products. But none fit my needs. There are mains powered ESP8266 boards with one or more relays, but those relays are common 10A type. After some searching on AliExpress, I found an ESP8266 module with 30A relay, but this one was missing a mains adapter and required DC low voltage supply. This one could have been my choice. After all I only had to get a power supply.

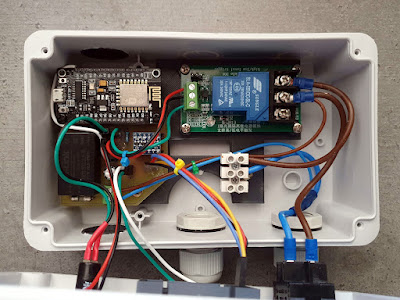
    Later, I decided to add a small display to my device so, I ended up making my own PCB. A NodeMcu board is the controller of this device. I added a 30A relay module and used a Hi-Link PCB power supply module to deliver required 5 V. The display is a 4-digit 7-segment TM1637 module which came with another challenge. It is a 5 V device that needs to be controlled by a 3.3 V MCU. I added a level shifter module and designed a PCB to fit all of them (except relay module which has its own PCB).

    Electronics for the MQTT switch mounted in a plastic box
    Electronics for the MQTT switch mounted in a plastic box

    Read more

    Značky: #ESP8266, #3D-Print, #Elektro, #MQTT, #Electronics

    • chevron_right

      WiFi Analyzer with ESP8266 and ILI9341 LCD

      Cornelius (noreply@blogger.com) · pubsub.slavino.sk / onetransistor · Sunday, 12 April, 2020 - 19:26 edit

    This WiFi analyzer can help you identify all wireless access points (AP) in your area, providing you with detailed information about each of them. You can identify potentially unused channels and find the best place to install your router. You can use any smartphone for this task since there are a lot of apps that will scan for WiFi networks. However, I did this with NodeMcu, an ESP8266 development board.

    ESP8266 has some advantages over my Android phone: it scans faster and it finds more access points. The phone comes with the advantage of 5 GHz band support, yet for the simple task of scanning WiFi, the analyzer app needs permission to access location of the device. Building an analyzer with ESP8266 requires a way of showing the information. I used a 2.8” color LCD display, with 240x320 pixels, based on ILI9341.

    WiFi Analyzer with ESP8266 and ILI9341 LCD

    Read more

    Značky: #Arduino, #Electronics, #ESP8266, #LCD, #Elektro

    • chevron_right

      DHT22 sensor web server on ESP8266

      Cornelius (noreply@blogger.com) · pubsub.slavino.sk / onetransistor · Sunday, 29 December, 2019 - 14:28 edit

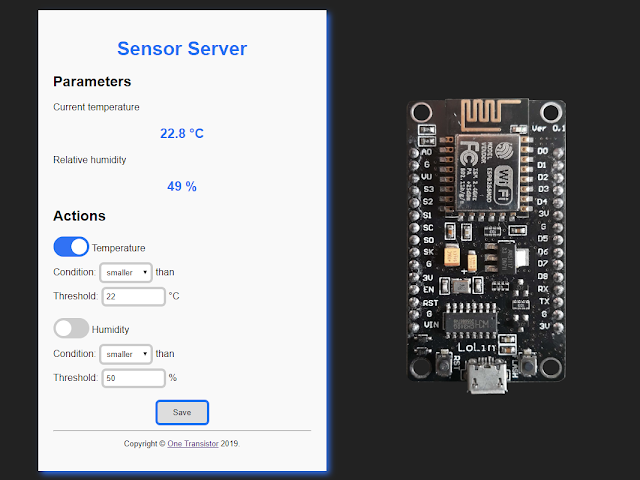
    There are plenty of projects using digital temperature and humidity sensors such as DHT11 or DHT22 and various development boards. I'll try to make this one a bit different. A common thing that I didn't like about projects using sensors and web servers is the way most users choose to update sensor data. The easiest way is to use a refresh meta tag in the HTML of the web page.

    I don't like this. Asking the browser to refresh the document means to request it again from the server and render it on the client's device. I'll use in this article Javascript code which will request a new sensor reading from the server running on the development board and update the specific HTML element. As additional features, I'll add some user-selectable actions when readings reach a threshold.

    DHT22 sensor web server on ESP8266

    Read more

    Značky: #DHT11, #DHT22, #Electronics, #ESP8266, #IoT, #Elektro

    • chevron_right

      Upload files from Arduino IDE to ESP SPIFFS

      Cornelius (noreply@blogger.com) · pubsub.slavino.sk / onetransistor · Saturday, 7 December, 2019 - 16:32 edit

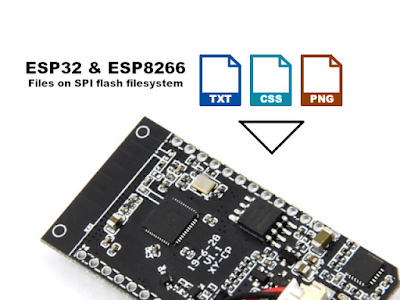
    ESP8266 and ESP32 development boards have SPI flash memory used mainly for program storage. But, if there is enough space, the flash memory can be "partitioned" and used for other purposes. Making a SPIFFS (SPI Flash Filesystem) partition has some advantages. Even though file system is stored on the same flash chip as the program, programming new sketch will not modify file system contents. Since ESP development boards have WiFi connectivity it's easy to think of something useful to do with SPIFFS. For example a web server can store images, scripts, styles and even HTML files that will be used to create the web interface. Another usage would be to create a data log that can be downloaded via a web interface.

    Obviously SPIFFS data can be read/written from other interfaces, including serial monitor. If you're developing a web server on ESP8266/ESP32 you'll want an easy way to upload server files to SPIFFS. Fortunately, there are plugins for Arduino IDE that handle this process. We will see how to do this and then check for the existence of files on the SPIFFS partition.

    Upload files from Arduino IDE to ESP SPIFFS

    Read more

    Značky: #Arduino, #ESP32, #ESP8266, #Software, #Elektro

    • chevron_right

      Build and install NodeMcu firmware on ESP8266 boards

      Cornelius (noreply@blogger.com) · pubsub.slavino.sk / onetransistor · Friday, 8 November, 2019 - 21:01 edit

    I got some ESP8266 NodeMcu boards that came with pre-installed firmware. Yet, the first thing I did was to upload the Arduino blink sketch on them using ESP8266 development kit for Arduino. Obviously, this has overwritten the default firmware. Now, I want to try NodeMcu as well. I discovered there is more than a binary that you have to flash to the development boards. In fact, you have to build this by yourself, depending on your needs. I'll overview in this post the available options for building and flashing the firmware using Linux and Windows computers.

    NodeMCU is an open-source Lua based firmware for the ESP8266 WiFi SoC from Espressif and uses an on-module flash-based SPIFFS file system. NodeMCU is implemented in C and is now community-supported and compatible with any ESP module. The NodeMCU programming model is similar to that of Node.js, only in Lua. It is asynchronous and event-driven. Many functions, therefore, have parameters for callback functions.

    Build and install NodeMcu firmware on ESP8266 boards

    Read more

    Značky: #Development, #Electronics, #ESP8266, #NodeMcu, #Elektro