• chevron_right

      Découverte du AK1PLUS – Le Mini PC Intel Alder Lake-N95 de NiPoGi

      news.movim.eu / Korben · Sunday, 8 October, 2023 - 14:35 · 5 minutes

    Si vous me lisez depuis longtemps, vous savez que je parle très peu matos sur ce site, car je suis du genre à garder mon matériel longtemps. Mais là, j’avais besoin d’un petit PC récent pour faire mes tests sous Windows et Linux.

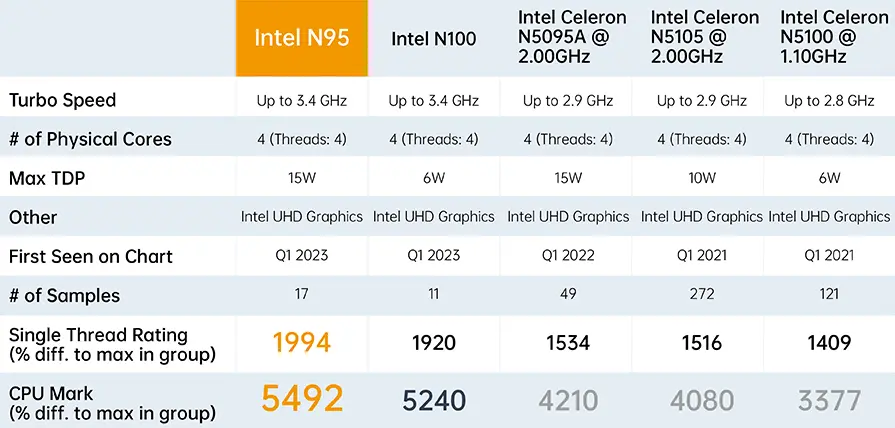
    Pas besoin d’une grosse machine de gamer, ni d’un truc cher, donc je suis parti lurker un peu du côté des Mini PC. Et je suis tombé ce MiniPC AK1PLUS de la marque NiPoGi équipé d’un processeur Alder Lake-N95 (jusqu’à 3,4 GHz), de 16 Go de DDR4 ainsi que d’un SSD M.2 NVMe de 1 TB. Il peut également accueillir 2 écrans 4K et intègre tout le confort moderne en matière de connectivité USB, Ethernet, Wifi et Bluetooth.

    Alors oui, je sais que le Alder Lake-N95 c’est vu comme le fond du panier de chez Intel, mais vu que ça ne consomme pas grand-chose et que j’ai pas prévu de faire du gaming dessus (mis à part du Xbox Cloud), je n’en ai rien à faire. Moi j’ai juste besoin d’un truc qui ne prend pas de place, et sur lequel je pourrais faire un dual boot Windows / Linux pour bidouiller.

    De base, je trouve que ce AK1PLUS est plutôt cher vu le peu de matos qu’il y a dedans (439 euros au catalogue).

    Mais j’avais déjà pris un PC de chez eux et j’en suis content.

    Mais hors de question de l’acheter à ce prix là… Toutefois, ce qui m’a vraiment décidé c’est le bon de réduction de 210 € proposé sur Amazon qui fait qu’au final, je l’ai payé 229 euros. Je trouve que c’est son juste prix, surtout qu’à config équivalente, c’est le moins cher rapport à ses concurrents.

    Bref, pour une fois, je me suis dit que ce serait sympa de vous le présenter en détail sachant que ça fait bien longtemps que je n’avais pas testé un PC ici.

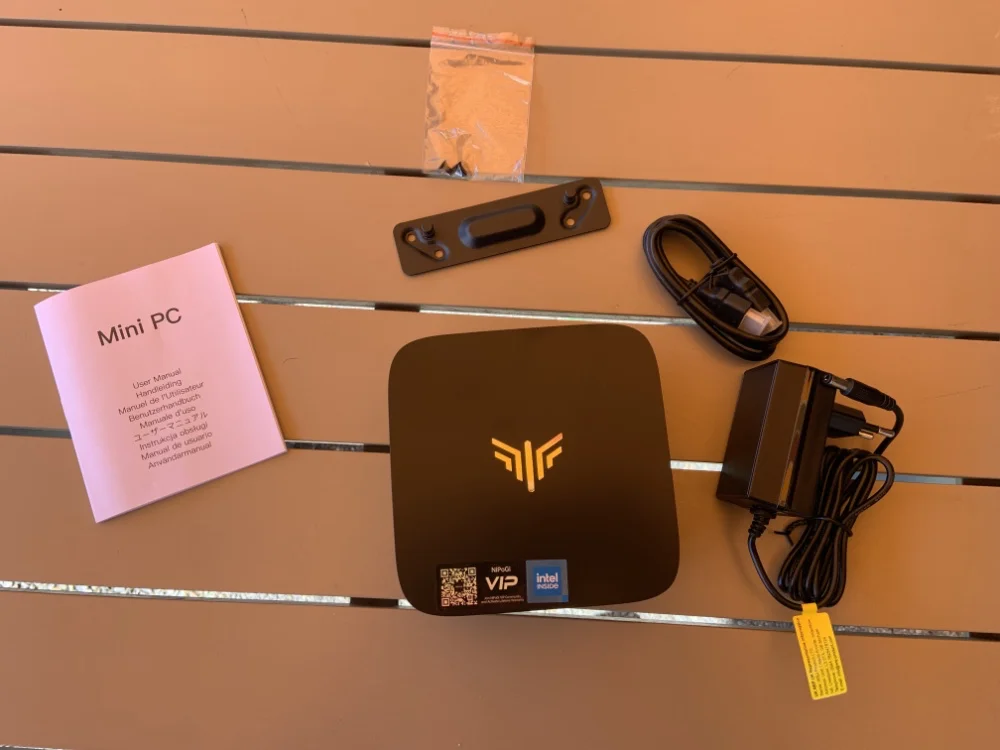
    Dans la toute petite boite, vous trouverez un manuel d’utilisation qui ne sert à rien, un support VESA pour le fixer au mur, derrière un écran ou encore sous un bureau ainsi qu’une alimentation et un câble HDMI.

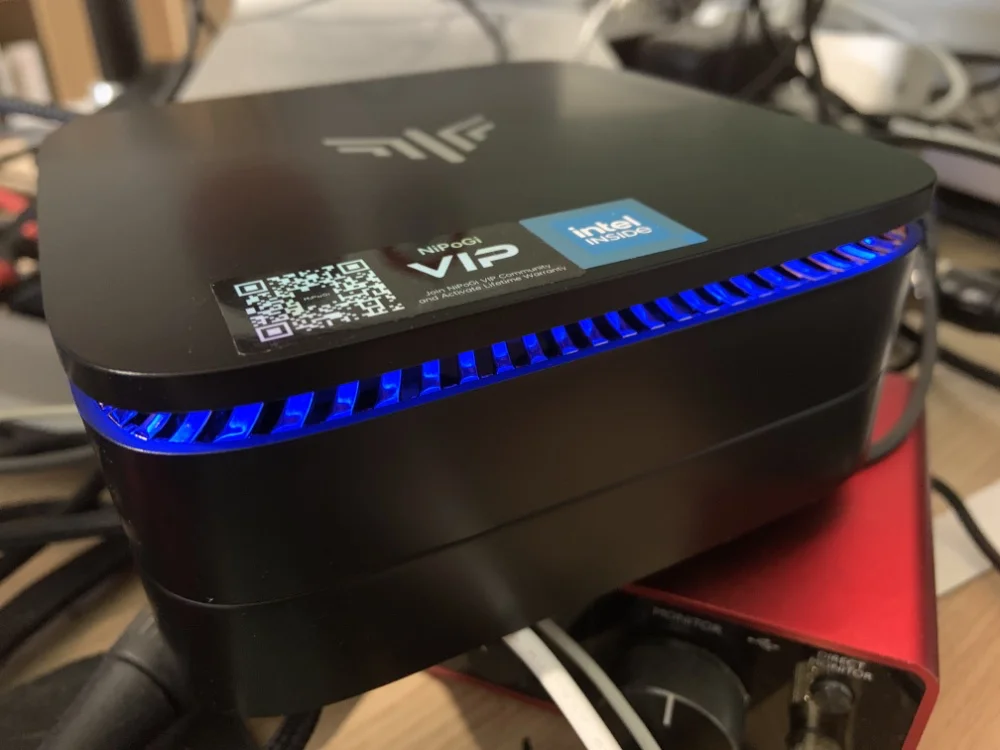
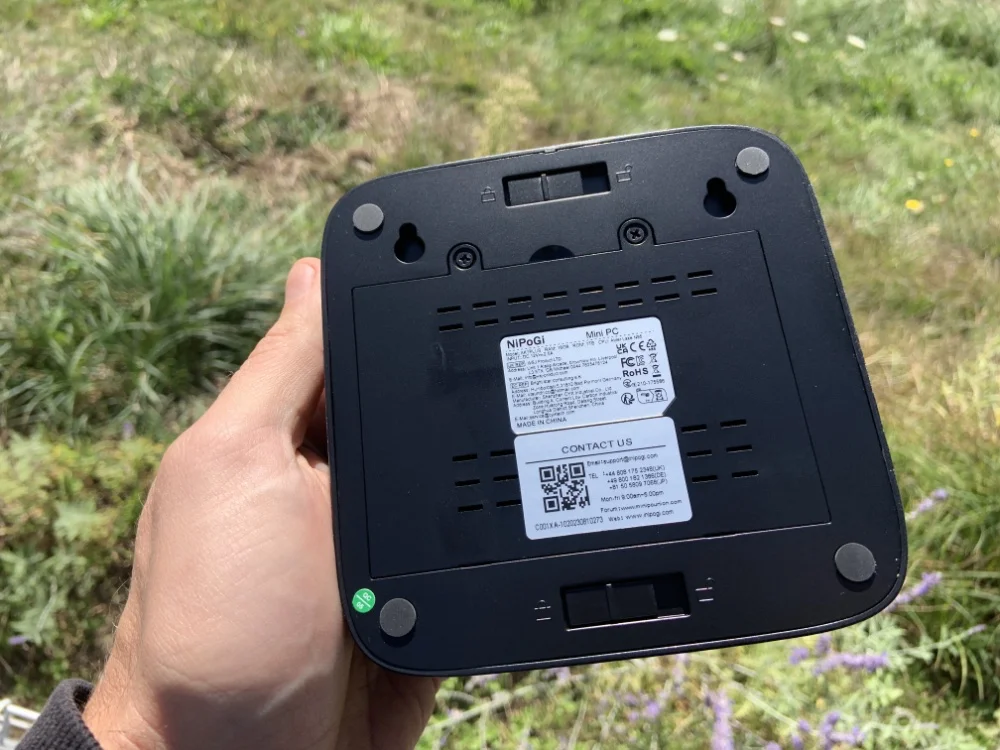
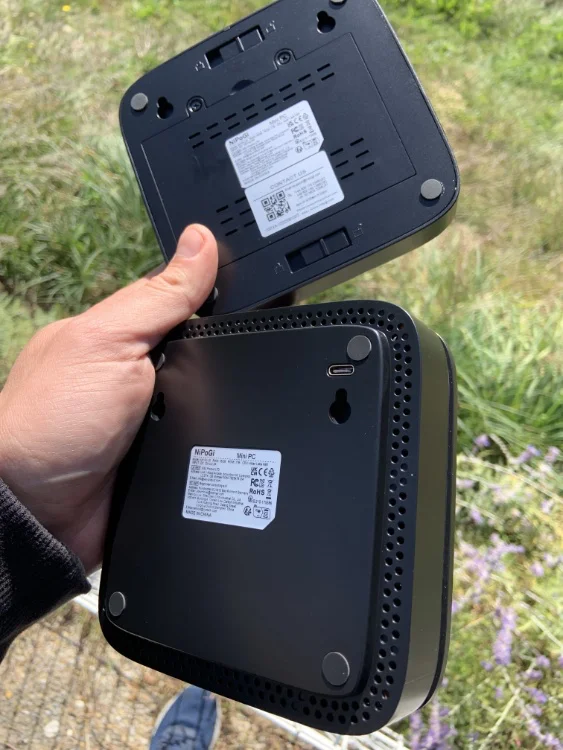
    Au niveau du look de la bête, rien de spécial… C’est une petite boite noire d’environ 13 cm de côté sur 5 cm de haut avec un peu de LEDs bleues qui s’allument quand il fonctionne (ça peut se débrancher facilement si vous ne voulez pas que ça éclaire chez vous). Bref, c’est tout petit, parfait pour les amateurs de minimalisme, car ça peut même se planquer derrière un écran ou dans un tiroir.

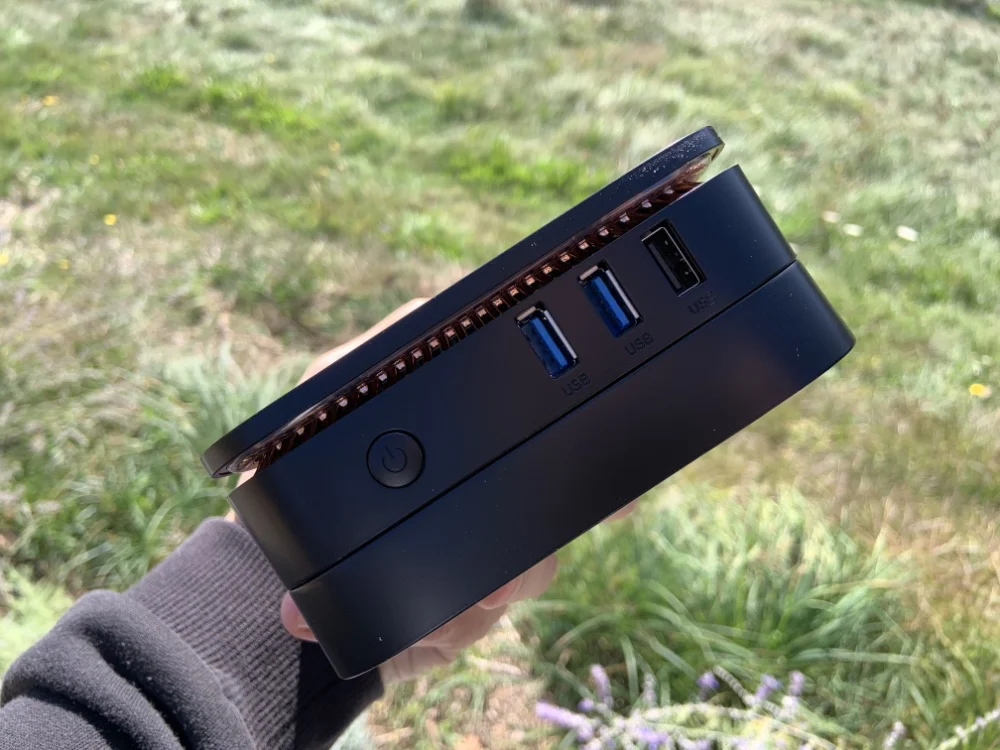
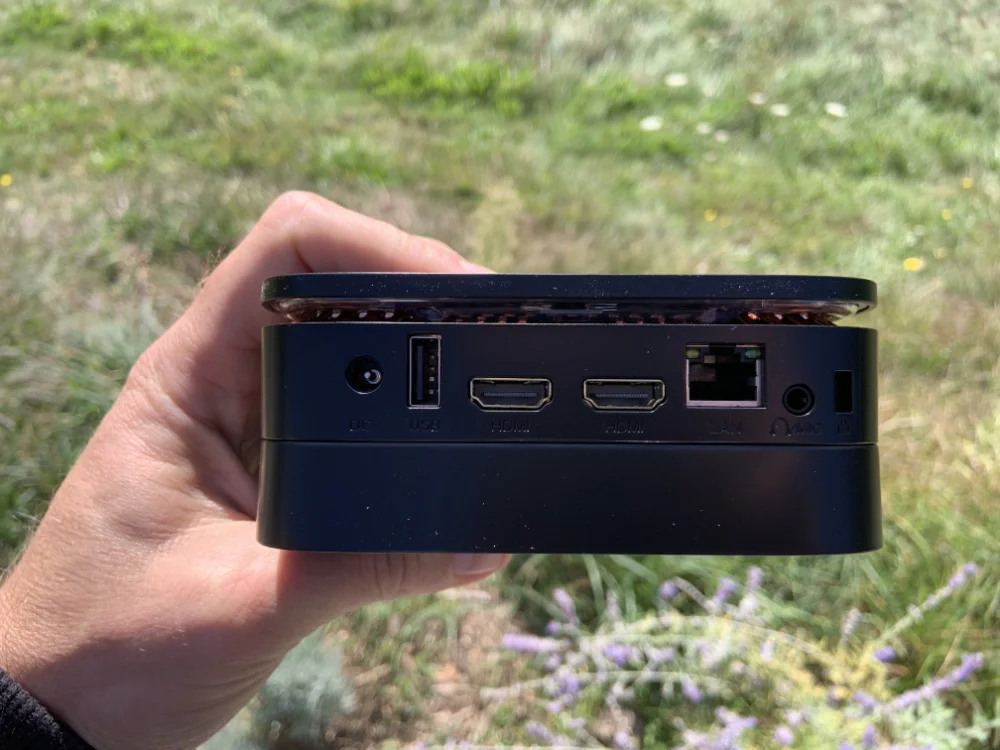
    Niveau connectivité, y’a un port USB et le bouton d’allumage sur le côté droit afin que ce soit accessible et le reste de la connectique se trouve à l’arrière. Soit au total 4 ports USB, 2 HDMI, 1 Ethernet et une prise casque.

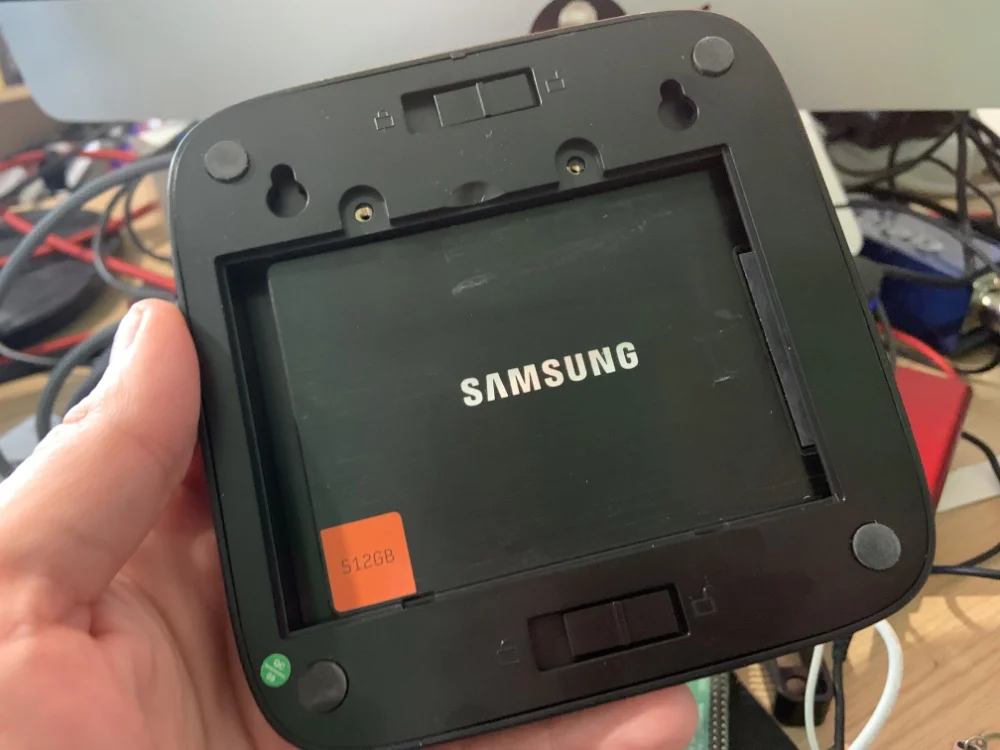
    Un truc que j’avais pas capté en achetant ce truc, c’est qu’il dispose d’un socle amovible dans lequel on peut rajouter un SSD. Donc ça fait une bonne extension en matière d’espace disque pour ceux qui ont besoin de place, par exemple si vous voulez vous en faire un média center. Pour ma part, je l’ai retiré pour le moment.

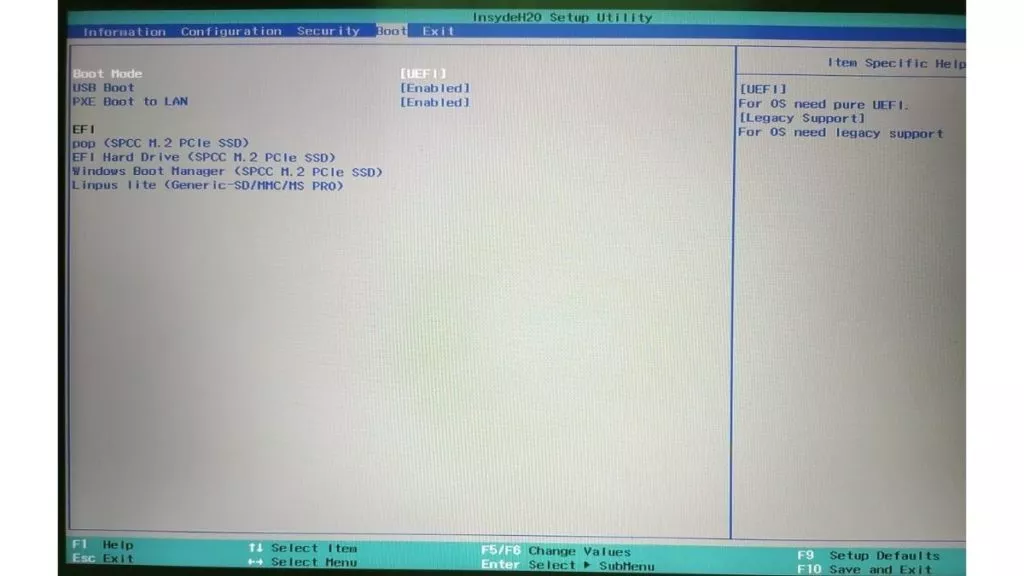
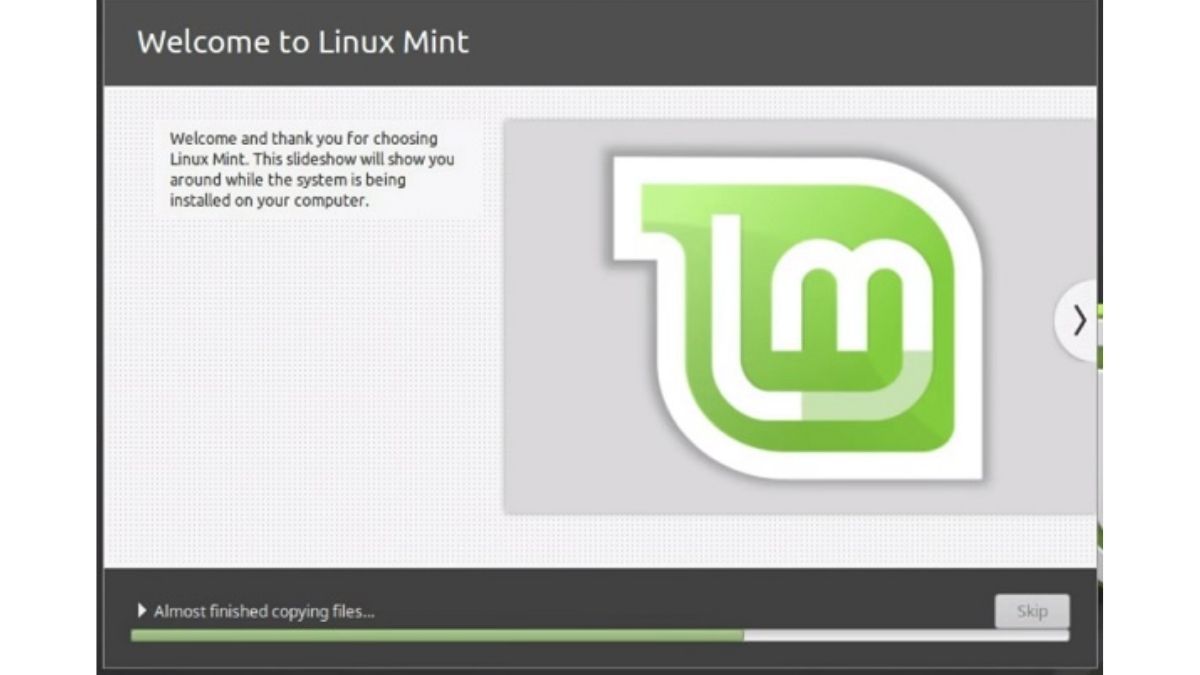
    Ensuite au niveau de l’install de l’OS, rien à dire de spécial si ce n’est que c’est livré avec un Windows 11 Pro.

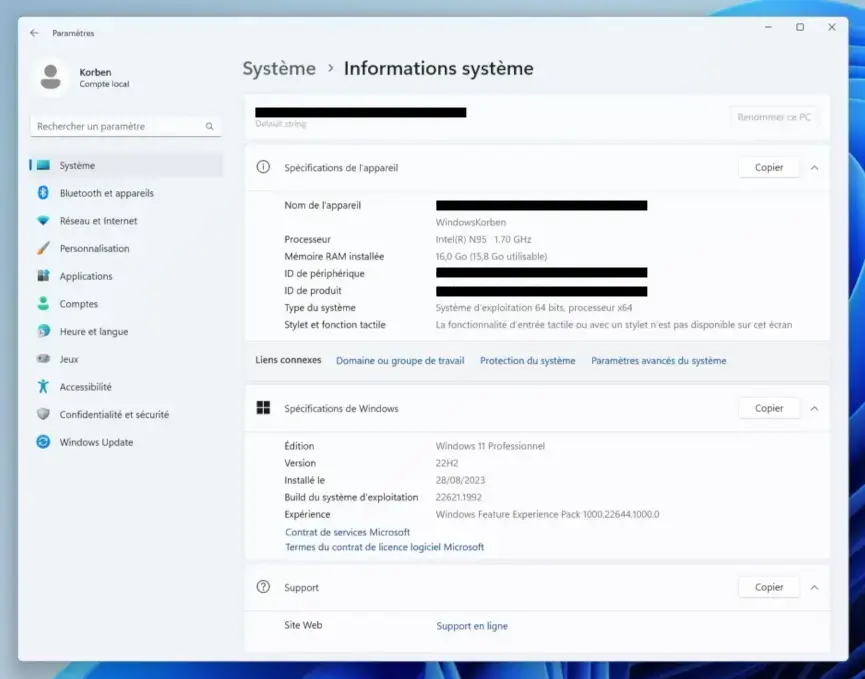
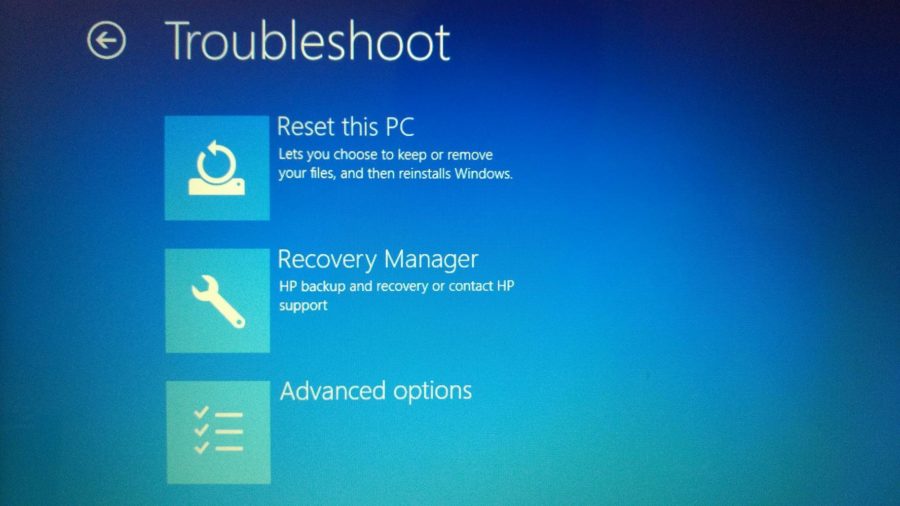
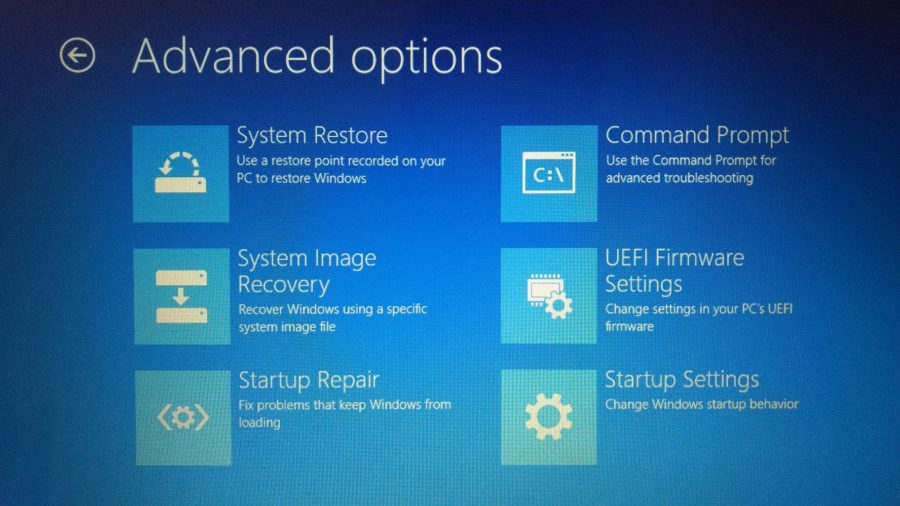
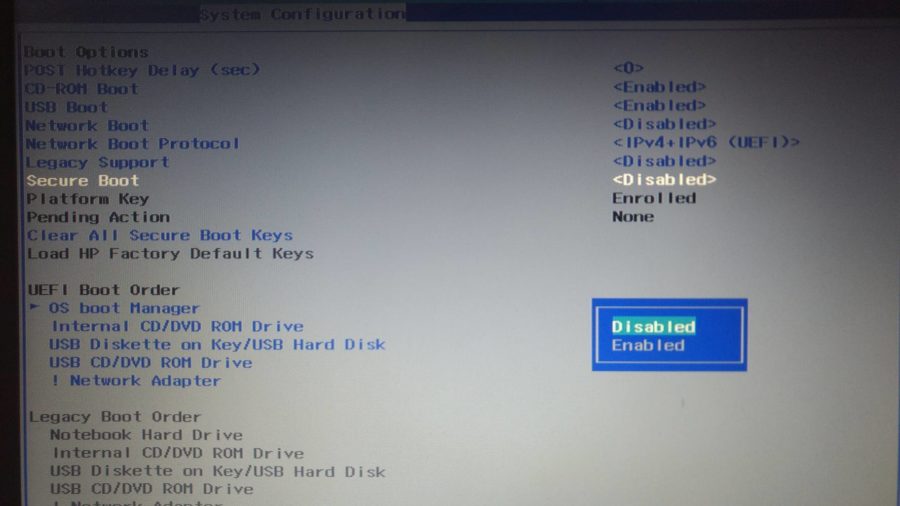
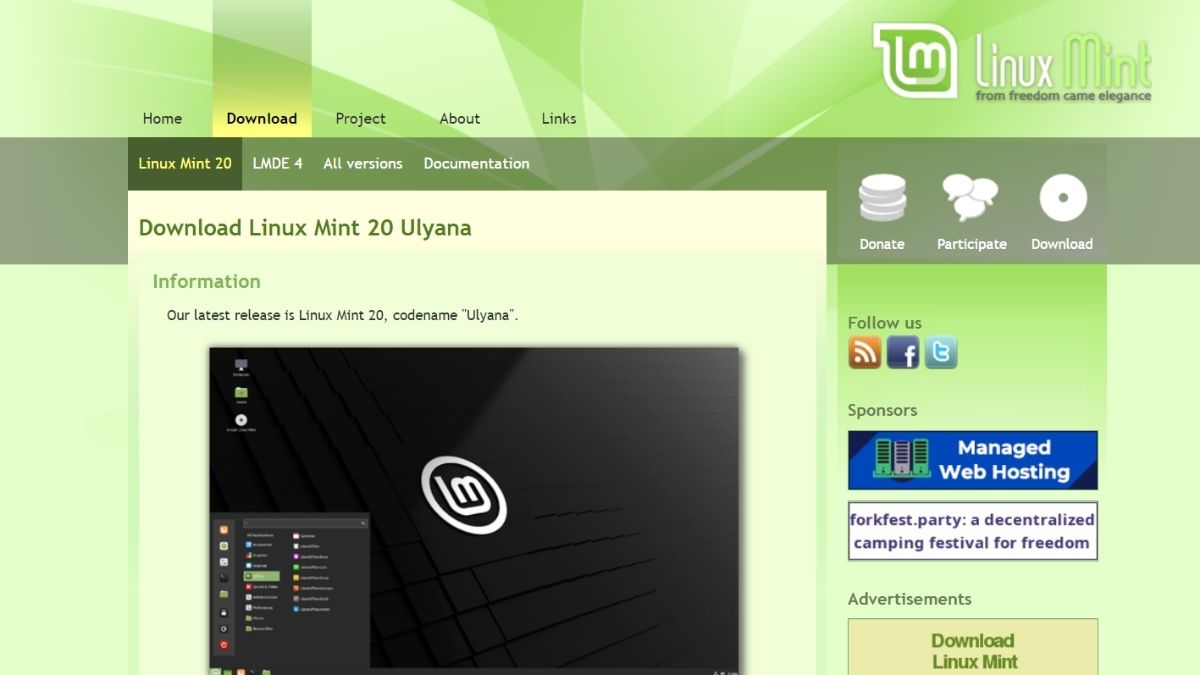
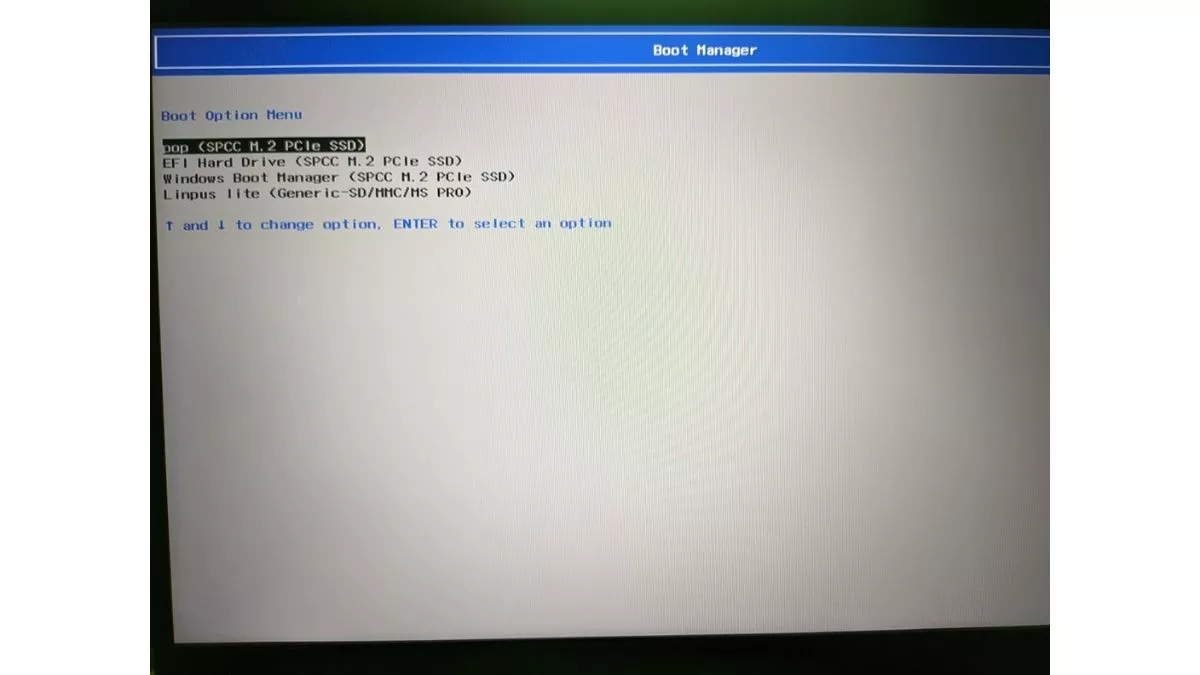
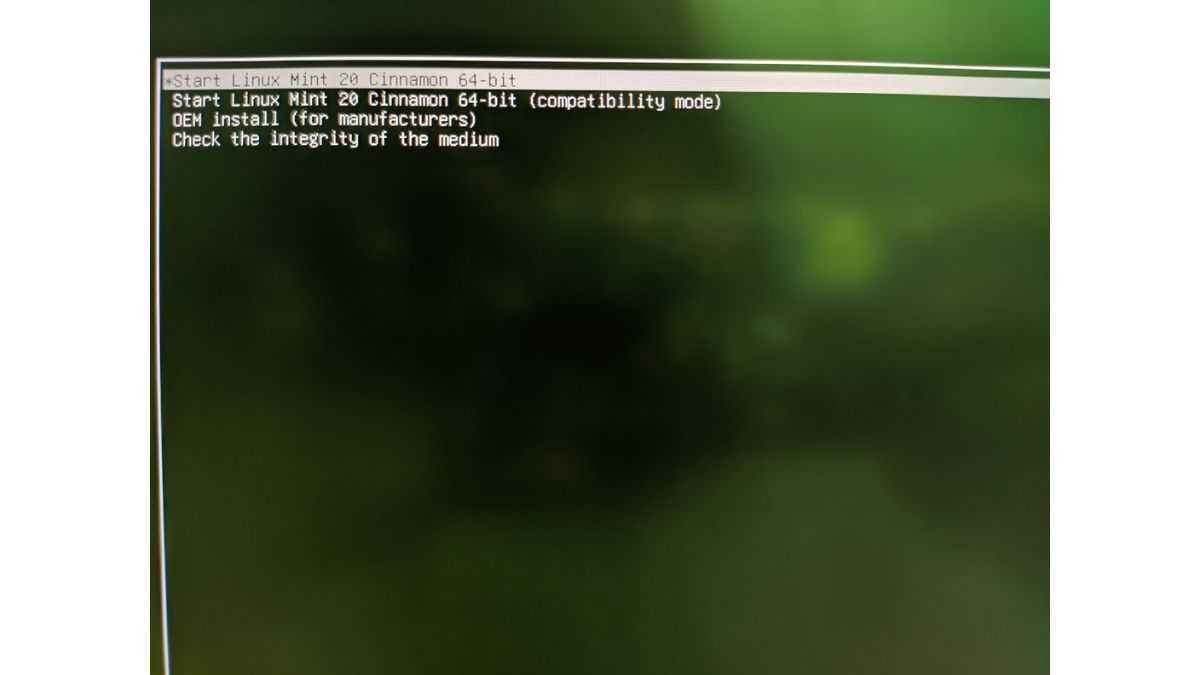
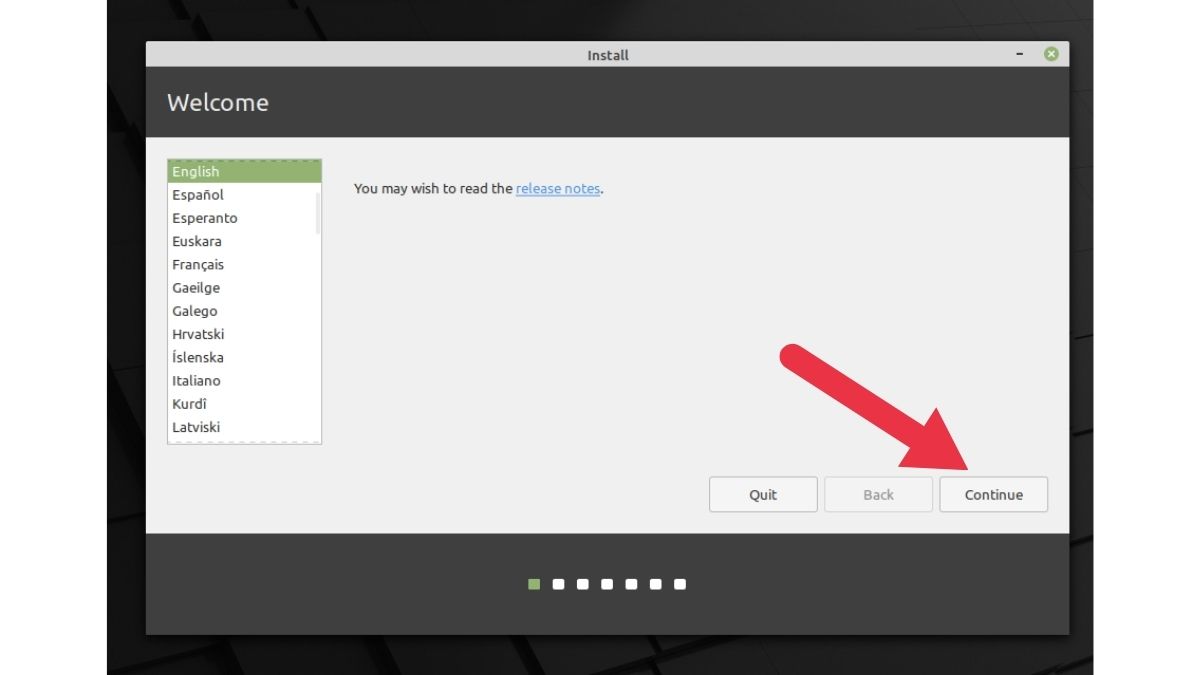
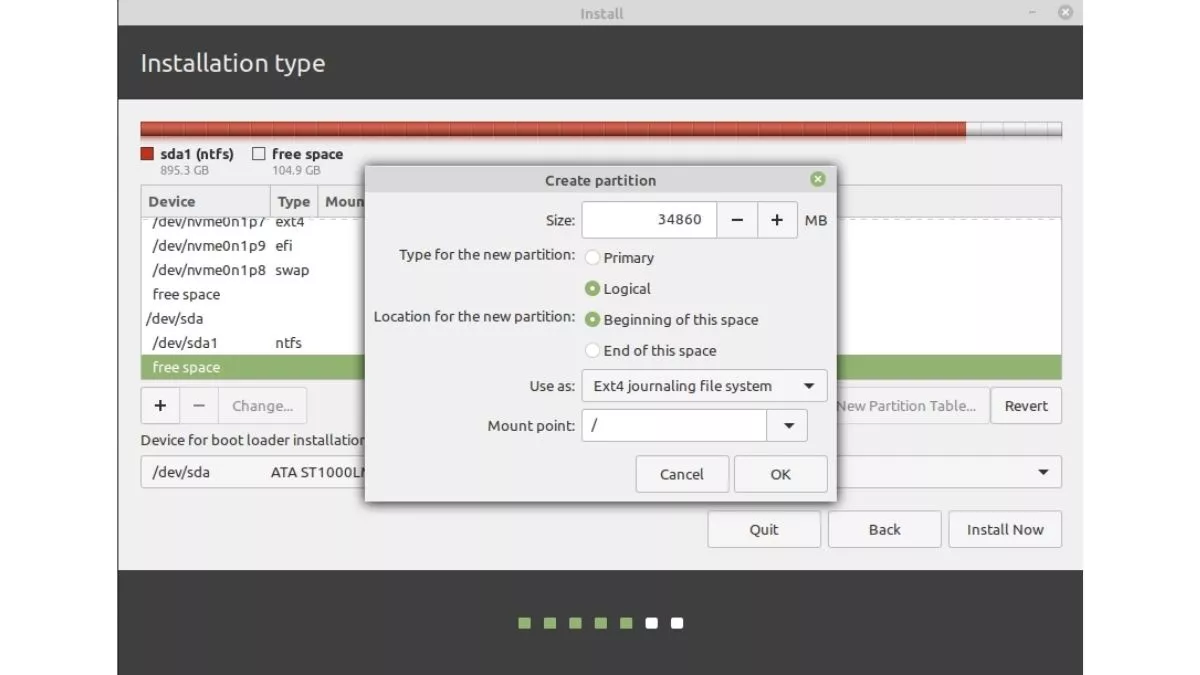
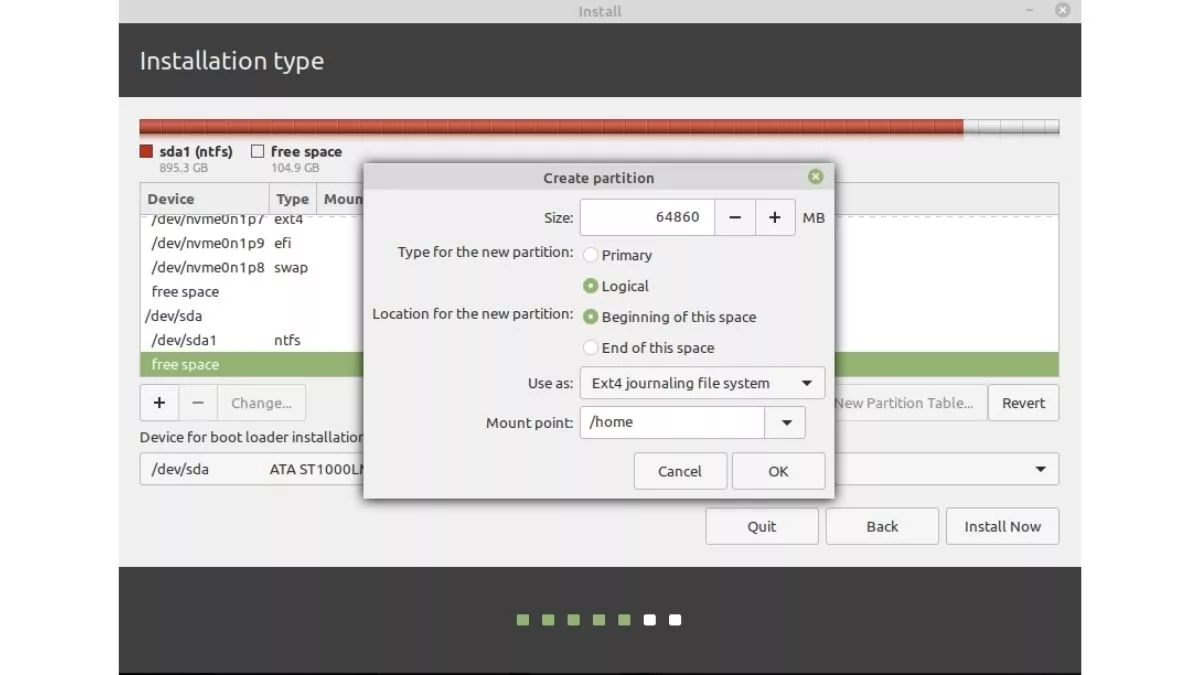
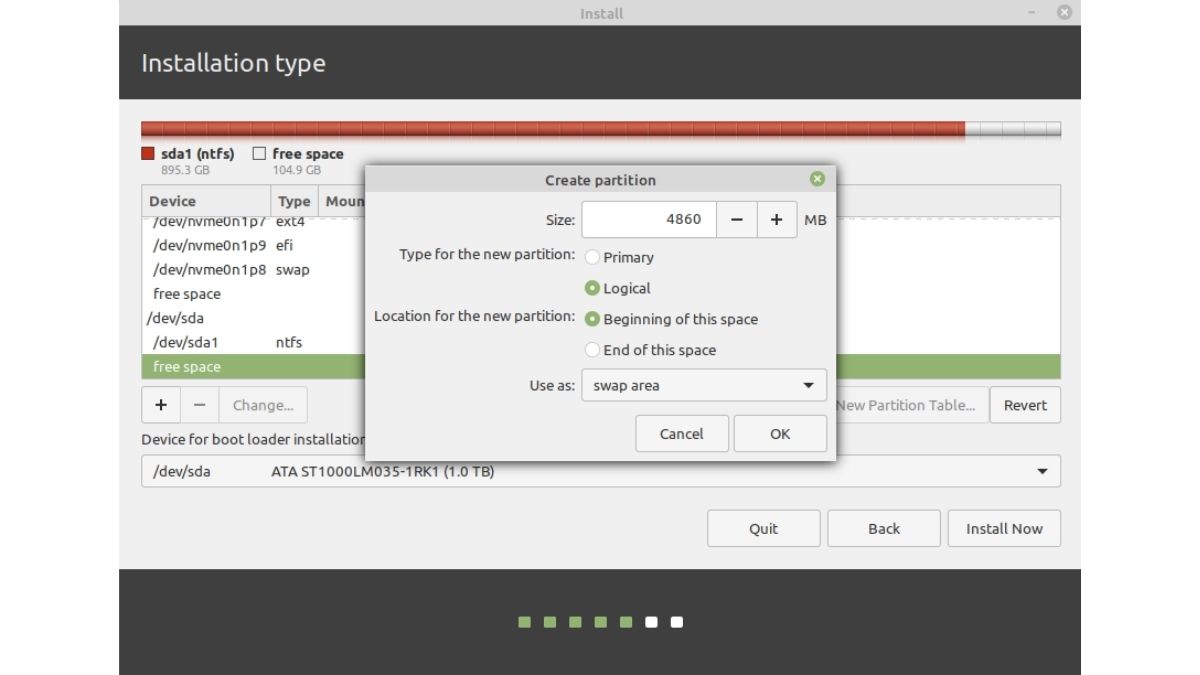
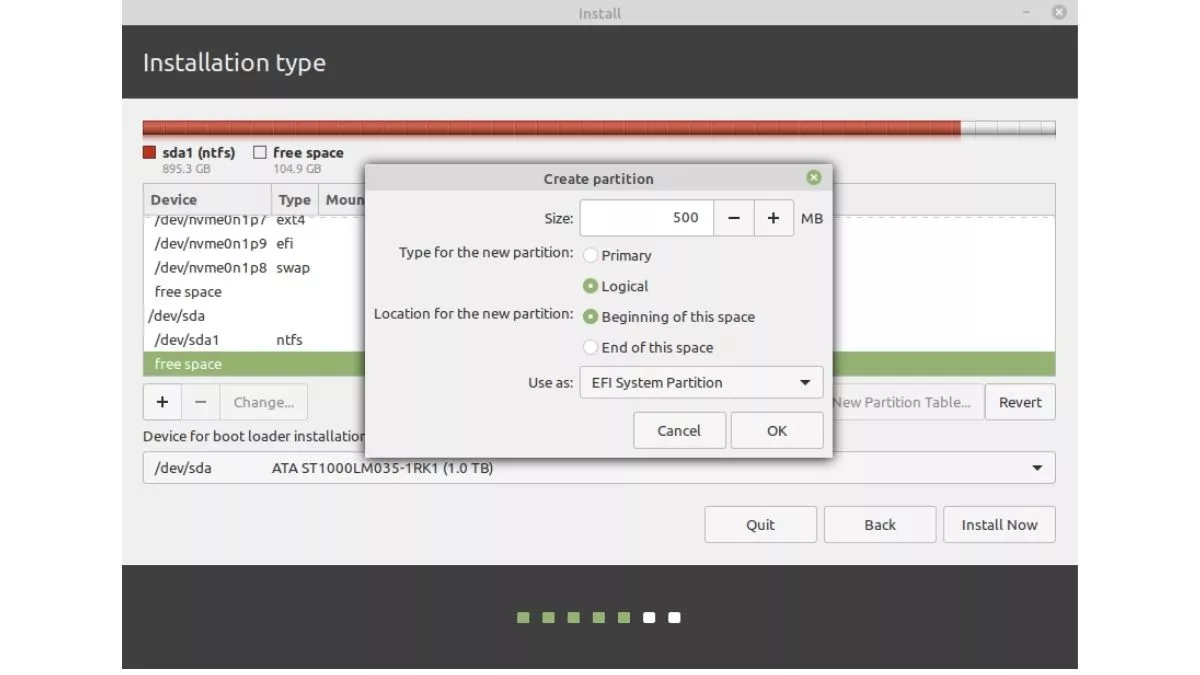
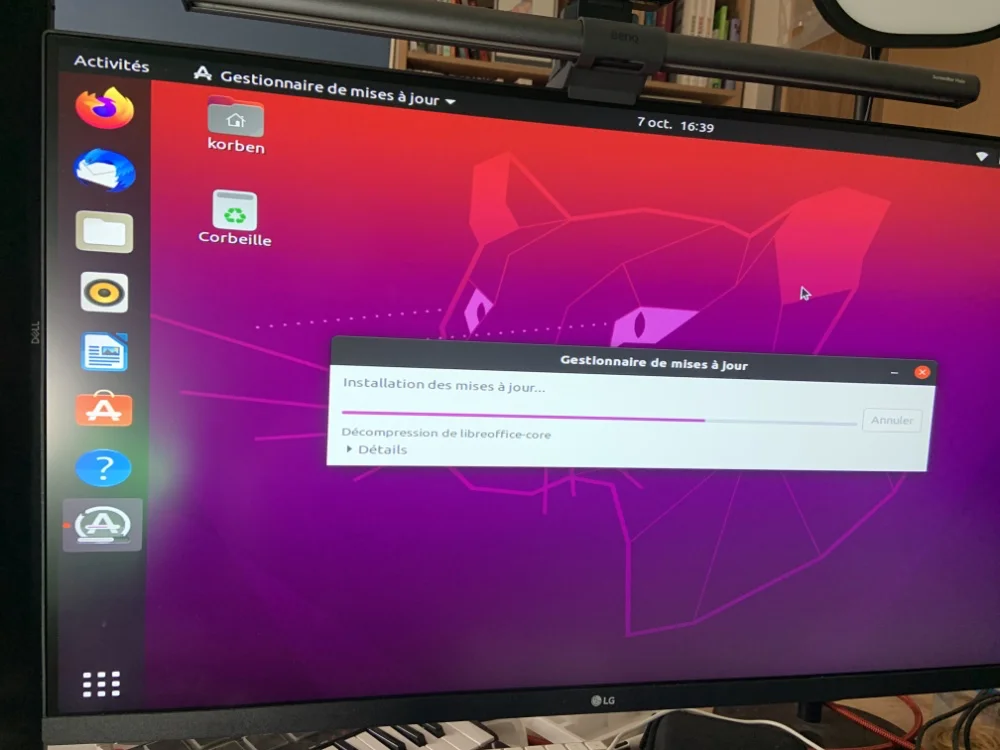
    Je m’interrogeais quand même sur la possibilité de mettre un Linux là-dessus, et c’est passé comme une lettre à la poste en dual boot (c’est de l’UEFI). J’ai juste dû passer sur un noyau Linux 6.5.6 pour avoir un bon support du processeur graphique d’Intel qui est quand même récent et donc avoir ainsi une résolution d’écran correcte.

    Par contre, attention, si vous vous lancez là-dedans, sachez que le seul port USB réellement bootable est celui qui se trouve à l’arrière. J’ai perdu pas mal de temps à essayer de comprendre pourquoi ma clé USB ne voulait pas booter alors que je l’avais branché dans les ports USB situés à droite de la machine.

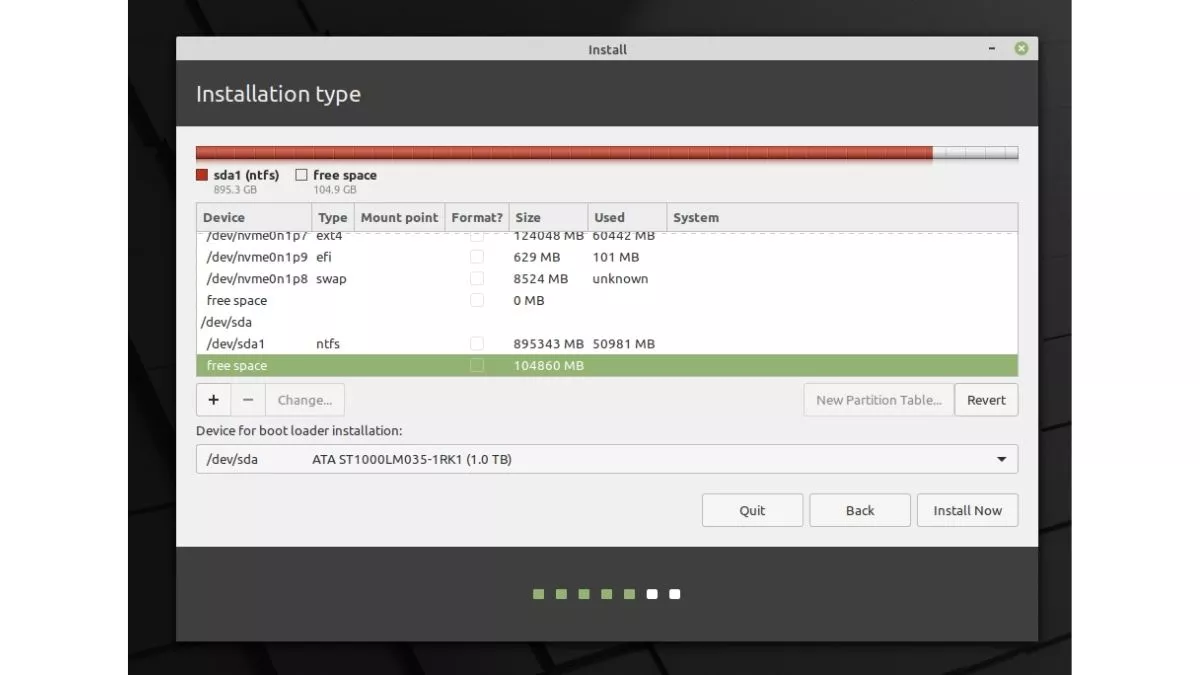
    Comme j’ai 1 TB sur le Nvme, j’ai divisé le disque en 2 partitions de 500 GB chacune, ce qui sera largement suffisant pour ce que je vais en faire.

    Évidemment comme je suis curieux, je l’ai démonté pou voir à quoi ça ressemblait dedans. C’est assez facile, il suffit d’enlever les patins du dessous, qui cachent les vis. Puis de l’ouvrir délicatement par le haut, en prenant garde de ne pas arracher les fils pour les LEDs bleues.

    Voici l’intérieur de la bête.

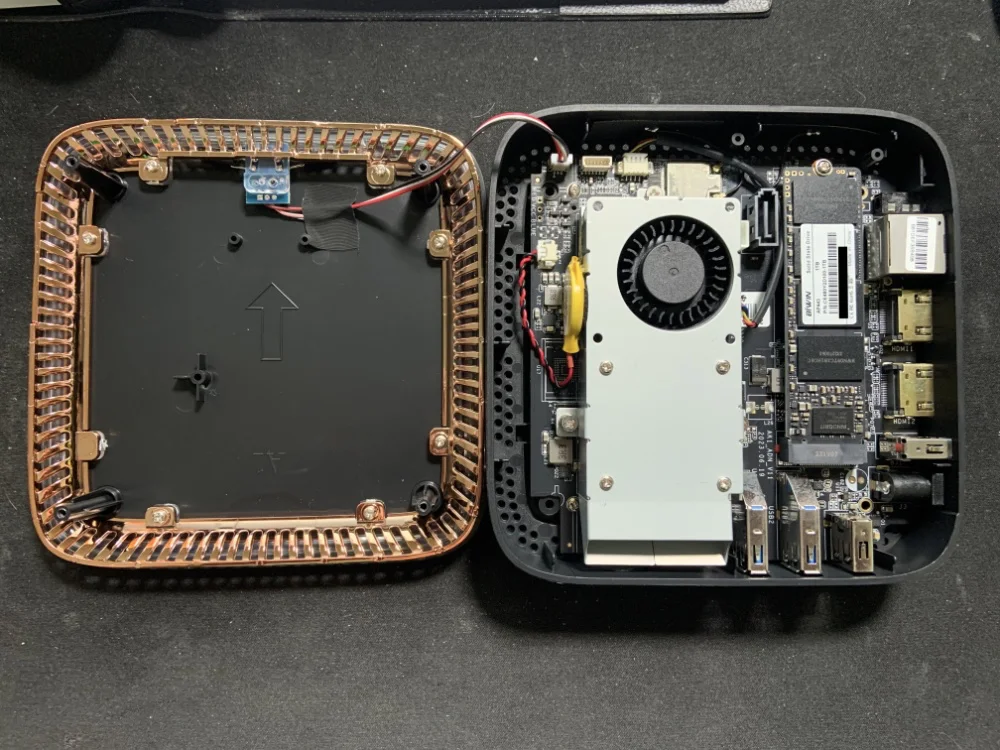
    Comme vous le voyez, l’alimentation des LEDs peut être facilement déconnectée. Et ensuite, c’est assez basique, y’a pas grand chose. Un gros radiateur / ventilo vraiment très silencieux. Et un NVme de marque BiWIN… Aucune idée de ce que vaut ce dernier, mais comme on peut le remplacement facilement, je ne suis pas inquiet.

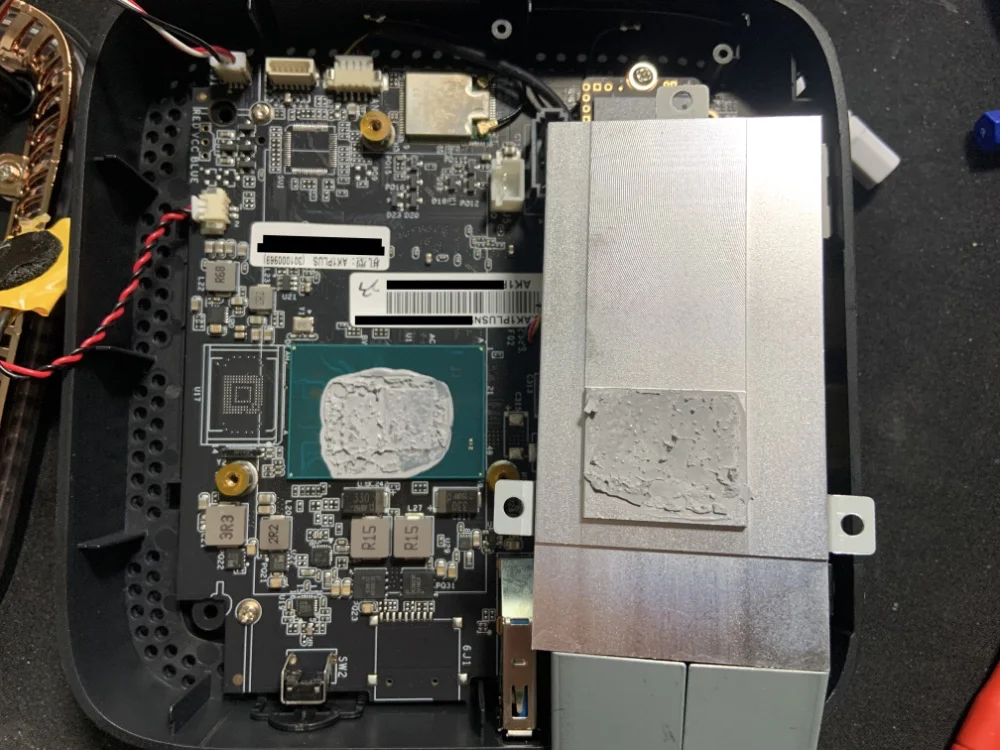
    J’ai enlevé le radiateur quand même pour voir le processeur avec sa bonne dose de pâte thermique.

    Voilà pour le petit retour côté matos. C’est donc un mini PC silencieux et discret, avec un CPU récent et performant pour peu que vous vous contentiez de faire de la bureautique / internet / mater des films avec.

    Ça conviendra bien à ceux qui ont un petit budget, qui veulent un minimum d’encombrement et surtout du silence 🙂 et comme ça supporte très bien Linux, y’a de quoi faire aussi d’autres trucs cool.

    Par contre, encore une fois, oubliez les usages qui demandent du GPU. C’est loin d’être un PC avec lequel on peut jouer à des jeux récents ou faire de la 3D.

    Notez que d’autres modèles sont également dispo chez NiPoGi avec moins d’espace disque, moins de RAM, donc moins chers (et également de chouettes bons de réduction).

    À voir maintenant ce que ça donnera sur le long terme.

    • Fo chevron_right

      How To Enable/Disable Secure Boot In Windows 10, 8.1, 8, 7?

      pubsub.do.nohost.me / FossBytes · Monday, 22 March, 2021 - 10:19 · 3 minutes

    How to disable secure boot windows 10 pc

    Have you ever read a tutorial on dual-booting your PC and found that you need to disable secure boot in order to achieve your goals? Yes, Secure Boot is a modern security feature built into Windows 10 (and Windows 8).

    So, what is Secure Boot?

    As the name says, Secure Boot is meant to safeguard to boot process when you start your computer; it’s found on newer PCs that come loaded with UEFI firmware. Secure Boot’s job is to prevent unsigned UEFI drivers and bootloaders from loading during the startup process.

    This reduces the chances of unauthorized access to your device in case someone wants to steal data in your absence. However, the secure boot feature has faced some backlash as well, as it prevents people from doing some useful stuff on their machine. For example, running two operating systems at the same time.

    But if you don’t want the feature, you can easily disable secure boot on your device.

    How to disable secure boot in Windows 10, 8, 7?

    The steps to turn off the secure boot feature are almost similar for both Windows 10 and Windows 8 systems.

    1. Search Advanced startup in the search option at the taskbar of the Windows. Then, select Change advanced Startup Options as shown below in the snapshot.
      Advanced startup option in Windows 10
    2. Once you click on the “change advanced startup options”, the following screen will appear. You just have to click Restart now under the Advanced startup.
      Advanced startup
    3. The above command will restart your PC in the advanced mode which comes with lots of advanced options to let you configure your Windows. Some of the advanced options are using an external device, troubleshooting your Windows using advanced options, or resetting your PC etc. The screen appears something like this. Click on Troubleshoot.
      secure boot windows1
    4. You can see above that Troubleshoot option had two options– Reset your PC and Advanced options. So, once you click on Troubleshoot, you will the same two options coming up. Click on Advanced options as shown below.
      secure boot windows2
    5. The advanced options look something like this (as shown below). Select UEFI Firmware Settings.
    6. Once you click on the UEFI firmware settings, it will restart your system once again or ask you to restart the system. So, click on the restart on the next screen. However, this restart will start in BIOS and you will see different BIOS setup.
      secure boot windows3
    7. Click on the Security tab under the BIOS settings.
    8. Use the Up and Down arrow to choose the secure boot option as shown in the previous image.
    9. Select the option using Arrows and change the secure boot from Enabled to Disabled.
    10. Press Enter.
    11. Save your work and exit.

    Since the secure boot is now disabled, you can easily boot your devices with any external or unauthorized device.

    Now, if you want to know to enable secure boot, then you can follow the same steps as above and change the secure boot setting to enabled.

    What happens after I disable secure boot?

    Your PC won’t check whether you’re running digital signed operating system after your turn of this security feature. However, you won’t feel any difference while using Windows 10 on your device.

    Here are some conditions that would be allowed on your PC after disabling Windows secure boot option:

    • Booting Windows on your PC from an external device like USB or CD.
    • Dual OS booting like Windows with Linux, Ubuntu or Fedora.
    • Booting Windows using Windows password recovery tools
    • Running the previous versions of Windows etc.

    Do I need to disable secure boot to install Windows 10?

    No, you don’t need to disable secure boot to install Windows 10. In fact the security feature is already meant to ensure that the your copy of Windows you’re running is trusted by your OEM and safe to use. Keeping the feature enabled will only help in that.

    Why can’t I disable secure boot on my PC?

    One thing to note is that your PC may not have an option to disable it as it’s up to PC maker whether it wants to add the functionality or not. So, if you can’t find it on your device then you should contact your manufacturer for support.

    So, this is what we know about secure boot and how to use it. If you have anything to add, drop your thoughts in the comments below.

    The post How To Enable/Disable Secure Boot In Windows 10, 8.1, 8, 7? appeared first on Fossbytes .

    • Fo chevron_right

      How to Dual-Boot Linux Mint 20.1 Alongside Windows 10?

      pubsub.do.nohost.me / FossBytes · Tuesday, 9 March, 2021 - 10:00 · 6 minutes

    linux mint windows dual boot

    Mint is one of the most popular Ubuntu-based distributions, mainly due to its easy-to-use interface. Apart from that. Mint’s ability to run smoothly even on older machines is truly amazing. Another good thing about Mint is that the download page allows you to choose between three desktop environments, Cinnamon, MATE, and Xfce, with Cinnamon being the most popular.

    Mint is a great distro for people who want to try out Linux and are unsure where to start. If you own an ancient PC that can hardly run Windows, install Mint on it and see the magic. In this article, let’s look at how to install Linux Mint easily. Additionally, we’ll also be looking at how you can dual-boot it alongside Windows.

    Warning! This method requires fiddling with your computer’s hard drive, which we don’t recommend doing unless you know what you’re doing. Please make sure to take a backup of your files before proceeding.

    Prerequisites for Linux Mint dual boot with Windows

    • An 8GB or above Flash drive
    • Free storage space on your computer (at least 100GB)
    • Patience

    Making a Bootable USB Drive Using Rufus

    To flash the distribution and boot into it, you’ll first need to make a bootable USB Drive. There are a lot of software that can make bootable USB drives, but the one we’ll use in this tutorial is Rufus, which you can download here .

    1. Download Linux Mint from here and save the iso on your Desktop.

    Download Linux Mint - How to install Linux Mint Mint download page

    2. Insert your flash drive into the USB port and fire up Rufus.

    Download and Open Rufus - How to install Linux Mint Download and Open Rufus

    3. Your flash drive will be automatically detected by Rufus. Click on the Select button

    4. Browse your desktop and select the ISO. Now, Click on start.

    5. Allow Rufus to download Syslinux if prompted and wait for the flashing process to complete.

    Creating a Partition for Linux Mint

    1. Search for “ partitions ” in the Start menu’s search bar and click on the first option ( Create and Format Hard disk Partitions ).

    Create and Format Disk Partitions - How to install Linux Mint Create and Format Disk Partitions

    2. All the partitions and drives on your computer will be displayed. As my laptop has both SSD and HDD, this window might look different on your computer. I’ll be installing Mint on the HDD.

    Shrinking Hard disk - How to install Linux Mint Shrinking Hard disk

    3. Right-click on your drive and click on “ Shrink Volume .” Enter the amount of space to be shrunk (in my case, 100GB) and Click on “ Shrink .” This will create an empty partition on the Drive. You will now see an “ Unallocated ” partition.

    4. Now Plug in the USB drive you flashed Mint on, restart your computer, and before your manufacturer’s logo appears, keep pressing F2 , F5 , F8 , F10 , or F12 to enter into the BIOS. The key to enter into BIOS is OEM specific so, try out the other keys if one doesn’t work. In my case (for Lenovo), it’s F2 .

    BIOS Settings

    5. Under security , make sure secure boot is disabled. Under boot options , make sure it’s set to UEFI . Now, not every interface looks like this, but the terms will probably be the same. Save your settings and exit BIOS (Usually, every button’s functions will be visible under the options in the BIOS, as you can see in both the pictures).

    Booting and Installing Linux Mint

    Here are some of the crucial steps of this tutorial to make sure you don’t miss anything.

    1. Booting into the Boot menu

      Power on your PC, and before the manufacturer’s logo appears, press the OEM specific key to boot into Boot options. Look up on Google or your PC’s manual about the key or try pressing F2 , F5 , F8 , F10 , or F12 . The menu will look like this. Boot manager - How to install Linux Mint

    2. Navigate and press enter

      Your USB drive will mostly be displayed at last, as you can see in the above image (Generic -SD/MMC/MS Pro) as I’m using an SD card in an SDHC adapter.
      Pressing enter will take you to the Linux Mint desktop. You can try Mint before installing it.
      If you don’t like it, I’d suggest you check out our Pop!_OS Review article. The same procedure can be followed to install most of the Linux Distros. Start Linux Mint

    3. Open “Install Linux Mint” application.

      The “Install Linux Mint Application” can be found on the desktop. Install Linux Mint

    4. Set up the language until..

      Set up the keyboard and OS language until you reach the “Installation Type” menu. Install Linux Mint Welcome!

    5. Select “something else”

      Select the “Something else” option and continue your installation journey. You can also choose the option “Erase everything and Install Mint” considering you’ve already backed up every file. Install Linux Mint Welcome!

    6. More Partitions!

      Phew! It’s been a long journey so far; you don’t want to quit after coming this far, do you? Four more steps and Linux Mint will be all yours. Remember the space we freed up for installing Mint while in Windows? In the list of partitions, find a partition labeled “ Free Space .” Double-click on it to create new partitions. Install Linux Mint - Partitions!

    7. I AM Root!

      The Root is the place where essential components of your system are stored. In standard terms, consider it to be the “ C:\\ Drive ” of Windows.
      The least recommended space for root is 30GB (considering we only have 100GB of free space). In the list of Mount points, select “/.” Make sure everything looks exactly the same as in the image. Install Linux Mint - Root Partition

    8. Home Sweet Home

      Home is where you’ll store most of your downloaded files and folders. The bare minimum recommended space for the Home partition is, in our case, is 60GB. Make sure to select “/home” from the list of mount points. Install Linux Mint - Home Partition

    9. Swap? Meh

      It is necessary to have swap memory if you have less than 2GB of RAM. For starters, the swap memory is used when your RAM runs out of storage, so you can continue working or watching in a new tab that YouTube video your friend recommended in the class even though you have 4-5 Chrome tabs open. Install Linux Mint - swap area

    10. . Creating an EFI Partition

      EFI stores your grub, which helps you choose between booting into Windows or Mint while booting. The minimum recommended space to allocate is 500MB. Install Linux Mint - Efi

    11. Final Step!

      Now that you have created the partitions, make sure you select the Root partition (you’ll know when it’s highlighted) and click on the Install Now button.
      The installation may take up to 30 minutes, depending on the speed of your hard drive. Once it’s done, you’ll be asked to reboot, and by the end of it, you will have a dual-booted system with Windows and Linux Mint installed. Installing Linux Mint

    That’s pretty much it in this How to install Linux Mint tutorial. Pat yourself on the back if you made it till here, and for those still stuck in the process, do let us know the issue(s) you’re facing, and we’ll try to help out.

    That said, installing most of the Linux distros requires you to follow the same steps except their may be visual UI changes here and there, but most of the time, the process will be the same. Do hit us up if you have any suggestions.

    The post How to Dual-Boot Linux Mint 20.1 Alongside Windows 10? appeared first on Fossbytes .