• chevron_right

      Spice Up Your Zoom Chats With Filters

      pubsub.dcentralisedmedia.com / LifehackerAustralia · Tuesday, 9 February, 2021 - 20:00 · 2 minutes

    You know you’re stuck in the never-ending loop of pandemic life when you can no longer muster the enthusiasm to change your silly virtual Zoom background. I’ve been overusing Zoom’s default “space” image for some time — but imagine my surprise when I did go to switch it the other day and discovered the app now includes a bunch more virtual backgrounds and effects for everyone to try.

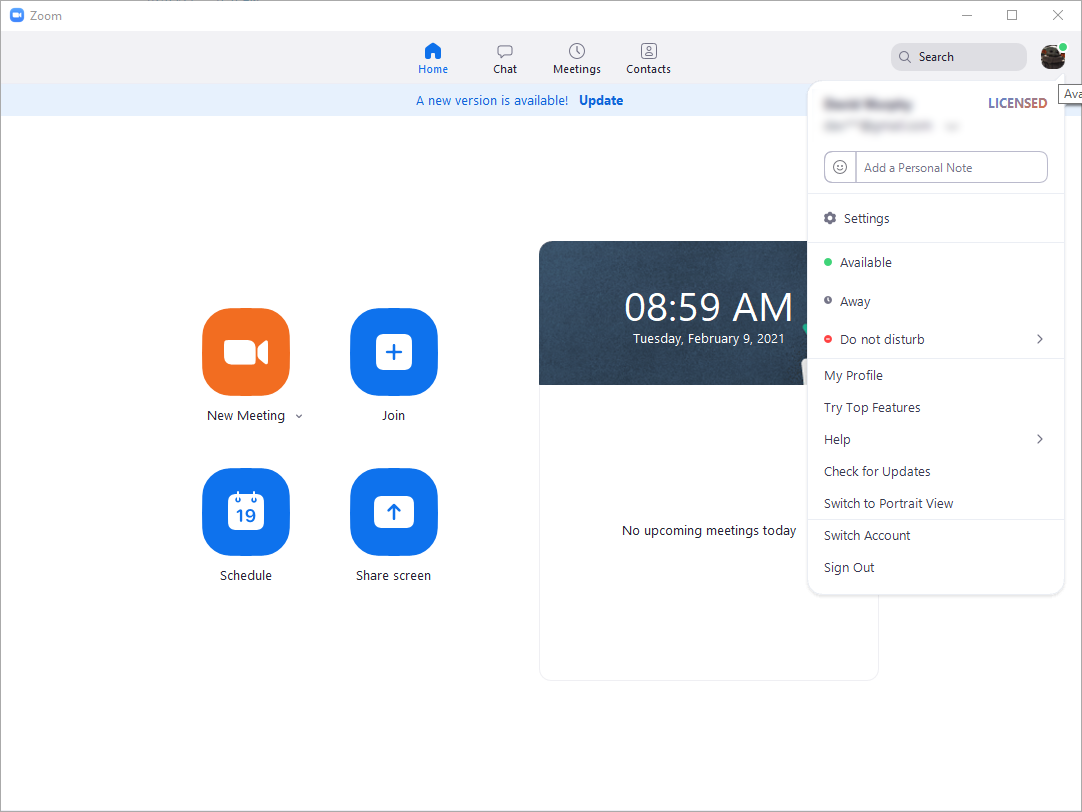
    To access them, make sure you’ve updated Zoom to the latest version of the app. Doing so should be self-explanatory on your mobile devices. On desktop, click on your profile image in the upper-right corner of Zoom’s primary window and select Check for Updates under the menu.

    jfnaly56591vwwayqain.png?auto=format&fit=fill&q=80&w=1280&nr=20

    (While there’s no guarantee that you’ll get extra features by updating to the latest version of Zoom, staying on top of your updates gives you the best possible chance. And it’s great for Zoom security, too. OK, back to the fun.)

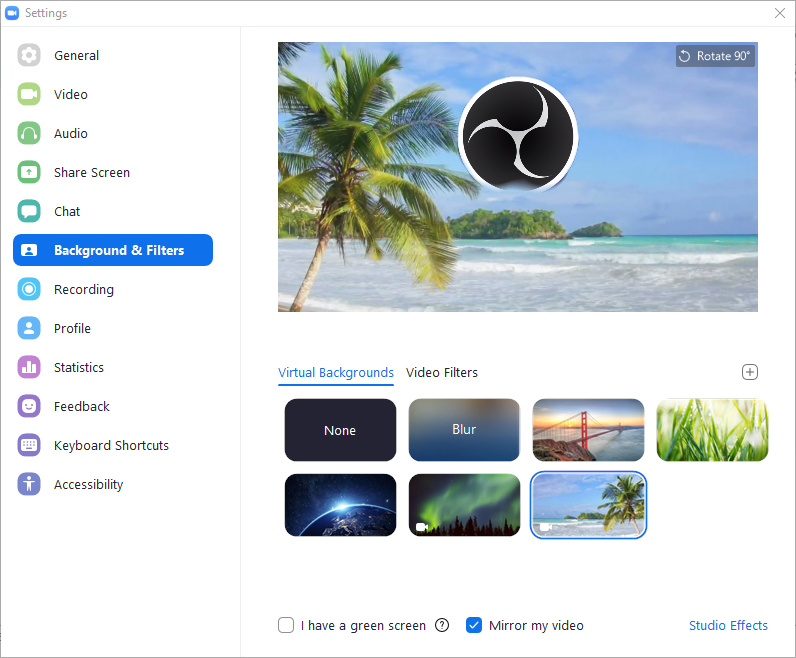
    Launch a zoom call and pull up the virtual backgrounds feature by clicking on the arrow next to your video toggle in the lower left corner. Select Choose Virtual Background ,” and you should now see a few new options — a lovely animated beach, as well as a simpler “background blur” feature. I can’t decide which I like more.

    idy74k3iqa7ieesh9srt.png?auto=format&fit=fill&q=80&w=1280&nrs=40

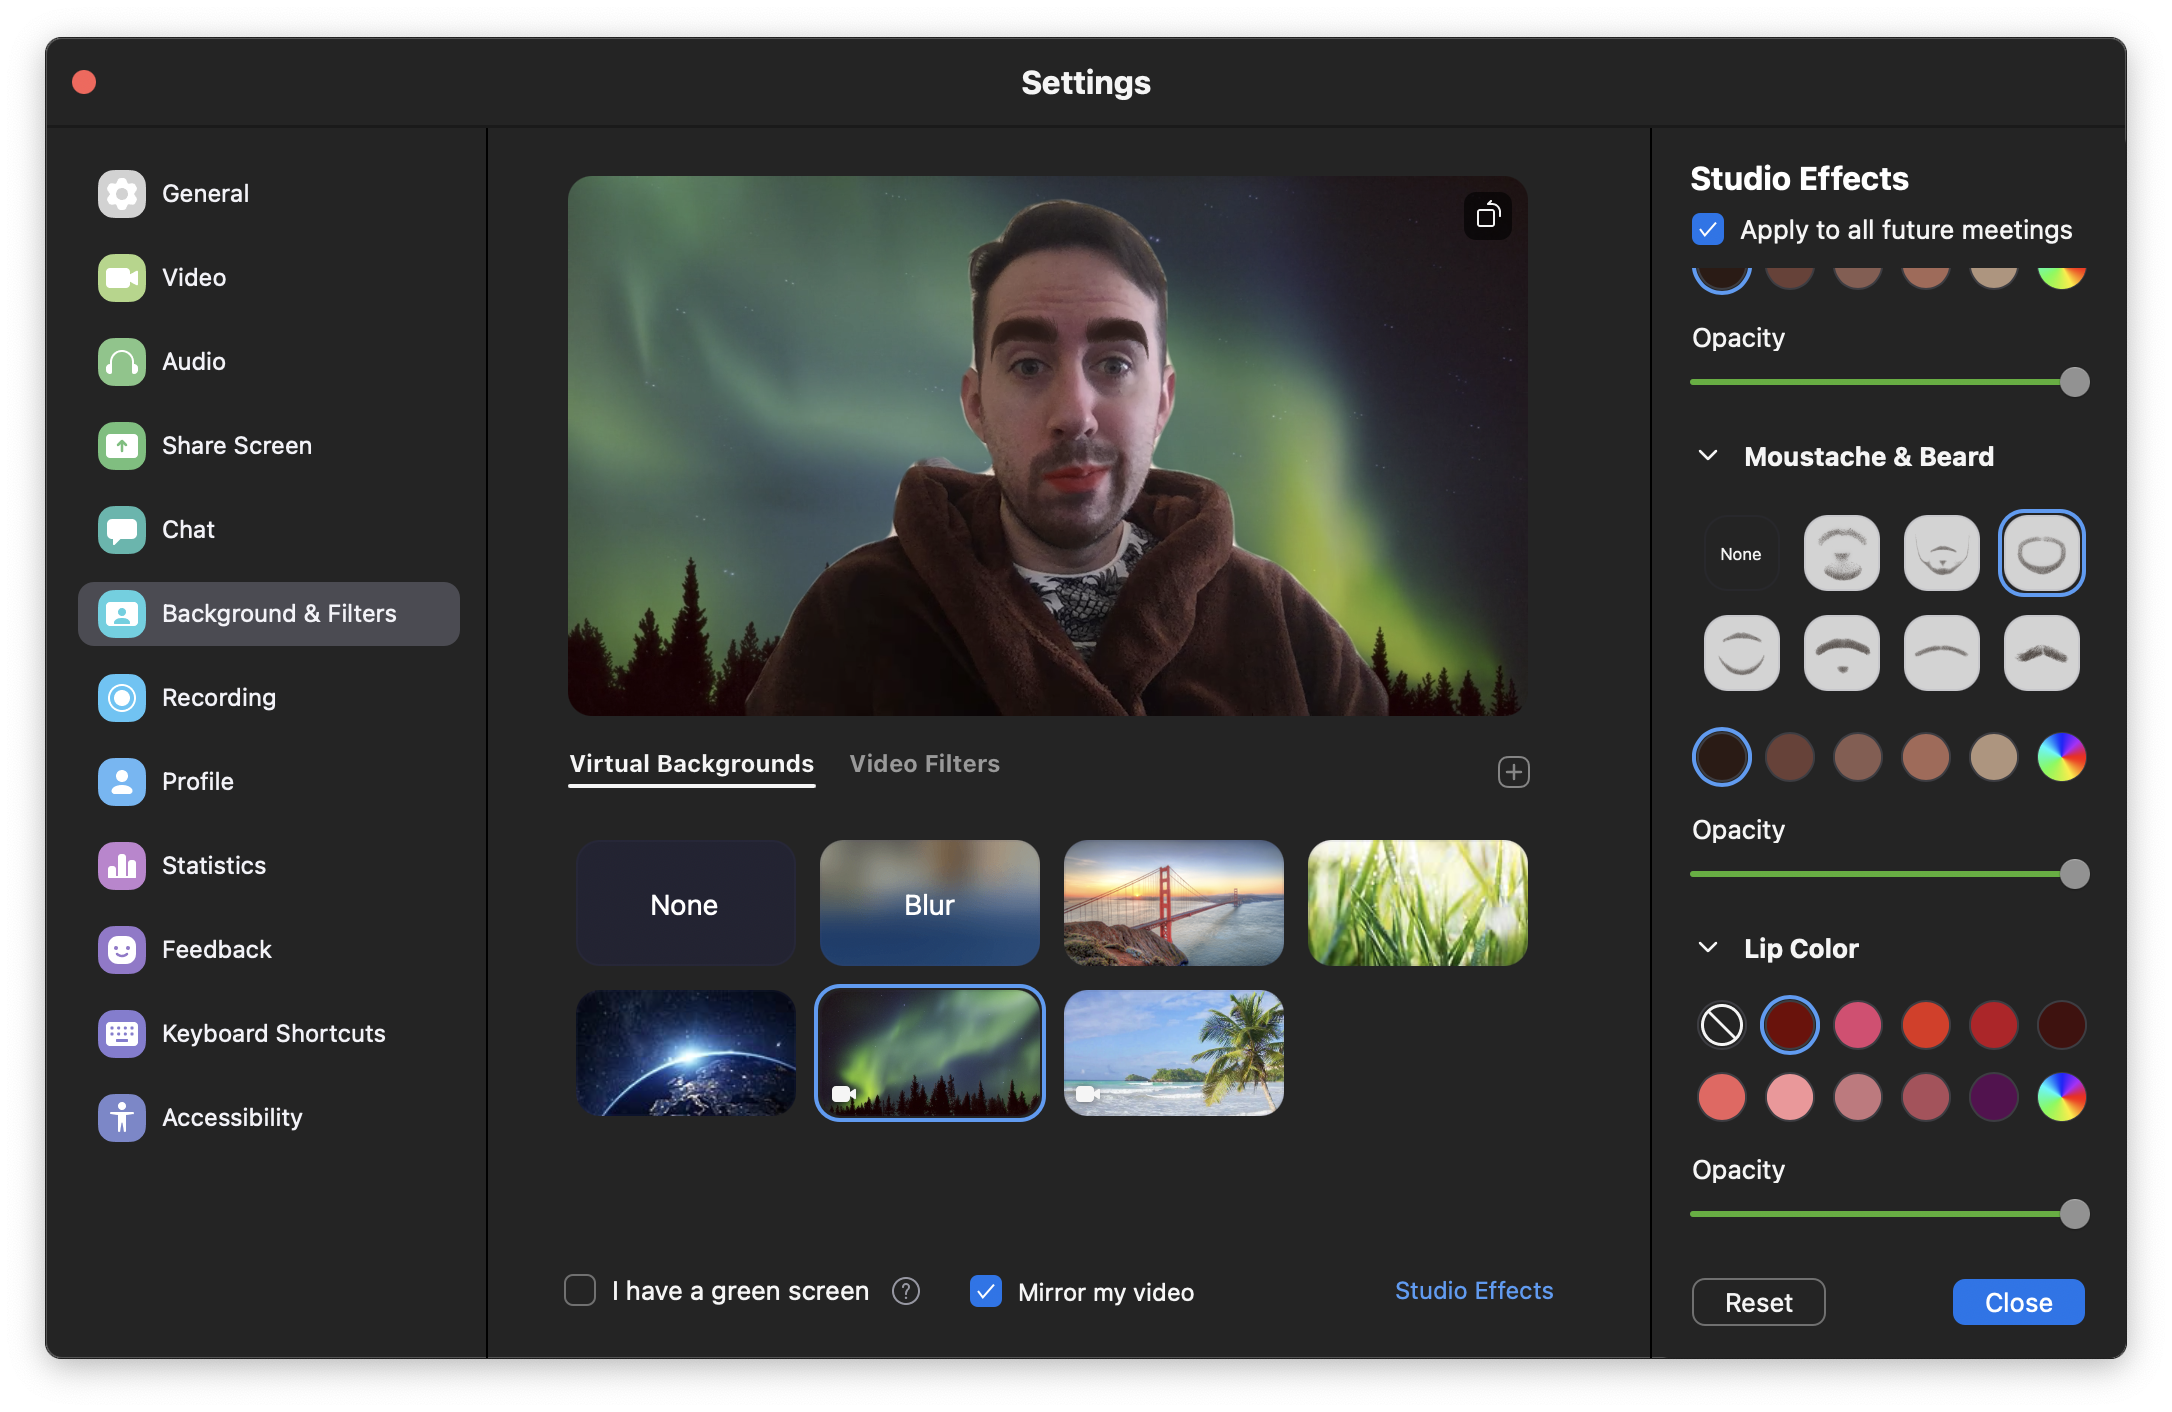
    But we’re hardly done. Click on the small S tudio Effects” link in the lower-right corner, and you’ll get a pop-out sidebar that lets you assign yourself new eyebrows, a mustache and/or beard, and a lip colour. Lovely. Who doesn’t want a pair of Eugene Levy brows ?

    ct6p7mz3e7hxpkhhffcm.png?auto=format&fit=fill&q=65&w=1280

    Make sure you uncheck “Apply to all future meetings” so you don’t have to worry about forgetting to adjust these effects when switching from your friends-on-the-weekend hangouts to your next work chat.

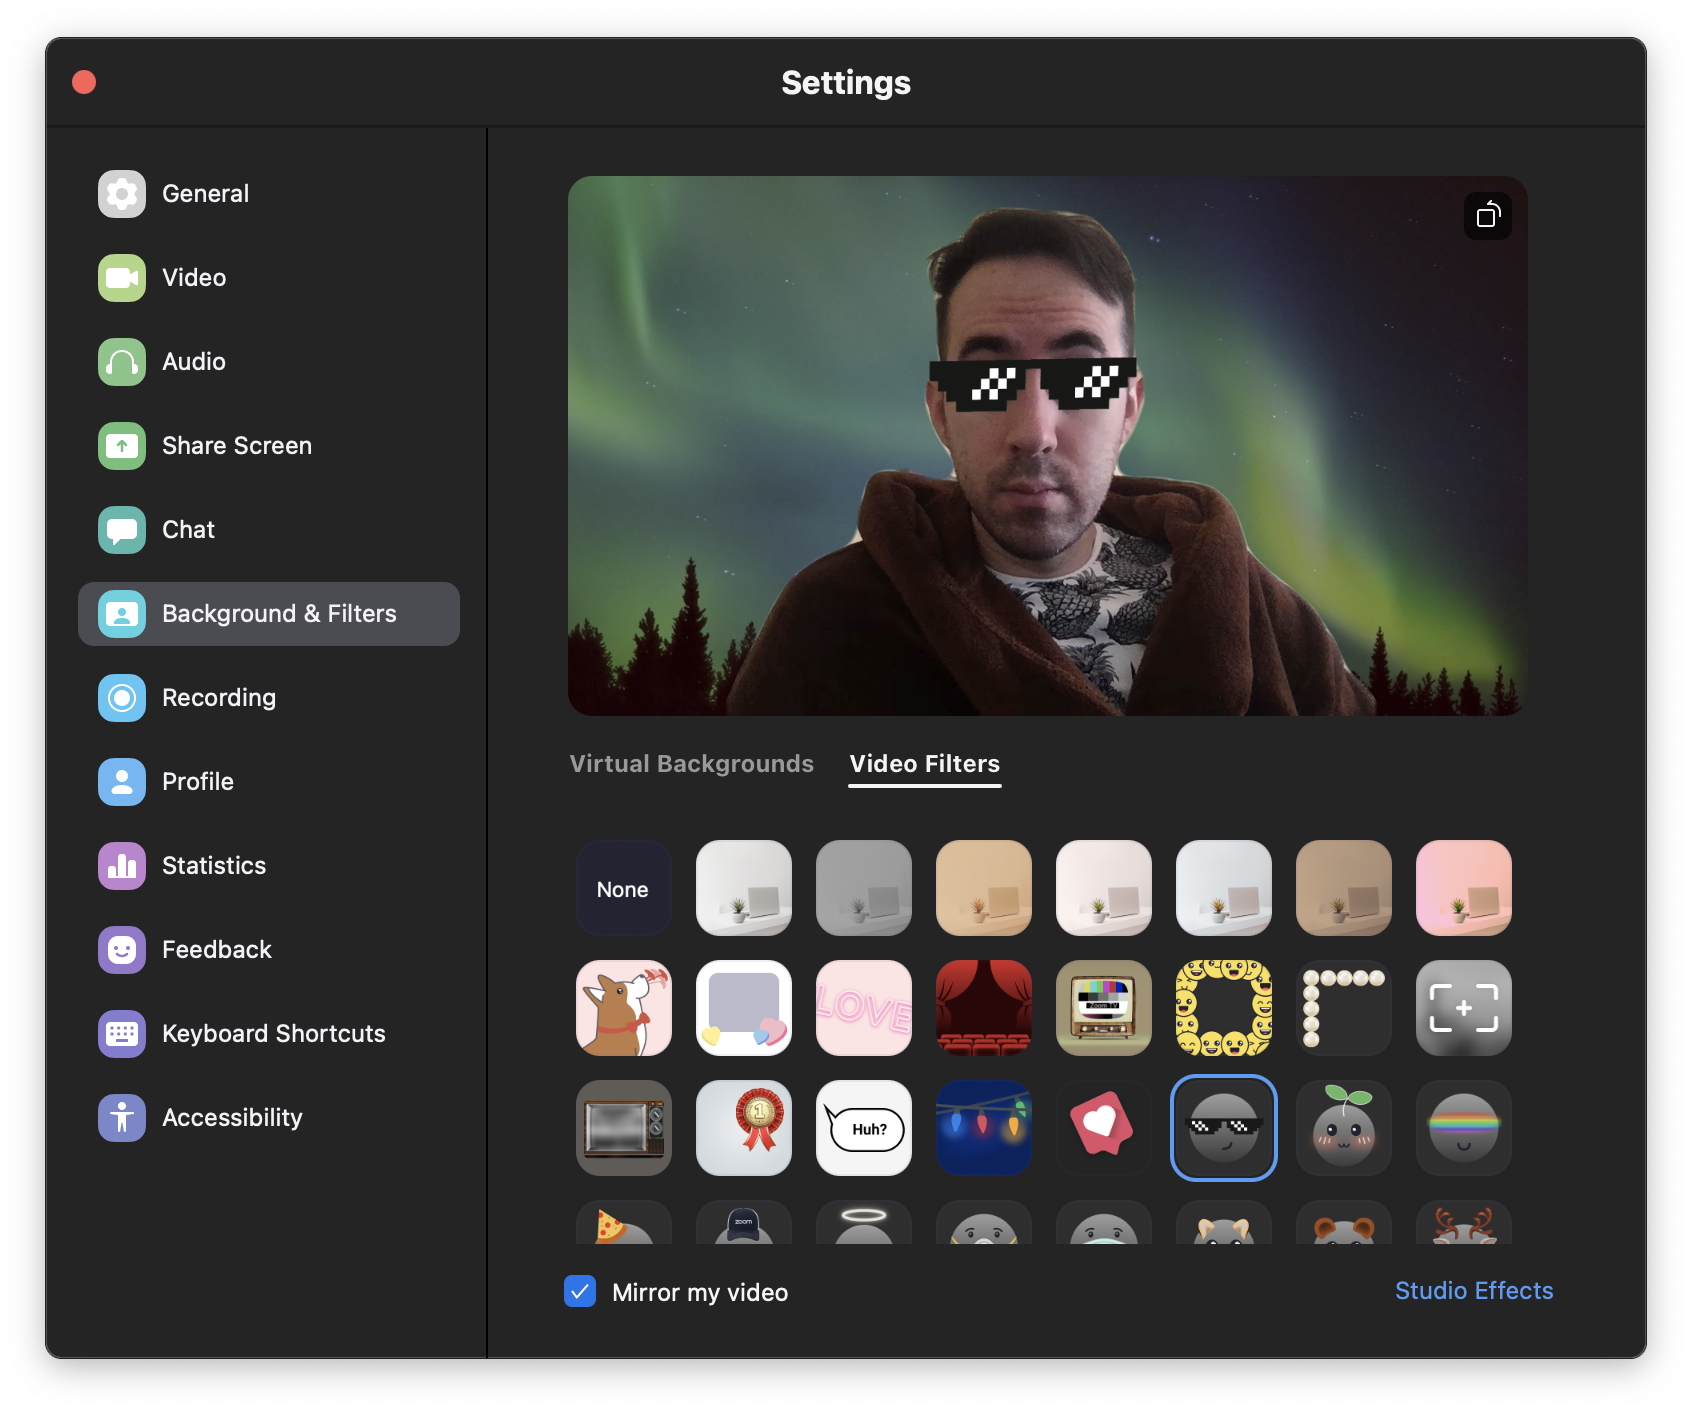
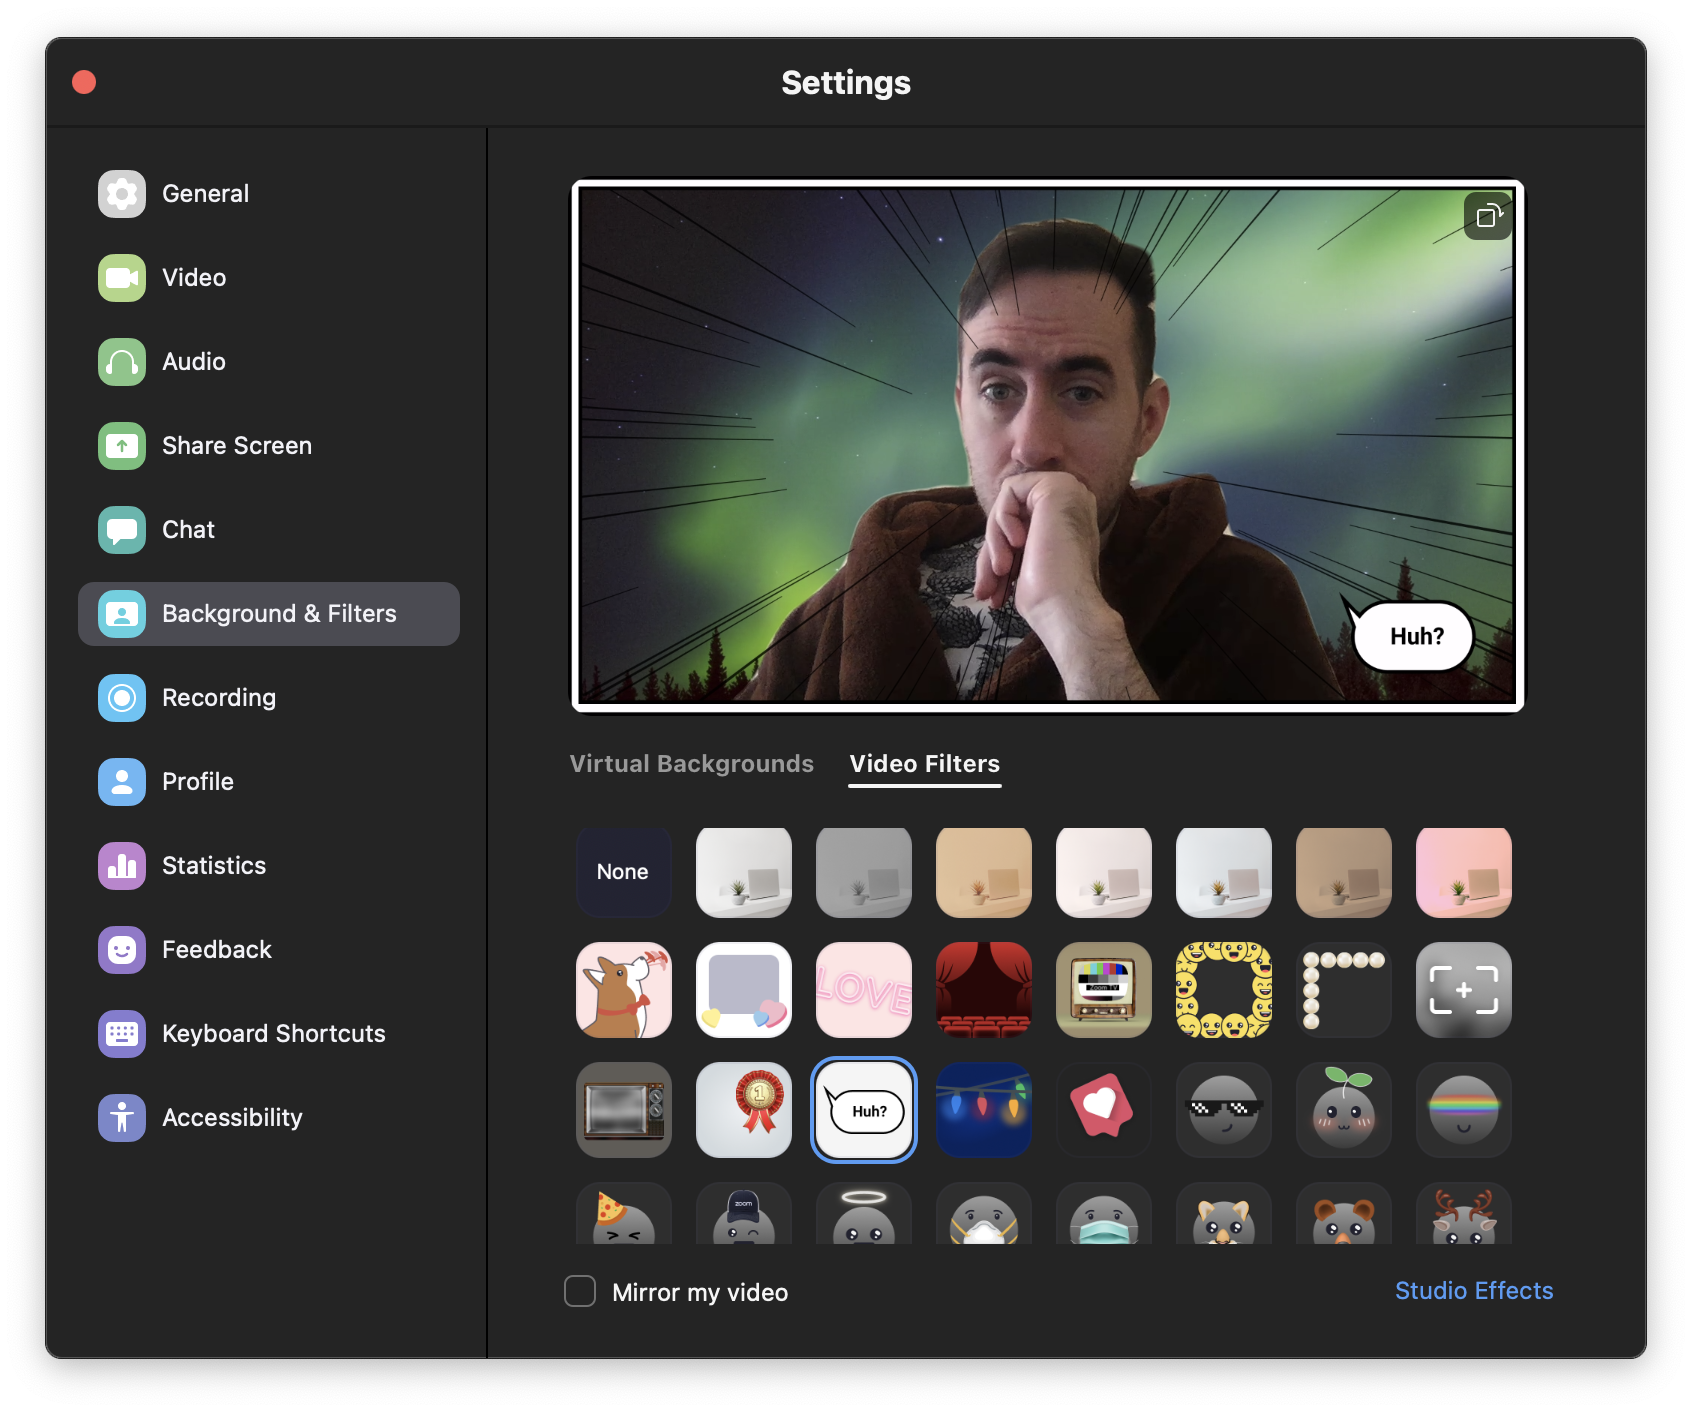
    Once you’re done messing around there, make sure you click on Zoom’s “Video Filters” option, located to the right of “Virtual Backgrounds.” There, you’ll find a whole host of different filters that you can slap on top of your image, from filters that adjust its colour to, well:

    akipqjocinstabzf2ioo.png?auto=format&fit=fill&q=65&w=1280

    Don’t forget to turn off “Mirror my video” if you find that some of the effects are reversed.How else will your friends and colleagues know you’re confused by their presentation?

    yi3ku2bgcphmzpsatwjg.png?auto=format&fit=fill&q=65&w=1280

    While you won’t find the aforementioned Studio Effects, nor the lovely animated beach, on the mobile versions of your Zoom app (as of this writing, at least), you should still be able to access filters from your virtual backgrounds menu.

    The post Spice Up Your Zoom Chats With Filters appeared first on Lifehacker Australia .

    • chevron_right

      How to Try Out the Upcoming Firefox Redesign Now

      pubsub.dcentralisedmedia.com / LifehackerAustralia · Monday, 8 February, 2021 - 17:00 · 2 minutes

    Later this year, Mozilla will update Firefox’s desktop design with the new Proton interface. The visual overhaul is expected to include:

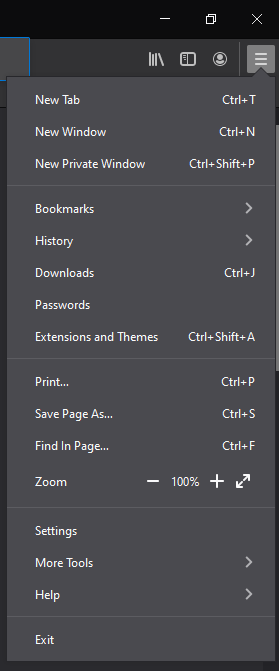
    • A streamlined “hamburger” menu: Mozilla will remove the icons and make the menu fully text-based. Several options will also be renamed, combined, or removed entirely.
    • A personalised new tab page: You’ll be able to change the look and layout of the new tab page, including the number of links, recommendations, and new snippets that appear.
    • Info bar and notification changes: Firefox’s notifications will have more colour to make the messages more personable.

    Those are the main changes we know about based on early looks and leaks ; the final version of Firefox 89’s Proton design may include even more tweaks and updates. The redesign launches in May, but you can get an early look by installing the Firefox Beta, Nightly, or Dev build and turning on the new interface changes in the browser’s experimental settings.

    Turn on the Proton interface early in Firefox Beta, Nightly, or Dev versions

    nqc0nuriehjdqazz9agw.png?auto=format&fit=fill&q=65
    1. Download and open Firefox Beta, Nightly, or Dev .
    2. Go to about:config in a new tab.
    3. Click “Accept the risk and continue.”
    4. Search for “ browser.proton.enable”
    5. Click the arrow icon to turn on the setting.
    6. Restart Firefox to apply the changes.

    After you enable the browser.proton setting, turn on these using the same method:

    • New proton tabs: browser.proton.tabs.enabled

    • New hamburger menu: browser.proton.appmenu.enabled

    • New new tab page: browser.newtabpage.activity-stream.newNewtabExperience.enabled

    If you’re asked to add any of these settings, select “boolean,” then click “+” to add the setting, then the arrow to enable and restart the browser.

    Any available Proton interface elements appear after you restart Firefox. Some users may not see every new interface change immediately, so keep checking over the coming weeks to see if Mozilla rolls anything new out to you.

    Enabling Firefox’s Proton interface early in stable

    While the pre-release Firefox builds have the most option to pre-enable, the stable version can give you a preview of the Proton interface as well:

    1. Open Firefox and go to about:config
    2. Click “Accept the risk and continue.”
    3. Use the search bar to find browser.proton.enable
    4. Click the arrow icon to turn the setting to “true.”
    5. Restart Firefox

    New stuff won’t appear right away for a stable version; changes have to be enabled server-side. This way, you’ll receive any early updates as soon as they’re officially available.

    The post How to Try Out the Upcoming Firefox Redesign Now appeared first on Lifehacker Australia .

    • chevron_right

      How Do I Transfer Data When I Switch Out My Laptop’s Hard Drive for an SSD?

      pubsub.dcentralisedmedia.com / LifehackerAustralia · Sunday, 7 February, 2021 - 21:09 · 5 minutes

    Replacing an ancient mechanical drive with a super-speedy solid-state drive is one of the best upgrades you can make to a desktop or laptop computer. Though it won’t turn your 8-year-old HP into a new M1 Mac, you’ll definitely feel and appreciate the difference (especially if you pair it with some extra RAM, but let’s not get too wild).

    However, Lifehacker reader Len has a dilemma. He wants to know how to get all of his data from his laptop’s old-and-busted mechanical drive to the new hotess of his solid-state drive. He writes:

    “I bought a Samsung SSD 500GB SATA 6Gbps to upgrade my old Toshiba laptop. How is the best way to do it and transfer the data from the old drive?”

    A storage upgrade is a great time to start fresh

    You might not love my answer, Len, but I think it’s the best one: Switching out your hard drive offers a great excuse to install a fresh, decluttered version of your operating system — which I’ll assume is Windows 10, but if not, we’ve talked about that , too.

    Sure, you can easily clone your entire mechanical drive over to your new SSD, but it’s going to require a bit more hardware, and you’ll probably end up using it once and forgetting about.

    Replacing your laptop’s hard drive usually means taking the primary hard drive out and putting a new one in (as I can’t think of many laptops with space for a second drive). That’s a bit different than a typical desktop PC, where you can install the new SSD, connect it to your motherboard, and run both drives at once. In that instance, you’d clone your original drive to your new drive, disconnect and remove the old one, and hook up the new one using the original SATA connection. Generally, your system should boot up just fine with your new drive, and you won’t have missed a beat.

    With a laptop, this gets a little trickier. You’ll need a cheap external enclosure or USB-to-SATA adaptor to connect to your SSD, allowing you to connect your SSD to your laptop’s USB port. You’ll then run a disk clone, just like before. Depending on how much data there is to transfer over and the USB speeds you’re working with, this could take some time.

    Find Out What’s Taking Up Space On Your Windows Computer With Wiztree

    Windows: Most computer geeks know about WinDirStat, an incredibly useful utility that shows which folders and files are taking up so much room on your drive. It’s a must-have app, because you’ll be surprised – heck, I’ve been surprised – how many times you might find some random, triple-buried folder...

    Read more

    What I suggest you do instead is take this time to audit the data on your laptop . What do you really need? What can you get rid of or re-download later, if and when you do need it? If you’re storing a bunch of iTunes movies on your system for convenience or you have a ton of music files you rarely listen to, you probably don’t need them eating up space on your laptop.

    Where possible, transfer your data to cloud storage so it’s backed up somewhere else and can be accessed only when needed. Apps and programs? Make a list , save or make a mental note of any specific settings you care about, and don’t worry about them; you can always reinstall them later.

    I try to use my laptop as a simple workstation. When I’m working on something, I try to edit it in the cloud when possible. If it needs to live on my desktop, it goes somewhere else when I’m done with it — typically back to the cloud, but also the recycling bin if need be.

    I have a desktop PC that I treat the same way. Photos and documents go to the cloud; the PC itself is generally the middleman between raw materials and finished product. (I’ve been playing too much Dyson Sphere Program lately.) I stream my media whenever possible rather than storing it for years on my hard drive, or I transfer it to a NAS box where it can copy it back to my desktop, or wherever, when I want to access it.

    Operating this way, backups are a cinch. I never clone my hard drive anymore. I just copy over my entire Windows user folder to another hard drive (to preserve data like my wallpapers and my overflowing Downloads folder). If I were to encounter some crippling issue with Windows, or even a total hard drive meltdown, I would just reinstall Windows 10 from scratch. Setting it up takes less than an hour, and that includes reinstalling the apps I use each day and my absurdly large Steam library.

    So, that’s my suggestion: Copy your essential data to the cloud, swap your drives, and reinstall Windows on your new one. You’ll have a bloat-free operating system than you can then fill with the data you truly need.

    However, if you have too much data you simply can’t part with, you’ll need to go the route I previously mentioned. Spring for a drive enclosure — possibly even a docking station — that supports both 2.5″ and 3.5″ drives. Connect your SSD, clone your laptop’s drive to your SSD, then swap the drives. Now, hold on to your old mechanical hard drive . Not only does it have a current backup of all your files, but you can slap it in the enclosure or docking station and use it as a secondary backup source going forward.

    As for the process of replacing your laptop’s hard drive with an SSD, you didn’t mention your exact model, so I can’t give specific directions. Generally speaking, you’ll have to remove a panel or the entire back of your laptop to access the hard drive. Here’s a good primer on what’s involved:

    I recommend investing in a precision screwdriver set for this sort of thing, but you might not need it if your regular ol’ screwdriver is good enough. Make sure you ground yourself before you touch your laptop’s insides (so you don’t fry anything with static electricity), and do your very best to avoid dropping or misplacing any of the tiny screws you’ll be dealing with. Otherwise, it shouldn’t be a very difficult upgrade.

    The post How Do I Transfer Data When I Switch Out My Laptop’s Hard Drive for an SSD? appeared first on Lifehacker Australia .

    • chevron_right

      How to Play the Leaked ‘GoldenEye’ Remake

      pubsub.dcentralisedmedia.com / LifehackerAustralia · Sunday, 7 February, 2021 - 21:07 · 1 minute

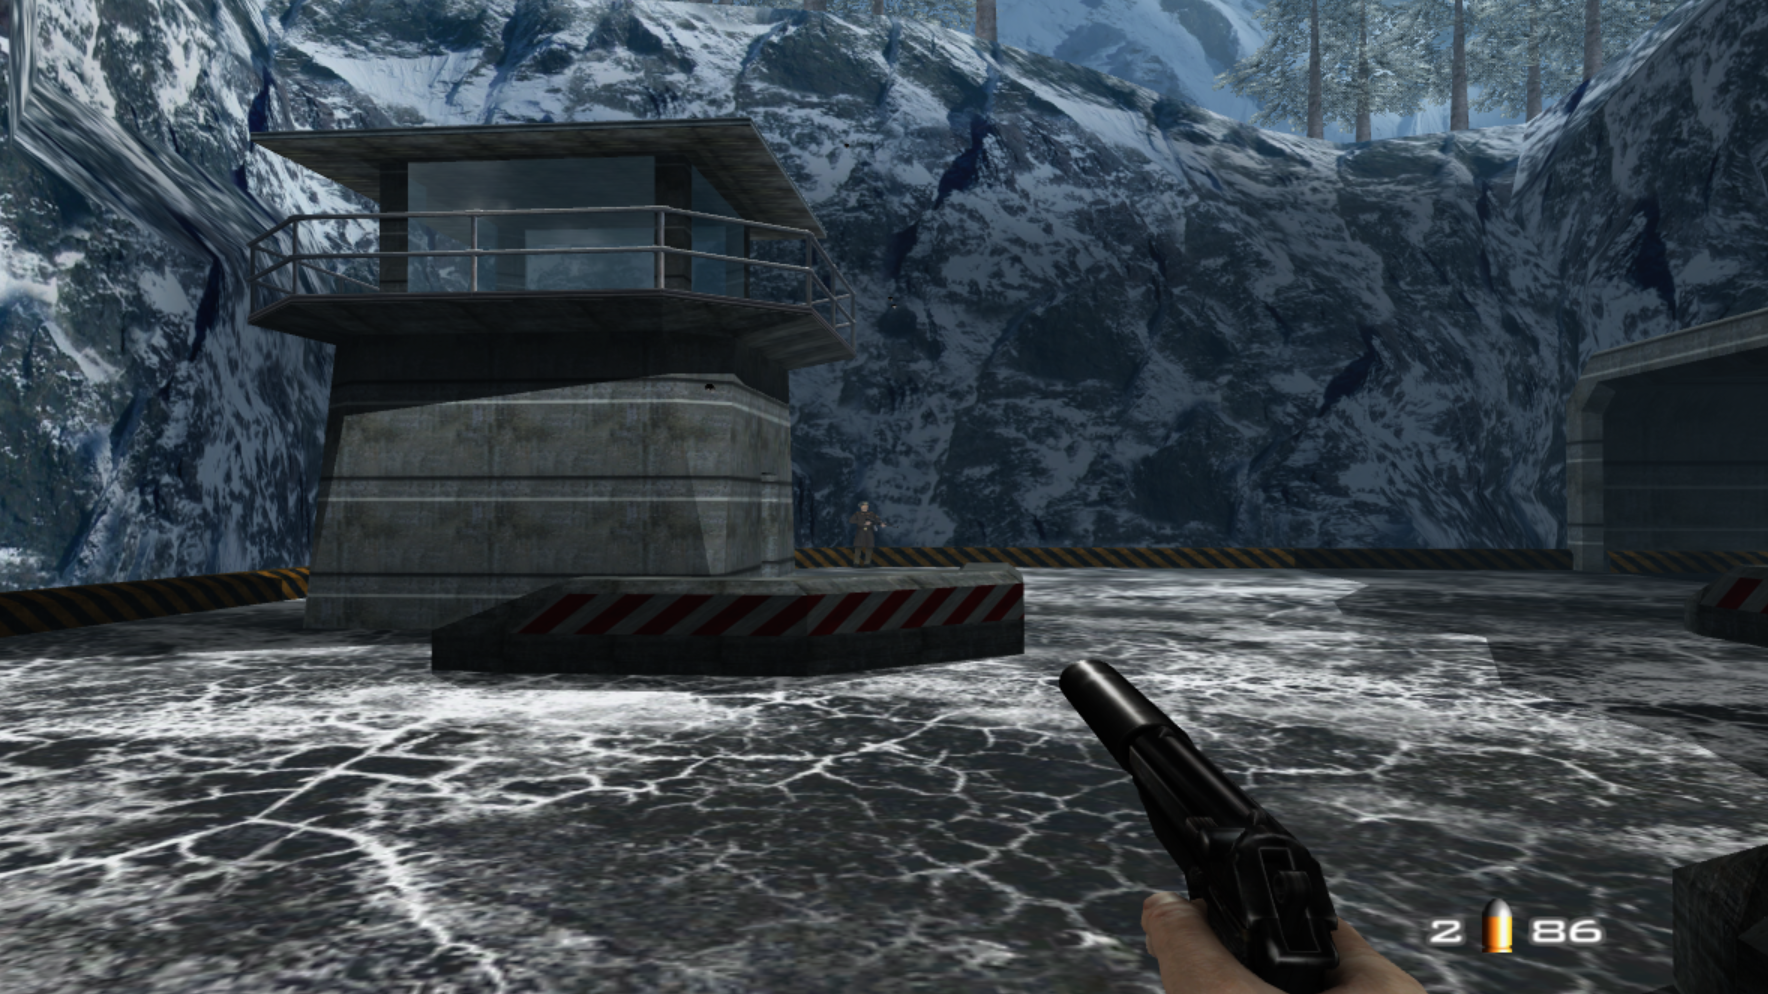
    In the late 2000s, video game development studio Rare attempted to remake its beloved Nintendo 64 first-person shooter, GoldenEye 007 , for the Xbox 360. The new vision featured the classic single-player campaign and fan-favourite multiplayer modes along with updated graphics, modern controls, and online play. It even included a toggle that would let players swap between the new graphics and the classic N64 visuals. The remake was nearly complete, but it got shelved in 2008 due to complicated copyright issues.

    While the cancelled GoldenE ye remake was an open secret in the video game industry for years, fans finally saw proof of the project when gameplay footage surfaced online last month. And now, someone leaked a build of the game online .

    We can confirm the game is fully playable on PC using Xbox 360 emulation software. The leaked version does not include online matchmaking, but there are local multiplayer options.

    For those wondering: Yes, you can theoretically play the 2008 GoldenE ye remake on your PC, too. Be aware it’s technically illegal to download or distribute the ROM file, so we won’t show you how to find it. Emulation is a legal grey-zone at best , and the GoldenE ye Xbox 360 ROM is even murkier — it’s technically the unreleased property of Rare and contains copyrighted materials from numerous companies, plus the likenesses of several actors.

    However, it’s entirely legal to install the necessary software one would need to hypothetically play the leaked ROM on PC. In this imaginary scenario, you’d need to download the Xenia Xbox 360 emulator . Follow the setup and installation steps in the video below:

    Note that Xenia is a research tool and not intended for playing illegally-obtained software, but you can use it to play Xbox 360 games you personally own and dumped to your PC. You can play games with a controller or keyboard and mouse. I recommend an Xbox controller, which should get automatically recognised, but you can also use a PlayStation 4 controller if you install DS4Windows .

    The post How to Play the Leaked ‘GoldenEye’ Remake appeared first on Lifehacker Australia .

    • chevron_right

      What to Do When YouTube Stops Working on Your Old Apple TV

      pubsub.dcentralisedmedia.com / LifehackerAustralia · Friday, 5 February, 2021 - 20:15 · 2 minutes

    According to a notification from Apple, YouTube is dropping support for some Apple TVs in early March. Users can still watch videos from a secondary Apple device via AirPlay, but you won’t be able to use the YouTube channel itself on third-generation Apple TVs from 2012.

    Newer Apple TV devices, like the Apple TV HD and Apple TV 4K, will still support YouTube. These models run tvOS, which is a modified version of iOS. That means they can run many of the same media apps that an iPhone can. Older Apple TVs, however, used proprietary “channels” that had to be made specifically for these models. YouTube already pulled support for the first and second-generation Apple TVs, so it was only a matter of time before gen three got nixed, too.

    We’d love to offer a workaround for those affected, but so far we haven’t seen one. That leaves owners of older Apple TVs with two options for watching YouTube on their TVs. The first is using AirPlay to watch YouTube. Watching over AirPlay is a minor extra step, but an extra step nonetheless. And you’ll need a compatible iPad or iPhone to cast from.

    The other option is even less great: Switch to a different device when you want to watch YouTube. It’s possible you already own a viable alternative, such as a smart TV or a gaming console like the PlayStation 4 and 5, or the Xbox One, Series X, or Series S.

    Besides, it’s probably time to upgrade that ancient Apple TV. And if you do, you have several options. The best upgrade for existing Apple TV users is the latest Apple TV HD or Apple TV 4K. The Apple TV 4K is the more powerful option, but the Apple TV HD is still a great choice for those without a 4K TV. Either will feel like a major upgrade if you’re moving on from an older Apple TV box.

    If the new Apple TVs are too expensive, you could jump over to Amazon’s Fire TV stick or a Roku. The good news is that you can get the Apple TV app on either, which means you’ll still be able to watch all of your Apple-purchased content (or subscriptions) without paying for a more-expensive Apple TV set-top box.

    The post What to Do When YouTube Stops Working on Your Old Apple TV appeared first on Lifehacker Australia .

    • chevron_right

      How to Fix Twitter’s Recent Dark Mode Changes

      pubsub.dcentralisedmedia.com / LifehackerAustralia · Thursday, 4 February, 2021 - 22:15 · 1 minute

    Many Twitter found their display settings suddenly changed without warning today.

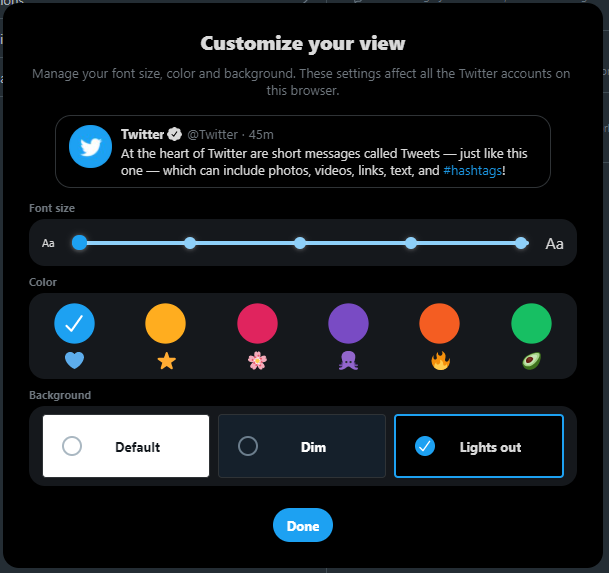
    For some — including me — the app swapped from the “Dim” dark mode to the fully-black “Lights Out” theme, while others are now seeing the default Light mode rather than either dark mode. Some users were unable to change their Twitter display settings back to a dark theme if their OS was set to light mode.

    Good news is, if you’re unhappy with Twitter’s new look, there’s an easy explanation and an even easier fix.

    Twitter recently changed its website and mobile app to automatically match your device’s theme settings, and “Lights Out” is now the app’s default dark theme. So if your computer or smartphone has dark mode on all the time, Twitter now shows up with the “Lights out” theme unless you manually change it to “Dim.”

    This is also why Twitter switched to light mode instead of dark mode in some instances — the app is simply responding to the device’s system-level settings. However, Twitter told The Verge the forced light mode was an unintended bug. The bug is reportedly fixed now, so users can switch back to Dim or Lights Out in the app’s settings without having to change their device’s OS theme.

    How to restore Twitter’s dark mode settings

    mcsfazf6twdqr9flm7t1.png?auto=format&fit=fill&q=65&nrs=40

    On desktop (Windows, Mac):

    1. From any Twitter page, click “More” from the sidebar to open the overflow menu.
    2. Select “Display ” to open the display settings. (These options are also found under Settings and Privacy > Accessibility, Display and Languages > Display ).
    3. Select your desired theme under the “Background” section. The new theme will appear automatically.

    On mobile (Android, iOS):

    1. Open the Twitter app then tap your profile picture to open the overflow mneu.
    2. Go to Settings and privacy > Display and sound .
    3. Make sure the “Dark mode” slider toggled on.
    4. Select your preferred dark mode appearance.

    (Note: This menu is only available on the standard Twitter mobile app. Twitter Lite doesn’t include display options.)

    The post How to Fix Twitter’s Recent Dark Mode Changes appeared first on Lifehacker Australia .